Pages

Friday, September 30, 2016

Super EXCITING News & Garden Delight LO/ Card


Hello everyone and Happy Friday to you all!!
Today I have some SUPER EXCITING News to share with you all, I am now part of the Club Scrap Artist Team, and so excited to be designing for this AWESOME company! They have the most beautiful design paper , and the thickness is just awesome! I LOVE all the sweet embellishments and goodies you receive in their kits, I absolutely LOVE their kits, and cant tell you how excited I am to now be designing with them!!! whooooohoooo!!! :) You can see both of my projects here on the Club Scrap Blog.
 
Everything you see on my pages here was designed using their September Club Kit called "Garden Shed Deluxe Kit" . I did use some dies to cut out all flowers using again their beautiful design paper. I submitted this 2 page layout and a card for the final round :)
All details are listed below on my 2 page layout. 
 
 
 Garden Delight 2 page LayoutPage 1 & 2
green 12 x 12 card stock
Yellow 11 3/4" x 11 3/4"
Design paper 11 1/2" x 11 1/2" I then added sewing.
Page 1 & 2 - Photo matte measures 6 1/4" x 4 1/4" for the green, the yellow is 6" x 4" , and then the design paper is 3 3/4" x 5 3/4"
 
I cut the printed cut a part sheet to get my banners for the left hand corner on page 1, and then the right corner on page 2. I then took scissors to distress the edges, I also used an antique linen ink to distress over the edges.  All the flowers were cut out with dies using the 8 1/2" x 11" design paper sheets. I also fussy cut the bee's and butterfly. I then did my favorite technique the Glass flower technique that I use on most of my flowers. This was done using clear embossing powder and NO inks or paints. That way you can see the beautiful prints on each of the flowers. I do have video's on the glass flower technique on my blog. The branches were cut using a paper punch and your  pale green card stock. I did add different size pearls to the centers of all my flowers. 

The sweet plant stakes I loved working with. I used the stencil and airbrushed the LOVE & BLOOM on them with copic markers and my airbrushing system. For the
"LOVE Stake" I stamped the Garden Freshness stamp on white card stock and then colored it in, and punched it out using a circle punch. The edged of the circle were airbrushed.  I thought the little bee would look cute with some clear glitter stickles on his wings. I then cut out the printed green card stock and popped the sentiment on top of that. Lastly I attached the sentiment tag to the plant stake. The bee at the top of page 1  was fussy cut and then I added some glitz to his wings. The bee that is on the flower on page 2 was also fussy cut and I used the glass technique on it and the butterfly. The charms in this set are too sweet so I added the watering can charm to page 1, and then the garden shovel to page 2. I LOVE the buttons and added 1 to that page as well. Lastly I had to add some of the beautiful ribbon to my page, and did so behind the clusters of flowers.


Supplies Used on layouts:
3 green photo mattes
3 yellow photo mattes
2 8 1/2" x 11 printed papers for the photo mattes
green card stock for leaves
Printed green card stock for scalloped circle
butterfly and snail cut out from one of the printed sheets
4 12 x 12 colored card stock sheets
2 12" x 12" printed papers for layouts
printed papers for 44 flowers
1 cut a part printed sheet
all cream colored ribbon
2 charms
1 button, and piece of fiber through it
2 garden stakes
stencil sheet
Stamp
Copic markers
half backed pearls
sewing in yellow thread
Tim holtz distress ink in antique linen
stickles , clear embossing powder, heat gun, glue gun, scissors, cutter, sewing machine,
punches, and flower die
I want to thank you for stopping by, and please let me know what you think of my layouts :)
Hugs to all
Cheryl

Thursday, September 29, 2016

Celebrate Christmas

Hello everyone, and Happy Thursday to you all!
Lately I have been busy in my craft room creating Christmas cards and spending many hours just having fun. Here is one I created for JustRite Papercraft using their beautiful Dies and Stamps! I also used some OLD Creative Imaginations design paper I've had in my stash. LOVE this paper!!!

Today's card was a simple one to make. It consist of 2 layers only, and then the JustRite Layers.
Card Instructions-
Card Base-  5 1/2" x 5 1/2"
Layer 1- bazzill blank check cut at 5 1/4" x 5 1/4" then the dp is cut at 5" x 5"
Layer 2- bazzill blank check cut at 5" x 3 1/4" , then the design paper at 5" x 3" they are then attached together using a small piece of scor-tape then sewing is added in one swoop.

JustRite Layers-
JustRite DIE-05049 Joy Oval Frame dies (using the #1 die)
JustRite DIE-05066 Vintage Labels Eleven Dies(#3 die used)
JustRite Stamps CR-05097 Inside and Outside Christmas Sentiments
JustRite DIE-05023 Floral Trio Two Dies (used the dies # 2 & #3)

Flowers- are done using the Glass technique(Video's found here) with airbrushing, I will have a video on this shortly on the airbrushing and glass technique.
Branches are Martha Stewart punch.
Challenges-
Fab N Funky /Christmas
The Crafty Addicts/anything goes & use pattern paper
A Snowflake Promise/anything goes with seasons(I chose Christmas season)
Creates and Makes/anything goes with using a die(flowers and frame)
Holly Jolly Christmas Challenge/Must be Christmas with a technique( mine is heat embossing for glass flowers) & sewing
Craft Dee Bowz/Anything goes with a handmade bow

I hope you enjoyed my card for today!
Thank you for stopping by!
hugs to all,
Cheryl

Wednesday, September 28, 2016

Autumn

 Hello everyone, today I have a sweet Autumn card made for I Brake For Stamps using the Beautiful Fall Half Sheet of stamps. I love the little pumpkins and the sentiment from this collection.

Pumpkins were stamped in Black Soot distressed ink, and colored with stampinup markers. Next I fussy cut 2 out, to place on my dp sheet. I also stamped the sentiment in the same ink, and stamped directly on my design paper layer. I used the Mini Misti to stamp, love using this tool!

My card today was a simple one. 2 laers,bow, and popped up the pumpkins. :)
To view all fall stamps, please visit the I Brake For Stamps Store here!
Hope you have a lovely day, and thank you for looking!
hugs to all,
Cheryl

Tuesday, September 27, 2016

Every Leaf Speaks Candy Wrapper


Hello everyone, and Happy Tuesday to all!
todays candy wrapper was created for The Project Bin using the "Autumns Calling" stamp set using 1 of the sweet sentiment! I did used the Ombre stamping technique and you can view my video here on that. I seem to be addicted to using the Mini Misti tool! :)

I used different StampinUp! markers to create the look here. The ribbon I used is the beautiful Shimmer Satin from Really Reasonable Ribbon in the Rust color. I also used the grosgrain leaves on truftan brown ribbon.

Embellishments: Leaves, glitter leaves, and plastic leaf from my stash. Also the pumpkin is from my fall stash as well.

JustRite Papercraft Hello Decorative Frame dies this is one of my favorite frames to use, it seems to be my go to frame.
Thank you for looking and have a lovely day!
hugs
Cheryl

Monday, September 26, 2016

WITH Caring THOUGHTS

 Hello everyone,
Today I have a super sweet card made for JustRite Papercrafts using a combination of New Releases. Love the beautiful JustRite Classy Frame and Die Tag. Of course I just had to use my favorite color on this one :)

Today's post is a super short one, as I just got back from Montana, I went with my mom to a Doll Conference and we had a lot of fun there!

My JustRite Large Oval Sympathy was stamped in Memento black ink on the small tag, and I then ran some RRR through the back of it. Next I added some Sweetheart Blossoms and a Big bow created using Ribbon  from Really Reasonable Ribbon, its a Satin in white. The pearls were created using Viva Pearl pen in white. I wanted to keep this post short and sweet as its an extra post for this week :)
Thank you for looking and have a lovely day!
hugs to all,
Cheryl
Saturday, September 24, 2016

Merry Christmas to You

 Hello everyone, and Happy Saturday to all!
Today I've created  this beautiful Christmas card for JustRite Papercrafts and Really Reasonable Ribbon. Its hard to believe Christmas will be here so soon. I LOVE Christmas and LOVE decorating my entire home for the holiday :) I will have to share photo's when that time comes.

my card for today
Layers- are put together using Really Reasonable Ribbon Score-Tape & Foam Tabs
Base is white cut at 6" x 12" and scored at 6"
Layer1 - Bazzill Red embossed dots is cut at 5 3/4" x 5 3/4" then the StampinUp! Holly Berry Boutique is cut at 5 1/2" x 5 1/2"
Layer2- Red dot cut at 5"x 5" , then SU! Holly Berry cut at 4 3/4" x 4 3/4"
Layer3-  Red cut at 4 3/4" x 2" then the SU! design paper cut at 4 1/2" x 1 3/4"
Layer 4- Sentiment layering is done with
JustRite Papercraft DIE-05048 Hope Oval Frame cut in brown dp, and then in red.
Next I cut the DIE-Hello Decorative Oval Frame scalloped edge larger one in white and distressed it with antique line distressed inks by tim holtz, and then stamped the CR-05097 sentiment in Tim Holtz Black Soot ink.
Flowers are from JustRite Papercraft FL-009 white flowers and I used some Art Glitter Vintage Glass in Kryptonite.
Ribbon- I used Really Reasonable Ribbons Shimmer Satin in Brown.


Supplies:
JustRite Papercraft CR-05097 Inside and Outside Christmas Sentiments
JustRite Papercraft DIE-05064 Hello Decorative Oval Frame Dies( for the sentiment )
JustRite Papercraft -05048 Hope Oval Frame Dies
JustRite Florals FL-009
Really Reasonable Ribbon Shimmer Satin Brown
Really Reasonable Ribbon Scor-Tape
Martha Stewart branch punch
Art Glitter vintage glass
StampinUp! Holly Berry Boutique
1 green button

I hope you enjoyed my post for today! Please leave a comment letting me know what you think :)
Hugs to all,
Cheryl

Wednesday, September 21, 2016

Polar Pals Postcard

 Hello everyone and Happy Wednesday to all! Today's Post Card or Present tag was designed for I Brake for Stamps using the super cute Polar Pals stamp. I LOVE this sweet stamp, and coloring it was super fun and easy!

I stamped my Polar Pals stamp in black soot ink on this post card that was cut out of a design paper sheet. I colored up the little ones top and hat with 2 different red copics R37 & 39. The bow on the Polar Bear was done in copics G05 & YG03. Pants were done using a Brown E57, and then boots in 100 black.

I stamped I Brake for Stamps "Merry Christmas" in Black soot too! Lastly I added some stickles to the heart, and then the wings and hat on the Polar Pals image.

Ribbon is Emerald shimmer satin, from Really Reasonable Ribbon and then I added a little silver glitter stardust rhinestone.
 How super fun & Easy this was to create. Without the bow, it could be sent in the mail. However I think its perfect for a large gift for Christmas
Thank you for looking!!
hugs
cheryl

Tuesday, September 20, 2016

Life's a Witch and then you Fly Candy Pouch

 Hello everyone, today's Halloween Candy Pouch was designed for The Project Bin using the beautiful sentiment from the "Haunt It" collection. I also used my Mini Misti and I'm loving this tool!!!

About my Candy Pouch
The pouch is from American crafts and was meant for chalk pens. I thought it would be perfect covered in some Halloween design paper and some bling. Perfect for hiding some candy inside! hehehe

The Project Bin Haunt It stamp set was used here-I stamped the sentiment using the Mini Misti and coloring up the words and such with different color SU! markers. I do have a video tutorial on this Ombre technique

The frame is from JustRite Papercraft and is the Hello Decorative Oval frame dies, I cut out bazzill orange , some white, and then AC black frame. I also added some black rhinestones.

Ribbon is plaid ribbon orange with black stitching from Really Reasonable Ribbon, I also used the Shimmer Satin in Black. And one of the NEW silver glitter rhinestones stardust.

Rhinestone trim was cut and glued on. I bought this at Hobby Lobby in a bolt. Love the look of it
Challenges:
Craft Dee Bowz Challenge/ anything with a handmade bow
Crafting from the Heart /Anything goes challenge
Craft your Passion/anything goes
Make My Monday/Autumn Colors
The Sisterhood of Crafters/Color challenge( I chose black ,orange, and I did use a purple in the writing)
Pile it on/Autumn colors
Robyn's Fetish/Anything for Fall

Thank you for looking and have a lovely day!
hugs to all,
Cheryl

Saturday, September 17, 2016

Christ is The Light of Christmas

Hello everyone, today I wanted to share this beauty I made for JustRite Papercrafts  using their beautiful Christmas dies and stamps & also for Really Reasonable Ribbon.

Card Instructions:
Card Base is a white card stock cut at  6" x 12" and scored at 6" to make a 6"x 6" card base.
Layer 1 - cut white at 5 3/4" x 5 3/4" then dp at 5 1/2" x 5 1/2" then add sewing
Layer 2- I cut a white piece of card stock at 5" and then used Martha Stewart punch around the page. The dp layer is cut at 4" x 4" to fit perfectly within the frame.
Layer 3- JustRite DIE-05001 Snowflake and Tag Dies I cut the 3 pieces in white and layered them all up. the actual snowflake is 3-D using foam squares. I then added some Viva Pearl pen in white to create all the dots. Next I stamped JustRites Christmas Release Nativity Sentiments in Soot Black and outlined with a blue to match all the blue.
Tag- is from the Snowflake and Tag Dies as well and I stamped on it the JustRite Retro Sparkle Background stamp in blue, then stamped the Small Oval Christmas Tidings in black soot too.
Ribbon- Really Reasonable Ribbons Shimmer Satin in Blue Topaz, also I used a Really Reasonable Ribbon  rose.

Supply List & Links:
JustRite PapercraftCR-05103 Nativity Sentiments
JustRite Papercraft CR-05098 Small Oval Christmas Tidings
JustRite Papercraft DIE-05001 Snowflake and Tag Dies
JustRite Papercraft CL-02067 Retro Sparkle Background Stamp
Really Reasonable Ribbon Rose
Really Reasonable Ribbon Shimmer Satin Blue Topaz
Really Reasonable Ribbon Scor Tape
Really Reasonable Ribbon Foam Tabs
American crafts the color of memories design paper
Viva Pearl Pen white (for pearl dots)

Challenges:
Craft Dee Bowz/Anything goes with a handmade  bow
Crafting from the Heart/ Anything goes
Craft Your Passion/Anything goes
Come and Get it /Lots of layers

Thank you for looking and have a lovely day!
Hugs to all,
Cheryl

Wednesday, September 14, 2016

Christmas Past Card

 Hello everyone, and Happy Wednesday to all!
Today's card was designed for Really Reasonable Ribbon  & I Brake For Stamps Victorian Santa. I LOVE this Santa as he is absolutely Beautiful!!!
For my card today I chose to use Graphic45 Old Christmas Past design paper, and the Kiwi Shimmer Satin works PERFECT with this collection. The Red card stock is from SU! (Riding hood red), the green is AC and is one of the colors from the  assorted packs.
 
 
I created my bow doing 4 loops on each side, then hot glued the loops together and created this cluster with flowers and leaves. Love the way it looks together.
 
My Victorian Santa Stamped image is from I Brake For Stamps and is colored using copic markers Y28,C1, R00,E57,E93,B18,R85,RV34,RV11,RV21,R39,R37,YG67,E15,E37,E31,B41. I also used stickles in Crystal ice, and cotton candy. Lastly I embellished the corners with green gems. Stitching was done with red thread.
 
 Christmas is my favorite holiday, and I absolutely love decorating up the inside & outside of my home.

Challenges:
Love to Scrap/Flower power(2 or more flowers)
Sparkle N Sprinkle/anything goes with glitter
Christmas Card Challenge/Challenge 40 inspired by Christmas Lights
My Time To Craft/Stitching
Thank you for looking and have a lovely day!
hugs to all,
Cheryl

Tuesday, September 13, 2016

RRR Blog Hop & Mini Post-it Clipboard


Welcome to "Really Reasonable Ribbon's" September Blog Hop!
 

If you arrived here from Judy's Blog  you are on the right track. If not , you will want to head back to the Really Reasonable Ribbon Blog that way you don't miss out on any of the FABULOUS Designs from the Design Team today!

This months ribbon assortment is absolutely DARLING!!! It's perfect not only for Halloween , but Thanksgiving(orange, and greens), and other holidays as well. The selection is one of my many favorites!!!
Ok for todays super fun project I used this
Mini Clipboard Post-it thing,I picked up years ago, and decorated it up using the ribbons in this months assortment. I also used the Mini Ric Rac that is from Really Reasonable Ribbon as well. I made a bow out of the green, and then did a strip of the purple to place under the green. They are hot glued to the metal clip part of this :)
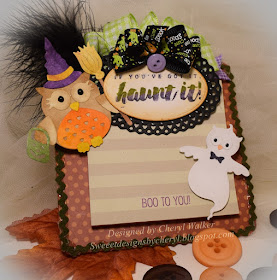
Next I used the mini misti to stamp The Project Bin Haunt it sentiment on here. I did the Ombre Stamping using the Mini Misti and LOVE how easy it is to use. I have a video on that here.
 
The dies are oldies from CC dies.  I also added a button, and a feather to complete my project for today :)
These little clipboards are super fun to decorate! Might have to do another for this year :)
 
Hope you enjoyed my post for today! thank you for stopping by, and PLEASE let me know what you think of my Mini Post-it Clipboard for today :)
Your NEXT stop for today's hop is Bonnie's Wonderful Blog!!!

Hugs to all,
Cheryl

Wednesday, September 7, 2016

Pumpkin Patch

 Hello everyone, and Happy Wednesday to all!
Today I'm sharing a card I created for I Brake For Stamps and Splitcoaststampers sketch challenge. On my card I used the super beautiful pumpkins from the I Brake for Stamps "Fall Half Sheet'! I am LOVING all the beautiful fall stamps on this sheet! I will post a photo and another link below to the sheet :)
 
While I love fall, I am going to miss our hot summer :( I have to be honest I LOVE the heat verses the cold. I do love all the colors for fall, so I will enjoy that :)
 
 So my card for today measures 5 3/4" x 5 3/4"
Layer 1- black cut at 5 1/2" x 5 1/2" then orange pumpkin patch design paper at 5 1/4" x 5 1/4"
Layer 2-( border layer) cut at 2 3/4" x 5 1/4" orange, then the design paper is cut at 2 1/2" x 5 1/4", next I cut borders and placed them behind. Also added some gem strips I cut from a thick trim.
Layer 3- 4 1/4" x 3 1/4" black, then dp is cut at 4" x 3".

I Brake for Stamps Fall Stamps were stamped in tim holtz distress ink black soot, and then colored with copics YR16,YR68 , YG05 YG13, and E31 I then fussy cut them out.

Next the Oh Bountiful Season was stamped again in Black Soot, and then cut out. I dusted with Black soot, and spiced marmalade distressed inks. I used the Judikins dusters to do this.

Flowers - JustRite Trio One dies I have a video on the flowers I created here on my blog.

Branches were punch out and hot glued on with the handmade flowers. I do have a video tutorial on this here on my blog.

Really Reasonable Ribbon is Satin Black , and shimmer satin Tangerine
 
I really enjoyed creating my card for today, and for the challenge over at SCS! Hope you enjoyed my post!!!
Challenges-
Stamps & Stencils / The Colors of Autumn
Crafty Catz Challenge/Anything goes with Autumn colors
Craft Dee Bowz challenge/Anything goes with a handmade bow
Scrapbook Stamp Society /Handmade flowers

Thank you for looking and have a lovely day!
Hugs to all,
Cheryl

Sunday, September 4, 2016

Haunt it! Treat box & Video 's

 Hello everyone,
 Today's project is done with a Laughing Cow Container turned into a Halloween Treat Box using Really Reasonable Ribbon & The Project Bin Stamps.  I have 2 video's , one is a complete walk through on making this treat box, and the other is on the Dusted Glass Flowers.
 Supplies Used:
Really Reasonable Ribbon Shimmer Satin in Gold Tangerine
Really Reasonable Ribbon Satin Tangerine 3/8"
Really Reasonable Ribbon Swiss Dots Grosgrain Black
Gem trim from my stash
Flowers, versa mark, embossing poswer, Gala Glitz black, distress ink, Martha stewart punch, spellbinders dies, laughing cow container.
American Crafts design paper pumpkin patch.
JustRite Dies, Floral Trio One dies(flowers) Hello Decorative Oval frame dies.
The Project Bin stamps
Mini Misti tool, heat gun, glue gun
 These containers are so much fun to make! I really had a fun time creating this one. LOVE the Really Reasonable Ribbons I chose to use today!
Dusted Glass Flowers using VersaMark! Super Fun!!!
 
My video is showing how I decorated this Laughing Cow Container. Hope you enjoy!!

Thank you for looking and have a lovely day!!
hugs to all,
Cheryl

Friday, September 2, 2016

My Favorite Color is AUTUMN & Video


Hello everyone,
Today I have my card created for Really Reasonable Ribbons Autumn Colors Challenge & The Project Bin. I also have a video showing how I did the Ombre Stamping with the Mini Misti Tool. I absolutely LOVE using this tool to do my stamping, as it makes it super easy and fun!

On my card for today I used The Project Bins Beautiful Sentiment from the Autumns Calling stamp set! LOVE all these beautiful unique sentiments that The Project Bin carries.

The Beautiful ribbons are from Really Reasonable Ribbon and are perfect for my card.
Card Base- 5 1/2 x 8 1/2" scored at 4 1/2" and then did the border punch to the longer side.
Layer 1- 5 1/4" 3 3/4" then frayed the edges using scissors,and distressed, then added a sewing
Layer 2 - 4 1/4" x 3 1/4"that is for the kraft card stock. Design paper is cut at 4" x 3" then frayed, distressed and sewn.
Layer 3- is spellbinders frames
Supplies Used:
Stamps- The Project Bin Autumn's Calling
Ribbon- Really Reasonable Ribbon Shimmer Satin Brown, Orange Gingham
Dp- American Crafts
Leaves- Random from my stash of fall embellishments
Gold Pearls- also from my stash.
Martha Stewart border punch, Spellbinders dies
Markers - StampinUp! Bravo Burgundy , Really Rust, Only Orange, Old Olive
 
Ombre Stamping using the Mini Misti tool 
 
Thank you for looking and have a lovely day!
hugs to all!
Cheryl