Pages

Wednesday, December 28, 2016

Club Scrap Shades of Winter Blog Hop

 Hello everyone and welcome to Club Scraps December blog hop featuring the NEW Shades of Winter Collection! If you arrived from Deb's Blog then you are in the right place , if not you will want to start from the beginning at Karen(Club Scrap blog)so you don't miss any of the wonderful inspiration from the Club Scrap Artist Team! There is also a list of the entire line up there for you with links :) Have fun & I hope you enjoy todays Hop!
For today's project I created a mini album/box. I LOVE LOVE LOVE this collection, as it reminds me of the beautiful snow and a white winter. This is a recycled Laughing cow cheese container, decorated using Club Scraps Shades of Winter collection. Inside is a mini album made using doily's and ribbon. and in the photo below you can see 2 of the design papers I chose to use today. I also used the beautiful blue shimmer text card stock & the Champagne color Text Card stock, both from the collection as well. For all the doilies I just used some white.

Photo album inside
So the doily's on the inside are hooked together using ribbon. I love that you can put photos on both sides, and that is comes out of the box. All dies used are from Cheery Lynn, and are listed below.

CLUB SCRAP
Shades of Winter greetings Unmounted sentiment
Shades of Winter design paper
Shades of Winter fibers
Shades of Winter Embellishment pack of Glitter Brads
Shades of Winter Deluxe Kit (metal snowflake)

Really Reasonable Ribbon Satin
Cheery Lynn Dies Used:
Cheery Lynn Priscilla Doily
Cheery Lynn Tea Rose Small
Cheery Lynn Pierced Stacker #3
Cheery Lynn LPC4 Circle Pierce and Tool LG Silver
Cheery Lynn Flourish #8


The sentiment on the top of the box is from this months kit as well, and I stamped it in black ink from Club Scrap.

Flowers were created using Cheery Lynn Tea Rose Small die, and the beautiful blue text weight card stock. The centers have brads in them that are also in this months kit. I love how the flowers have their own sparkle and glitz from the card stock and brads.

I added a bow using the beautiful white ribbon from Shades of Winter Kit, and also the snowflake too. the Beautiful snowflakes around the sentiment are stickers and are from Club scrap


I really enjoyed creating my Decorated Photo box for todays hop!! :) Your next stop on the HOP is Josette's Blog! Have fun!!! Thank you for joining us today!!
Hugs to all,
Cheryl

Monday, December 19, 2016

Club Scrap December Artist Team Challenge

Hello everyone, and welcome to Club Scraps December Artist Team Challenge! This month the December Challenge was to choose from some different challenges on the Club Scrap Forum found here. I chose a couple of different challenges for my 3 items today. Hope you enjoy them, as I truly enjoyed creating each one :)

Now you should have arrived from Josette's Blog , however if you did not come from there, you might want to start at the beginning with Karen's Club Scrap blog that way you wont miss anything. All design paper, card stock, Stamps and snowflakes used are from Club ScrapsShades of Winter collection", I also used the one Ribbon on the card from this collection as well.
1st up is my Fancy Doily Fold Card.(Made for Club Scraps Tool & Stash Challenge using liquid glitter)
I created my card using 4 doily's cut out of the shades of winter ivory pattern card stock. Next I cut the circles out of another design paper in this beautiful collection. All the design papers are from the Shades of Winter Deluxe Kit. I did use Cheery Lynn die's to cut out my doily, circle, frame, oval, and flowers. The Beautiful sentiment stamp used is from the Shades of winter kit as well. Lastly I embellished using white half backed dots, covered in stickles glitter, and then the metal tree charm(from Shades of Winter) and the ribbon also from the kit.


2nd up is my
White Christmas Doily Tag: Designed for the Non-Traditional Christmas Technique Challenge (use non traditional Christmas colors, and glitz)
I did just that on this tag. My tag was designed with 2 doilies, circle, bells, holly, and berries, all cut out using the Shades of Winter Collection. For the glitz I used stickles on the berries and then the glitzy snowflakes that came with this beautiful collection. I have to say this is another of my FAVORITE kits by Club Scrap!

3rd is my Snowman tag:
Lastly my snowman tag, that is going on my daughters gift :)
He was designed for the Tool & Stash Challenge too (Use Liquid glitter)
I designed him using 3 circles from Cheery Lynn dies. The hat was designed using SU! punch and then cutting a square and using a corner rounder on the top of it. Next I punched branches using Martha Stewart branch punch, this brown card stock came from the Christmas Thyme Collection. all other design papers on the snowman came from Shades of Winter Deluxe Kit He needed some Glitze so I did just that on his hat. I added stickles to the green branches and then the berries were made using a burgundy stickles. His eyes were done using Viva pearl pen, and his nose I cut by hand. super fun and super cute tag I must say. Now on the bottom of him I did add more stickles to give some glitz to him as well. I did add it to the braches that are part of the dp pattern. I should have made 3 of these, and might have to make a couple more for gifts. I love how they are so big, and you can add your writing to the back. perfect for large gifts I say!

I hope you enjoyed my post for today, and all my projects, as I had fun designing each and every one of them! Please let me know what you think as I always enjoy reading your wonderful comments!
Thank you so much for joining us and stopping by!!!
Your NEXT stop is Debbie's Blog!

Hope you enjoyed todays hop!
Hugs to all,
Cheryl

Sunday, December 18, 2016

Shades of Winter Doily Tags

Good Morning Crafty Friends!!!
Today I have 2 Doily Tags I created for Club Scrap & Cheery Lynn Designs, using the Beautiful Shades of Winter Collection, and an assortment of Cheery Lynn's Beautiful and fancy dies. These ar perfect for adding to your Christmas gifts, and I will be making more of these to add to ours. Speaking of Christmas its hard to believe its almost here! YIKES! I have been busy trying to get our home decorated and completed that today :) I decorated 3 floors, 2 bathrooms and the laundry room.....heheheheehe My bathroom I left plain, maybe next year I will decorate it :) Anyways onto my tags.
 Christmas Cheer Tag:
I started off by cutting the Cheery Lynn Sophia's Heart Doily (LOVE THIS)out with Club Scrap white boughs from shades of winter collection the Deluxe Kit, then cut out Horizon Circle Doily die DL272 in a shimmer sand color text weight card stock. Next cut was the design paper cut using LPC4 Circle Pierced die. Layered on that is also the CAS07 Ornament #7 die cut out in the same design paper,it is hard to see in this photo, but in person looks so pretty.

Cheery Lynn Christmas Bell:
was cut using the coordinating white boughs design paper, It was pretty enough, that I did not distress it, or do anything to it, but add 2 pearls, a bow, flowers and wreath branches.

Cheery Lynn B435 Tea Rose Small Flower
I cut this flower out using another design paper from the same Shades of Winter Deluxe kit , I absolutely LOVE this kit and all the papers in it. This shade is a real pale design, hard to see, in the photo, but I love it in person!, Next I cut out Cheery Lynns B21 Wreath Strip(for branches) in the coordinating shimmer sand paper., I did add a sheer bow  underneath my rose cluster created using the fibers from the deluxe kit, but also can be found in the fibers collection too. .
 Floral Cluster Tag:
All design papers used are from the
Club Scrap December Shades of Winter Collection:
all items listed below
Text weight shimmer sand
White Boughs print
design paper print
Ivory pattern print
Sheer Ribbon

This tag was cut using Sophia's Heart Doily die, and cut out with he same 3 design papers as listed above. The only difference is I wanted you to be able t see most of the Sophia doily on this tag. So with that being said, I cut a smaller Horizon Circle Boutique Doily for the center, and a small circle.

Layer for the cluster starts with the string, and bow. Next comes the Medium tea rose, I used 3, and on these I used 2 different inks to achieve the color I wanted.(Faded Jeans & Dusty Concord distress inks), I then hot glued them to the cluster, with the leaves, and wreath branches already attached. makes it easier this way, instead of trying to tuck them under after. Next I added in 3 of the small tea rose flowers, and added some vintage pearls to the centers of all. Super fun and easy to do!

Cheery Lynn Dies uses:
Thank you for looking and have a lovely day!
hugs to all,
Cheryl

Thursday, December 15, 2016

Christmas Thyme with Club Scrap

 Hello everyone, Today I'm sharing my Beautiful card created using Club Scraps Christmas Thyme Collection. I Absolutely LOVE this collection of Beautiful Design papers and card stock, and my Favorite design paper in this collection is this one used on my card here.
 I chose to make some Cheery Lynn Poinsettia's out of the wine colored card stock, and the other brownish, wine colored one as well. I ran my die through the machine 1 time for each color, glued them together, and then added some of the green card stock for the leaves.

 Now for Club Scraps Tool and Stash Challenge this month is to use some sort of Sparkle (Liquid Glitter) on your card or project. I chose Stickles in a green for the leaves, and a darker green for the wreath on the door. I also used red stickles on the berries under the windows.
My card was created using the green card stock that comes in this collection, the wine colored card stock, and the 1 sheet of design paper for this card.  My card does measure 5 3/4" x 5 3/4"

The Merry Christmas banner is from AC and was from my stash.

Challenges:
Club Scrap Tool & Stash Challenge/Use sparkle on your project
The Crafty Addicts/Anything goes with Christmas Paper
Holly Jolly Christmas Challenge/ Card or ABC
Try it on Tuesdays/Celebrate
Craft your Passion/Anything goes
I hope you will play along with this super fun challenge, it can be found HERE

Thank you for looking and have a lovely day!
hugs to all,
Cheryl

Wednesday, December 14, 2016

Merry Christmas Doily Tag


Hello everyone,
Today's Merry Christmas Doily Tag was created for Really Reasonable Ribbon( using the Beautiful Shimmer ribbon ,flowers , bead sprays , and Spiral stamens) & for I Brake for Stamps (using Elegant Merry Christmas Stamp), I just LOVE the way this tag turned out, and its going on a present for under our tree :)
 
Tag Design:
Tag was made using Cheery Lynn's Sophia's Heart Doily Die
I then cut 2 circles , 1 for the front (IBFS sentiment), and 1 for the back(to write on), I also airbrushed it lightly on the front with a soft blue copic
I Brake For Stamps Elegant Merry Christmas was stamped using the Mini Misti tool, and 2 StampinUp! markers. Love the look of the sentiment in the blues.
Flowers, Stamens, Bead sprays, and ribbon are all from Really Reasonable Ribbon, and all were hot glued on for ribbon cluster look.
 
Supplies Used:
Really Reasonable Ribbon:
Flowers Cherry Blossoms, and Sweetheart Blossoms, Bead Berry Sprays, Spiral Stamen , Ribbon from this months club kit
I Brake For Stamps:
Elegant Merry Christmas Stamp
Cheery lynn Dies:
Sophia's Heart DL184
Circle LPC4 Die

Branches: Martha Stewart Punch
Pens StampinUp!
White card stock for all paper used

This year I have been enjoying creating tags for our gifts. It makes it nice to have big tags for the gifts under the tree, as its easier to read who it goes too...hehehehe Anyways this is a 1st for me this year. So far I'm up to 9 tags made. I need more, I think at least 1 for each person would be nice!

 Thank you for looking and have a lovely day!
hugs to all,
Cheryl
 

Tuesday, December 13, 2016

Really Reasonable Ribbon December Hop

Welcome to "Really Reasonable Ribbon's" December Blog Hop!
If you arrived here from Judy's Blog  you are on the right track. If not , you will want to head back to the Really Reasonable Ribbon Blog that way you don't miss out on any of the FABULOUS Designs from the Design Team today!
 This months Ribbon Assortment is absolutely GORGEOUS!!! I LOVE all the beautiful blues, and greys, they are perfect for winter! I also think they went perfect with my Doily Tag I created for a tag on a present this year. This year I have made some really big tags for our gifts, I have enjoyed decorating each one, and hope you all have enjoyed seeing them :)
Christmas present tag measures 5 1/2" x 5 1/2"
TAG:
My tag was designed using Cheery Lynns DL184 Sophia's Heart Doily. Then I added a Cheery Lynn Circle (LPC4 ) to the back, set aside to dry, and worked on my 2flowers.
FLOWERS:
were cut using Cheery Lynns Medium and Small Rose dies. I ran them through just once each,a nd they made these 2 gorgeous flowers. The card stock I used is Bazzills White Wedding Butterfly paper. I then hot glued them together, added a Really Reasonable Ribbon Pearl (8mm & 10mm) to the center of both. Next I used Really Reasonable Ribbons Leaves, these are tiny. The branches were cut using the Wreath branch die from Cheery Lynn as well. I cut them in white and green.
BOWS:
were were made using Really Reasonable Ribbons Delicate Stitched Satin Ribbon that is in this months ribbon club. I made one big bow, and one small bow to put around the small sentiment tag. Once I glued these, I then added my flowers with the branches, and leaves already attached , then added the Really Reasonable Ribbon Bead Berry Spray in Silver.
SENTIMENT TAG:
My sentiment is from The Project Bin and is Luke 2 stamp set, and was stamped using the Mini Misti tool and coloring with 3 different shades of SU! markers. The tag is the Mirror tag from Cheery Lynn.
CHALLENGES:
Craft Dee Bows/Anything goes with a handmade bow
Crafting from the Heart/Anything Goes
Crafty Boots/Christmas
Dream Valley Challenges/Christmas
Crafting when we can/It's Christmas
Come and Get it Challenges/Christmas
I hope you all are enjoying today's hop, and hope you enjoyed my post as well! :)
Your NEXT stop for today's hop is Bonnie's Wonderful Blog!!!

Hugs to all,
Cheryl

Sunday, December 11, 2016

Merry Christmas /Candy tags

 Hello everyone,
Today I have 2 more candy tags that I created , this time using The Project Bin Stamps & Cheery Lynn Design Dies. I love these 2 as they have Candy Poinsettia's , that are too cute in person! The "Merry Christmas" is stamped using 2 different colors. and the Mini Misti tool, Super fun!!!
 These were also given away at our Christmas party, as favors from me :) I had fun making 14 of these Candy Pocket Tags! Might have to create a few more, but a little different in design I'm thinking.

Below ive listed what I used
The Project Bin:
Maybe Christmas Stamp Set
Cheery Lynn Designs Dies Used:
Cheery Lynn wreath strip 7 piece die set B216
Cheery Lynn Poinsettia strip B324
Cheery Lynn Pierced Stacker 3 XL21
Cheery Lynn Tags #3 CABD108
Really Reasonable Ribbon:
Foam Tabs
Ribbon Shimmer Satin
Embellishments Pearls
Thank you so much for stopping by and enjoy your day!
hugs to all,
Cheryl

Friday, December 9, 2016

Christmas Wishes Candy Pocket Tags

 Hello everyone, and Happy Friday to you all! Today I wanted to share 5 of 14 tags I created using the BEAUTIFUL Cheery Lynn Designs Dies. I had a blast making these, and created them to bring to our Doll Club Christmas Party, and everyone LOVED them!!! :)
 Of course I had to use the Beautiful Christmas Poinsettia Strip die from Cheery Lynn to create my Gorgeous flowers. They were cut using a striped metallic and regular dp print. I also did my favorite Glass Flower technique on these, as it makes them sturdy and beautiful :)  I love using the wreath strip die, as it cuts the perfect amount for each pocket tag, and that was 7.
 Cheery Lynn Designs Dies Used:
Cheery Lynn wreath strip 7 piece die set B216
Cheery Lynn Poinsettia strip B324
Cheery Lynn Christmas Bell 7 Piece B846
Cheery Lynn Pierced Stacker 3 XL21
Cheery Lynn Mirror CABD-74
Cheery Lynn Designs Oval Classic SM silver Stacker Layers 8

Really Reasonable Ribbon Embellishments & Shimmer Satin Ribbon used!

Challenges:
Craftaholics R Us/Tags and Christmas
Crafty Ribbons/Christmas
Sweet Stampin Christmas/Anything goes
Scrappy Land Challenges/Anything goes /Cheery Lynn dies used
Sisterhood of crafters /use pearls
Stampin Royalty /Holiday Tags
Deep Ocean Challenge/Santa is coming to town
Holly Jolly Christmas Challenge/Anything but a card
Try it on Tuesday /Celebrate (Christmas)
Craft-Dee Bowz/Anything goes with a handmade bow
Crafty Boots/Christmas
 To create my tags I started with Cheery Lynn's Pierced Stacker 3 XL21 using the largest die in this set for the main tag and dp. If you are creating 5 tags you would need to cut 8 greens to give you 5 entire ones, and then cut the others in half to create the pocket, leaving 1 half leftover. Dp pieces were cut using the same die. be sure to add your design paper before adding your pocket.

Next I cut my tag, oval , poinsettia's , holly, and wreath branches and had them all prepped and ready to decorated my pocket. you can also use ric rac, or trip or whatever to border the pocket , and then ribbon to embellish with a bow. I did add some half backed pearls to my flowers too. For these 5 Pocket tags I did add some vintage ric rac to the pocket. On the Oval Classic it was cut in white, stamped sentiment in black, and then added some red dots around the edges.

I really had a lot of fun decorating these up, and adding some fun Christmas candy to each one. The pockets were easy and came together quickly. Love using Cheery Lynn dies as they make for some beautiful crafts!!! 

 I hope you enjoyed my post for today, as I truly enjoyed sharing! Thank you so much for looking!!!
 
I hope you enjoyed my post for today!
Hugs to all,
Cheryl

Wednesday, December 7, 2016

A Hug for Rudolph /Candy Pocket Tag

 Hello everyone and Happy Wednesday to all!
Today I have a Candy Tag I made using I Brake For stamps darling " A Hug For Rudolph" Stamp. I absolutely LOVE making these tags, as they are super fun and easy to create! Perfect for giving as a little gift to a neighbor,  party favor, or for your co-workers.
My image was stamped up in black ink, and then cut out using the oval shape die. Next I airbrushed the background using copic marker. For Rudolph and the sweet little girl I colored them with copics and then used some stickles to give some glitz. I also added stickles to the snowflakes, as you can see they haven't dried yet :) hehehehe

My tag was created using several Cheery Lynn dies, and then added candy to the inside pocket. I made a bunch of candy tags to bring with me to our Christmas Doll club party that is tomorrow :) They are a little different .

The glitzy trim along the pocket is from my stash and is super OLD! Now the ribbon for the tag and bow  is called Chevron  Striped Twill Red and is from Really Reasonable Ribbon, and is one of my many favorites.
Challenges:
Deep Ocean Challenges/Santa is coming to town
A Snowflake Promise/Winter Theme
Everybody Art Challenge/Tag Mine is a candy pocket tag :)
Holly Jolly Christmas Challenge/ABC anything but a card (Candy Pocket Tag)
Thank you for looking and have a lovely day!!
hugs to all,
Cheryl

Sunday, December 4, 2016

Christmas Poinsettia Candy Tag

Hello everyone,
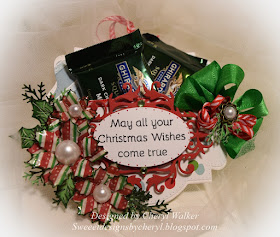
Today I have a super fun and sweet Candy tag I made for Really Reasonable Ribbon using the beautiful Ribbons and Embellishments. I also used all Cheery Lynn Dies to create this fun project.
 Base Tag was cut using Cheery Lynn dies pierced stacker #3 dies, and also for the dp on the front pocket and inside.I also used Cheery Lynn dies for the tag, oval, poinsettia's , branches are cut using Wreath Strip 7 Piece Die Set - B216 , and holly leaves were cut using Christmas Bell 7 Piece Die Set - B846 . Centers of flowers were done using Really Reasonable Ribbons Flat Half Backed pearls in sizes 8mm, 10mm, and 12mm.

Bows were made using Really Reasonable Ribbons Delicate Stitched Satin Ribbon in Emerald Green, and 1/8" diagonal striped ribbon. In the center of my bow  I used Really Reasonable Ribbon flatback round pearl flower.

Flowers were done using Cheery Lynns Poinsettia strip and I also used my Glass flower technique on these.

Stamped sentiment was done with JustRite Papercrafts Large Oval Christmas Wishes stamp set.

Design paper is from American Crafts

 I will be making more of these, and will have a video coming soon, showing how fun and easy these are to make. I am making 14 to bring to our doll club Christmas party this Thursday. Cant wait!!
Thank you for stopping by, and have a lovely day!
hugs to all,
Cheryl