Pages
Friday, July 29, 2022
Panda Birthday wishes / Sewing Video tutorial
Wednesday, July 27, 2022
The Robins Nest Dew Drop Caddy/Video tutorial
Monday, July 25, 2022
Floral Birthday Wishes card & Video
- Twill Chevron Celery Ribbon
- Delicate Stitched ribbon Pearl Pink
- Daisy pearls embellishment
- scor-tape
- foam tabs
- cherry blossoms
- Mini Gardenias fushia
- rose buds (pink , green, and blue)
- white sweetheart blossoms
Hugs, cheryl
Thursday, July 21, 2022
Tutorial on Picnic Basket/Gift box
Hello crafty friends and happy Thursday to you all!
Today I'm sharing this darling Picnic Basket Gift box & Video Tutorial on how I made it. This was made for a dear friend and she loved it! I added her birthday gifts inside for her, and made a card to go with it. I will have the card posting on next Monday, so be sure to check back.
Below is the video tutorial on how I made this, so I hope you enjoy!
Tuesday, July 19, 2022
Sweet Friends /Video Tutorials

I made a video showing how I designed my memorydex card using a die from TLC Designs, and hope you enjoy it. I have a video on coloring up winking wanda as well and video links are below.
- TLC Designs Winking Wanda
- TLC Designs Something bloomed design paper
- TLC Designs See you in the Center die
- TLC Designs Turtle-Icious stamp set for the sentiment
Flowers and ribbons are all from Really Reasonable Ribbon and can be found here.
Thank yo so much for stopping by and have a wonderful day!
Wednesday, July 13, 2022
Really Reasonable Ribbon July Hop/Gazing Gabe card
Gift bag & Video Tutorials using Creative Dew drops

Hello everyone, and Happy Wednesday! Today I am sharing my 1st post for The Robins Nest Creative using the beautiful dew drops they carry. I'm super excited to be part of their amazing design team!
Hugs to all,
Cheryl
Tuesday, July 12, 2022
TLC Designs Turtle-icious & Video
Hello crafty friends and Happy Tuesday to you all! Today I have a card designed for TLC Designs using the darling Turtle-icious stamp set. Absolutely love this set, and had so much fun coloring her up using copic markers.
For my card I started out with my card base, it measures 5 1/4" x 5 1/4" Next I cut my Black card stock to measure 5"x5" and then the TLC Designs "Something Bloomed design paper" was cut to 4 3/4" x 4 3/4". My next layer of black card stock was cut 4" x 4" and the Something Bloomed design paper cut at 3 3/4" x 3 3/4".
Next I cut the TLC Designs Loving Petal Square Die in black, then in white, and used the Happy Bloom Day stencil to add stickles to the background for my image. I will have a short video on this technique. Hope you enjoy it.
Turtle-icious was colored using copic markers G99,G94,G24,YG05,YG03,YG13,YG95,E07,R85,RV34,RV02,R11, YR31 , then I fussy cut her out. I did add some white paint pen for highlighting , Next I stamped the Birthday sentiment in black ink on white card stock and then cut using the oval die out of the TLC Loving Petals Square die set.. Next I used the copic airbrushing system and airbrushed around the oval, using the die in place. I kinda show this in my video using the square instead, same concept, different shape. Lastly on my large petal frame die, I added some dew drops and stickles in pink.
the border across the center of card was done in this size 1" x 5" black card stock, then 3/4" x 4 3/4" design paper from TLC Designs Something Bloomed paper pack, I did add the oval on top, and then some satin bows.
TLC Designs Supplies used:
- Turtle-icious stamp set
- Happy Bloom Day & Clouds Stencil
- Something Bloomed Slimline Designer Paper Pack
- Loving Petals Square Die set
- extra supplies, dew drops from Robins nest creative, white paint pen, sewing, copic markers, Really Reasonable Ribbon
Thank you for stopping by and have a lovely day!
Friday, July 8, 2022
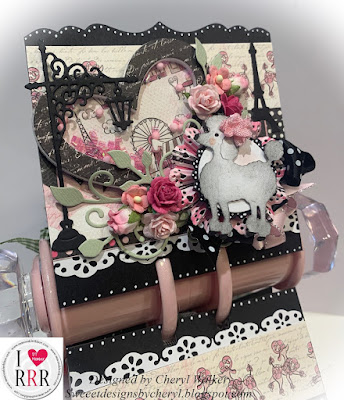
Paris theme Memorydex card
Hello crafty friends and happy Friday to you all! Today's Memorydex card set was designed for Really Reasonable Ribbon using the Gorgeous satins that are in the shop. I also used the beautiful flowers as well. Love making these and sure hope you enjoy my post for today.
Tuesday, July 5, 2022
Winking Wanda TLC Designs

Hello crafty friends and happy Tuesday to you all! Super excited to share that I am now part of the TLC Designs DT. This is my very first post and I'm so excited to share with you all this sweet Winking Wanda Digi that I colored up with copics. I absolutely love her and had so much fun coloring her. 

I Started out by printing Winking Wanda digi , and then coloring with lots of copic colors. I used E02 , E55, E43, E31, E11, E04, RV11, RV02, RV21, RV23, RV34, and B34. I then added some white paint pen, and some stickles to highlight her. Next I just had to use the beautiful Ink Me In Pink Digital Paper, which I used on my first layer, next I chose the butterfly design paper from the Soft Blush Digital paper pack and used it for my second layer. I added the next layer using again the Ink Me in Pink digital paper pack. On every layer I did add sewing to, and even inside my card. Lastly I added a pink satin bow.


Thank you so much for stopping by today! If you want to see even more inspiration and Live Creatively alongside us, please join us over on Facebook at TLC Designs Creative Sharing and over on our YouTube channel for even more fun! We hope you have a wonderful day, thank you for supporting TLC Designs!
Hugs to all, Cheryl (Sweeetdesignsbycheryl.blogspot.com)


