Showing posts with label Magnolia. Show all posts

Friday, September 13, 2019

Really Reasonable Ribbon September Blog Hop


Welcome to "Really Reasonable Ribbon's September” Blog Hop
if you arrived here from Ginny's Blog you are on the right track. If not , you will want to head back to the Really Reasonable Ribbon Blog that way you don't miss out on any of the FABULOUS Designs from the Design Team today! There is going to be lots of Beautiful projects to see today using the September Halloween Ribbon Assortment, so I hope you Enjoy!!!

Todays card was designed using the darling Halloween Ribbons, absolutely love them all! It was so hard to choose just the 2, but didn't want to add too many to my busy card.... hehehehe so I chose to use the black polka dots and the sweet Halloween grosgrain  ribbon to make my double bows. The card is 6' x 6' and the design papers I chose are ones I bought at the warehouse sale we had here several years back. I love making Halloween cards, as they are so much fun! 

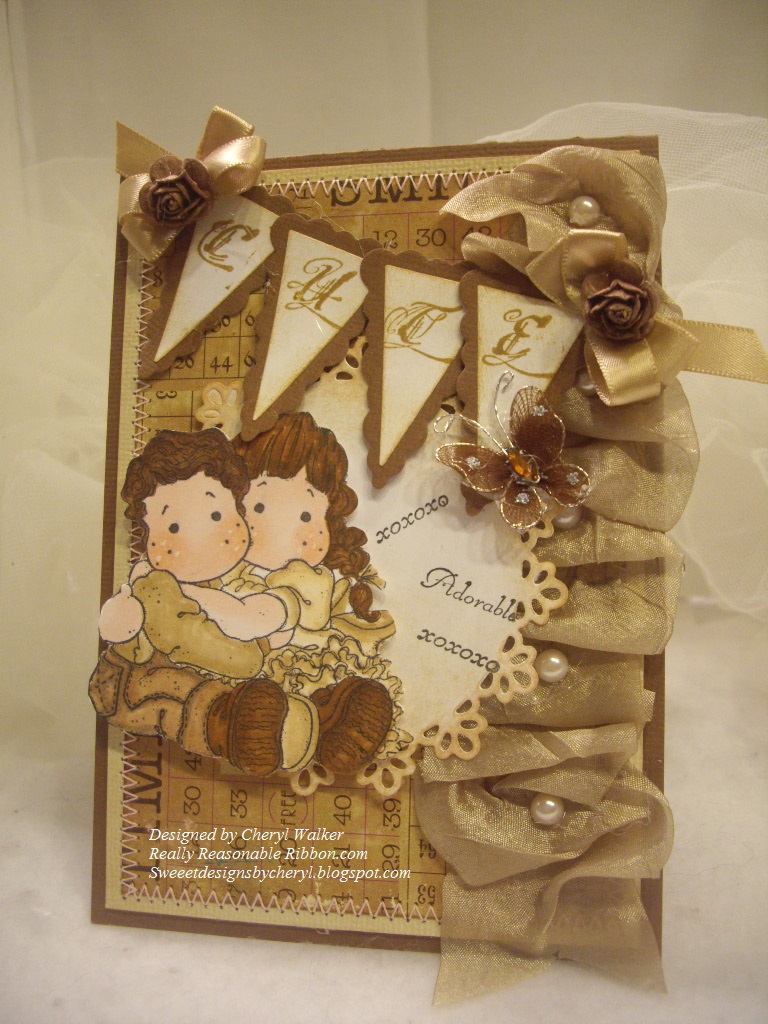
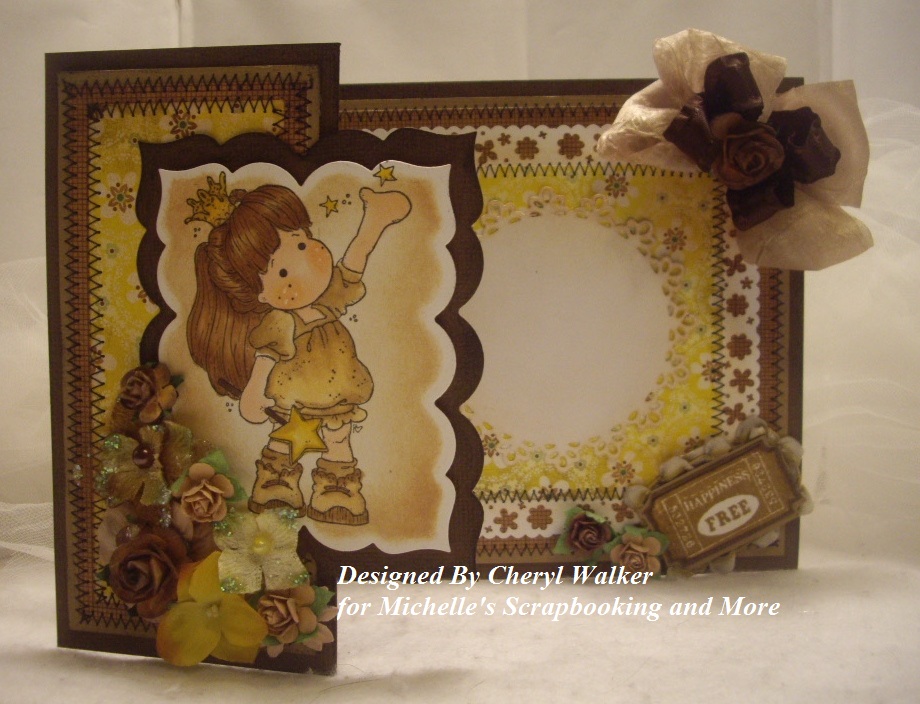
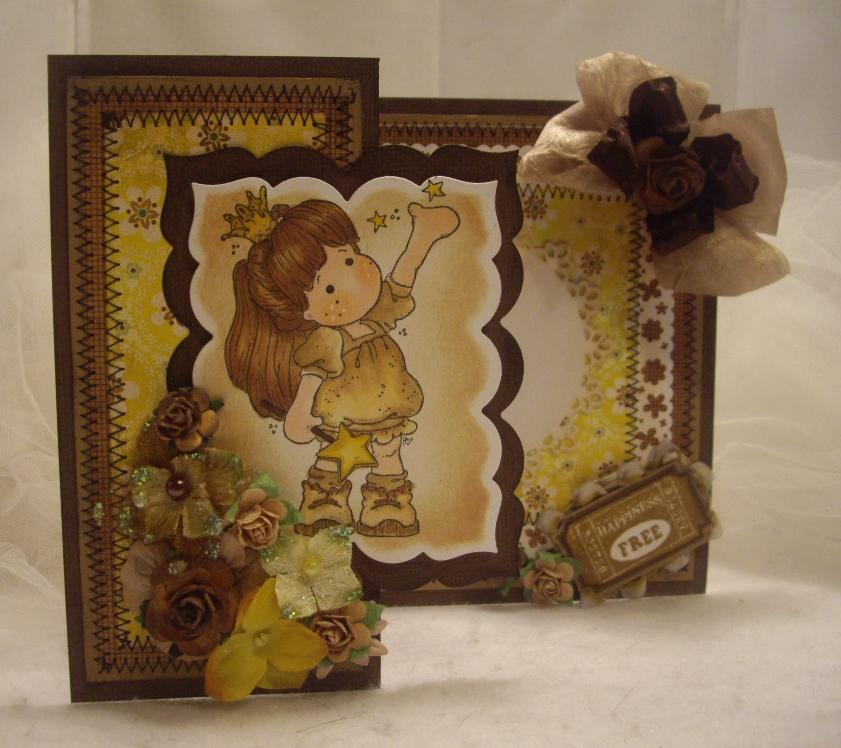
Tilda was colored using copics, and then I added some glitter to her bow.  The Halloween sign is CottageCutz and the frame is from Cheery Lynn designs. The stamps are all StampinUp! 

Card was put together using the Scotch advance tape refill and foam squares both from Really Reasonable Ribbon.

Really Reasonable Ribbon Supplies Used:
Halloween Assortment
Foam Squares
Scotch Advanced tape refill

other supplies
cheery lynn frame
cottagecutz sign
tilde stamp
stampinup! sentiments
gel pen for white dots
copics for coloring
sewing

Thank you so much for stopping by, and hope you enjoyed my card for today!

Your NEXT stop for today's hop is Karens wonderful blog!!!
Hugs to all,
Cheryl

Thursday, May 3, 2012

Cute,Adorable, XOXOXO/Video on Ribbon Border

Hello everyone and Happy Thursday to all. Today I'm sharing Tilda and her brother Card designed for Really Reasonable Ribbon's Challenge this week, and Michelle's Scrapbooking and More.
For my banner I used CottageCutz Pennants:

I also used the CottageCutz  Magnolia Doily to place my image on.

The lettering is Alphabet Stamps from Victorine Originals

Really Reasonable Ribbon I used is :
Satin Oatmeal 3/8" Half OFF right now

DARLING Tilda Image is from Michelle's Scrapbooking and More
Copics-Michelle's


So for the silky crushed Antique Gold ribbon I just used scor-tape and ran a strip of 1/2" down the card, then took my ribbon and started laying it down, and then scruch as I went.  I have a VIDEO below on  this :) Enjoy!!

Video on Using Really Reasonable Ribbon's Silky Crush as a Border/w pearls

Next I use out my CottageCutz Pennants and then stamped on the white ones using Tim Holtz ink and Victorine Originals Stamps.

More Really Reasonable Ribbon used to hold the pennants together. I used Oatmeal 3/8" Satin for this.

Challenges:
Paper Sundaes /Ribbon and Pearls


Thank you for looking and Have a Lovely Day!!!
Hugs to all,
Cheryl

Friday, April 27, 2012

Another Fun Fold Card ♥♥♥Thank you♥♥♥

♥♥♥Hello everyone, Cheryl here with another Fun Fold Card for Really Reasonable Ribbon. Todays Fold is a Z Card Fold. On my card I used several different ribbons,trim,and lace from Really Reasonable Ribbon.
  ♥♥♥Z fold Card 6 x 17" long♥♥♥
I love making different card folds, they are super fun and super cute. I love this one, since it has different scenes on it. I used for the front of my card Really Reasonable Ribbons Pink Satin in 2 different sizes. I also used the Moss Leaves Trim, and Noelle Lace. for the big bow I used the Pink Double Ruffled edge ribbon. I also used Tilda,her bench, and Wild Orchid flowers. All direct links are listed here below :)
♥♥♥Ribbons Used♥♥♥
Pink Satin
Moss Green Leaves
Double Ruffled Edge Pink Ribbon
Noelle White Crocheted Lace
Scor-Tape


♥♥♥Next you see is Tilda and a CottageCutz magnolia Doily, I figured I could add a stamp sentiment here or some writing. 

 ♥♥♥In my next picture you can see the entire card open. I think its neat to have the writing hidden, you see the tab in the back, well that pulls out for double sided writing, there is enough room to write on the front and the back of this pull tab panel. 

♥♥♥CottageCutz Dies Used♥♥♥
Picket Fence Border die
Window Die
Magnolia Doily Die
These are all from the CottageCutz Spring Release !!

♥♥♥close up of the front. I used the CottageCutz Picket Fence border die, and ran RRR Satin Pink through it.
♥♥♥Here on this page, I added Tilda's Tree, and Tilda Sitting. Her bird, and some clouds die cut pieces. I stamped on them with Su! sentiments. 

On my back page, I continued on with the Cottagecutz Picket Fence border, and then used the New CottageCutz window. Perfect for writing. I also added another Tilda and another Bird and cloud here.

 All my Tilda Stamps are from ♥♥♥Michelle's Scrapbooking and More!!♥♥♥


♥♥♥Now you can see where the writing is hidden here. LOVE this!!! Also LOVE working with Really Reasonable Ribbon!!! Thank you Bonnie for everything and Im super EXCITED to be designing for another Term!!! I couldnt imagine life without RRR :) Its my FAVORITE!!!! 


♥♥♥Challenges♥♥♥

♥♥♥Thank you all for looking and have a lovely day!!
Hugs,
Cheryl

Saturday, April 21, 2012

♥♥♥Tilda Catching Stars♥♥♥

♥♥♥Hello everyone and Happy Saturday to you all♥♥♥
 Today im sharing my Tilda Catching Stars Z-Fold Card, made for Michelle's scrapbooking and More.
I love TILDA!! She is sooo CUTE, and LOVE coloring her. I used copics to color her, and my NEW DP/and Spellbinders, that I WON from ABC Toys and Crafts! Thank you Julie and the DT for picking my Tilda Gatefold that i had entered here.

Ok now onto my card :) for this beauty I
♥♥♥Used♥♥♥

Here is part of the inside of my card. I used the RRR trim around the DARLING ticket. 

Here is my card closed up!!!
♥♥♥Challenges entered♥♥♥
Wild Orchid/Spring is in the Air
7 Kids Challenge Blog/Diecutz and punches
Bunny Zoe's Crafts/Ribbon or Twine(I used ribbons)

thank you all for stopping by and have a wonderful weekend!!!
Also I want to thank all my followers and a crafting friends for your WONDERFUL,SWEET Comments, I really enjoy reading them all!!
Hugs to all of you,
Cheryl

Tuesday, March 30, 2010

Blessings for a Happy Birthday!!!

This box was designed for a special friend who's Birthday is Today!
For my box I used a cookie box that I bought at the grocery store and recycled it to house some goodies:)

My Birthday box was also designed for these challenges below!!


  1. Pennys Challenge "Another Birthday"

  2. Your Next Stamp #12 "Distressing"

  3. Cute Card Thursday #105 "Dimensions"

  4. Handful of Stamps- Make it Sweet

  5. Crafty Calender: Flower Power.

  6. Busy little hand: Cut it all by hand
    Fun with Shapes and More: Faux Stitching

  7. KL Stampin N Scrappin: box or basket

  8. Quixotic Challenge: Monochromatic

  9. Sew Many Challenges:Lets Punch it!

  10. ALLSORTS: Rags to Riches!

  11. Simple Doodles:Add Layers!


The Magnolia image was given to me in a swap by a sweet friend Sue! thank you sweetie!! I used flowers,gems,ribbon,swirls, added sewing, and cut out my image by HAND! The corners are all punched with a corner heart punch! The lace border around the sides was punched out with the Martha Stewart Punch tooo!!

I wanted to keep the look sepia, since ive been on a roll with this color combo lately! :) I distressed the edges of all the layers as well! I love this SWEET image!!!


I also added sewing to each layer as well!!

My box went from Rags to Riches :) hehehehe :) Hope you enjoyed todays post, as much as I enjoyed making this fun sweet box!!! :)

The sentiment on the front is from Our Daily Bread Designs! The Happy Birthday is from SU!


Thank you for looking and have a nice day!!
Hugs,
Cheryl

Sunday, November 22, 2009

Inky Impressions Challenge & DT Call

This Ornament was designed for the Inky Impressions Ornament Challenge & DT Call!!! I soooo would love to design for this wonderful company! They have some Darling stamps


To view stamps here is a link to the store im sure you will fall in love with these sweeties too!!!


For my Ornament I used the ring leftover from our double sided sticky tape that I know we all use!! :) Ive been saving these for awhile I was try'n to think up something different that I havent seen before:) And I did!!! :)
Anyways this is pretty simple to make.

1st- pick several different ribbons that you will want to use

2nd- before I cut ribbon, I will tie one to see what lenght I want it to be, then you can cut as many as needed with that one as a guid.

3rd-tie them in any order.

4th- I added a bow to the top, and flowers,leaves, branches to the bottom.

5th-add your stamped image :)


This is the ring I wanted to show a close up for you!!


I really had alot of fun with this! Hopefully you will try this little technique! :)


Here is a link to the Challenge if you would like to join in! Have fun!!!


Thank you for stopping by and looking!!Hope you have a wonderful week!
Hugs,
Cheryl

Thursday, November 12, 2009

Sweet Little 60's Tilda

Today I wanted to share with you this little sweetie from the Magnolia stamps that KL Stampin N Scrappin carries.
This little darling is colored with
copics, and cut out. I also used the Spellbinder dies that kelly carries in the store as well. You can find the Spellbinders HERE.

I added the pearls to the centers of the flowers, and then put some dots around the heart with a white gel pen!


The border is punched and I did do sewing around the back 2 panels, and then on the smaller panel tooo! Lastly I added my bow!!
Right now Kelly has in the store High Hopes stamps and you can get them mounted or unmounted, isnt that awesome??!!! Also there are some darling new cc.designs, and some basic grey stamps as well to choose from. You can check them out HERE!!!
Have a nice day and Thank you for looking!!!
Hugs,
Cheryl
Also give a warm welcome to the new KL Stampin N Scrappin DT for 2010 !!! Wooooohoooo welcome Ladies and Congratulations!!!! You all will have sooo much fun with Kelly and Kristine they are wonderful ladies to work with!!!! Hugs to all!!!! :)

Thursday, November 5, 2009

Snowflake Sweetie

This card was designed for my Thursday post on the KL Stampin N Scrappin blog!

On my card I used this super sweet 60's Tilda and made her into a snowflake sweetie!!! :) I love snowflakes, of course I dont love driving in them :) LOL

Tilda is colored with copics, and I embossed her with the swiss dots to make it look like snow falling :) there is stickles on her lollipop and on her dress. The white background was also embossed with a cuddlebug snowflake embossing folder.


the borders are punched with the fiskars snowflake border punch. I added some ribbon, trim, and snowflake buttons to my card!!
Supplies used:
60's Tilda from: KL SNS Store
Copics to color, memento black ink
embossing folders cuddlebug, border punch fiskars
Embellishments: ribbon, trim, stickles, snowflake buttons, pearls
Thank you for looking and have a nice day!!!
Save 5.00 when you spend 30.00 or more at the KL Stampin N Scrappin Store!! Use coupon code NOV5 at checkout.
Also Kelly has the High Hopes stamps and some darling new cc.designs as well!!!

Thursday, October 29, 2009

KL Stampin N Scrappin Thursday (60's Tilda & Cat)

This is my card designed for todays KL Stampin N Scrappin Thursday post. On my card I used this super DARLING 60's Tilda from KL Stampin N Scrappin Store. I also used this super sweet kitty from KL SNS as well. Every image is colored with copics, and I did add stickles to Tilda and the cat.

The sleigh is from Alota Rubber Stamps and is stamped in Tim Holtz distressed ink Walnut Stain and Brilliance Galaxy Gold dew drop. I stamped up first with the Tim Holtz and then used the dew drop to add gold where I wanted :) I then cut the sleigh out!


Supplies used:
Stamps (Magnolia) (Alota Rubber Stamps Sleigh)
copics
stickles, Brilliance Galaxy Gold, Tim Holtz Distress Ink (Walnut Stain)
Design Paper (K&Company Christmas Cheer) Cardstock SU!
Sewing & ribbon for my bow!!
Lots of wonderful sales going on right now over at the KL Stampin N Scrappin Store so be sure to stop by and see for yourself!! Design Team Blog HERE Also spend 30.00 and get FREE shipping use coupon code OCTSHP!!!

Thank you for looking and have a lovely day

Hugs,Cheryl

Thursday, October 22, 2009

"Thank you" Easel card &mini tutorial!

Happy Thursday everyone!! For todays card I wanted to share with you how to make the Easel Cards that I posted while I was gone. I decided to make another since I had sooo many asking me how to make them.

Remember all pictures can be clicked on for close up!

1st start with your card base:


Next score or fold in half
Now fold or score the top of your card in half too. It should look like mine in the picture below


since my card measures 5 x 5
I then cut a 5 x 5 piece to attach to the bottom fold shown above.

On my card I used Miss Jam Tilda and colored her with copics.
Supplies used:
Copics , white gel pen, stickles
design paper, cardstock
ribbon, martha stewart border punch
Thank you for looking and have a wonderful day!!!
Hugs,
Cheryl
Kl Stampin N Scrappin Store is having a special if you spend 30.00 you can get free shipping with coupon code OCTSHP, that is an Awesome deal!!!! Check out the pre-orders while there, and High Hopes stamps are now in stock!!!! Have fun!! :)

Thursday, October 8, 2009

KL Stampin N Scrappin Thursdays & Challenge!!!

This card was designed for KL Stampin N Scrappins Oct Challenge! Im currently hosting our monthly challenge (Fall Colors)

To see more info and to join us please visit the KL Stampin N Scrappin Blog HERE

On this card I used Jam Tilda! She is sooo sweet!!! I colored her with copics, and then cut her out. I added stickles to her, and she is sitting on 3 flowers with gems. The ribbon I used is wired sheer with satin edges & I also used a frindge ribbon in brown under the sheer ribbon.
Thank you for looking and have a lovely day! a

Jam Tilda from KL Stampin N Scrappin
Copics from KL Stampin N Scrappin
Stickles from Pez-A-Doodle

Hugs ,
Cheryl

Monday, September 28, 2009

Thinking of you!

This card was designed for 2 challenges today! 1st one is SCS Featured Stamper challenge, and the other is Stampin' Sisters in Christ Challenge.
On my card I used this little Sweetie from the Yummy for your Tummy Collection from Magnolia stamps. This little one was sent to me by Kelly from the KL Stampin N Scrappin Store, that is where you will find her and other DARLING images! Kelly carries the Magnolias for alot less than other online stores, to check out the Pre-orders for this stamp click HERE Also right now if you spend 30.00 you can save 5.00 by using coupon code SAVE5 That is an Awesome deal!!
To find out more info on this card you can also see her on the KL Stampin N Scrappin Design Team Blog HERE
Thank you for stopping by!!
Hugs,
Cheryl

Thursday, September 24, 2009

Hey Cupcake!!!

Hello everyone today I wanted to share with you this DARLING new stamp Chef Tilda that you can pre-order from Kelly over at the KL Stampin N Scrappin Store! Isnt she sweeet???!!!!!I sooo love all the pre-orders for this new A Little Yummy for your Tummy collection.

Dont forget that Kelly is offering 5.00 off your order of 30.00 or more for this month. Dont forget to add your coupon code SAVE5!
And also if you pre-order the Magnolia Halloween stamp and 15.00 of other goodies from the KL Stampin N Scrappin Store, Kelly will add The Basicgrey Eerie paper pad to your order for free!! How AWESOME is that!!!???


Dont forget to check out the DARLING new pre-orders for the High Hopes stamps!!

Chef Tilda can be found here at KL SNS Store
Copicscan also be found at KL Stampin N Scrappin Store
Cupcake stamp can be found here at Alota Rubber Stamps
Stickles can be found here at Pez-A-Doodle Designs

Thank you for looking and have a wonderful day!
Hugs,
Cheryl

Also here is a link for the Design Team blog and where you can view all DT cards, and projects postings on this blog!!!

Thursday, August 20, 2009

Miss Tilda w/Tulips & Swiss Pixies Gretel

2 cards for todays KL Stampin N Scrappin post!!! Here is Miss Tilda :) On my 1st card I just had to used Tilda "with Tulips" I know shes an older stamp but I love this one:) and also wanted to remind all of you that Kelly has some of the Magnolias on SALE right now:)

On my card I used copics to color, and stickles to glitz. I cut miss Tilda out, and popped her off of my card. I did sewing on both dp panels, and added some flowers, and gems.
Next is Swiss Pixie Gretel. I sooo love these little ones, they are toooo cute!!! I also colored her with copics, and did some sewing on this card as well. I did sewing on all 4 panels:) Im getting pretty fast at this sewing thing:) LOL Just have to practice with some of the stitches. Anyways I also did this card for SCS Sketch Challenge:) and wanted to share with all of you:)

I added a big yellow flower with a button in the center :) Dont forget right now over at the KL Stampin N Scrappin Store if you spend 50.00 you get free shipping, how Awesome is that???!!!! Dont forget to use coupon code Aug2009 to save:)


Link to the KL Stampin N Scrappin Blog

To find these DARLING little sweeties click HERE!! :)
Thank you for looking and have a wonderful Thursday!!!
Hugs,
Cheryl