Showing posts with label The Project Bin. Show all posts

Thursday, October 27, 2022

KBD Candy Corn Donut Ginger


Hello crafty friends , today I'm sharing this darling Kadoodle Bug Designs Sitting Candy Corn Donut Ginger, isn't she the cutest? I wanted to make another fun Memorydex to enjoy and this one is the first fall one for this year. 
to start with I cut out my memorydex card using a die, and then used the sweet Ginger girl that I had put together. She is cut out in different colored card stock and then distressed. I used inks and pens to do all that. Next her eyes, I love doing their eyes its so much fun. On her eyes I try to use a 005 pen for the lashes, then using another little thicker pen for the liner, and then chalk for the highlighting.Next for the blue eyes I did cut in a blue and then used 2 copics for highlighting the edges. The black I did using the glossy accents over the black, and I did have to add more paint pen in white on top, as it faded what was underneath. I chalked her cheeks and added some white paint pen. I do show the pen in my videos, and I think I bought a 2 pack of these on ebay. I love the paint pens so much better than gel as the gel pens dry up. Now for her bow, I used the gorgeous RRR Sherry & Ivory Plaid ribbon. My sentiment is from The Project bin stamps.

Thank you so much for stopping by and have a lovely day!

Hugs to all, Cheryl

Thursday, October 20, 2022

KBD Sweet Pumpkin Pile Ellie card

 
Hello everyone today I have another fun card designed for Kadoodlebug Designs using their darling Gnomie Friends Pumpkin Pile Ellie, isnt she darling>>? I just love her, and had so much fun distressing her and putting her together.

Pumpkin Pile Ellie is from the Gnomie Friends Collection from Kadoodlebug Designs. I cut out all my pieces in colored card stock and the blue design paper. The blue design paper is double sided so I cut it a couple of times to get both sides so I could decide what I liked best. I did add some white paint pen, and black dots to her face, along with some chalk in pink. Lastly I added some yellow dew drops to the center of her bows.

My design papers are from echo park, and my stamped image is The project bin stamps. All flowers are from Really Reasonable Ribbon. and dew drops are from The Robins Nest Creative 


Thank you so much for stopping by and have a lovely day!

Hugs to all, Cheryl

Tuesday, February 1, 2022

Valentines Matchbook Treat Holder

 Hello crafty friends and happy Tuesday to you all! Todays darling Valentines was designed for Really Reasonable Ribbon using the gorgeous heart ribbon and a few other items. Ive been having so much fun creating Valentines treats, so hope you enjoy!

Matchbook- was cut at 3" x 6 1/2" and then I scored 1/2" ,3 1/2" , 3 3/4" Next I stapled the bottom, closer to the bottom edge, then covered with really reasonable ribbon. for the inside I used scor-tape to hold the Ghiradelli chocolate down, then added a heart shaped sentiment inside as well( stamp used was from The Project Bin Stamps) using scor-tape.

for the front cover I chose to use some old Cheery Lynn dies, and the cute little SVG fox. I added one of RRR hearts to the front, and a little I love you tag. Super fun these are to make. I really had tons of fun making this, and I hope you enjoy! Thank you!


Really Reasonable Ribbon Supplies:

Thank you for stopping by and have a lovely day! Hugs to all, Cheryl


Wednesday, September 1, 2021

So Grateful


Hello everyone, today I have a super short post to share. I made this card using up some leftover scraps, love when I can use up all the design papers, and not have to worry about saving them. I made this little card and another I will share on another day. This card here measures 4 1/2" x 4 1/2" and was super easy to do.
I added Really Reasonable Ribbons, and flowers. The sentiment is from The Project Bin stamps. 
Hope you enjoyed my card today as I enjoyed making it!

Hugs to all, Cheryl

Friday, August 13, 2021

Really Reasonable Ribbon August Blog Hop

 Welcome to "Really Reasonable Ribbon's  August” Blog Hop if you arrived here from Kathy's Blog you are on the right track. If not , you will want to head back to the Really Reasonable Ribbon Blog that way you don't miss out on any of the FABULOUS Designs from the Design Team today! There is going to be lots of Beautiful projects to see today using the Autumn Ribbon Assortment, so I hope you Enjoy


For my card today I started with cutting and putting together 3 different layers, all sewn using my sewing machine. Next I added white dots to each layer. The sentiment frames were cut out using dies, and then I stamped my sentiment on one. The sweet Spider bear is an SVG file that I cut out all in white on my Cricut Air machine ,and then colored the spider body in black copic, and airbrushed the bears face with the copic airbrushing system. I then added eyelashes and some highlights to her face, and then  added white and black dots. My bows were done using 2 different ribbons from this months assortment, I love this months assortment as all the ribbons are absolutely gorgeous! I added stamens , flowers, and some branches to complete my card for today. All the flowers were also dusted using black and orange ink, and the rosebuds were air bushed.


Really Reasonable Ribbon supplies used:
Chrysanthemums dusted black
Rose buds airbrushed black
Cherry Blossoms dusted in orange

other supplies
halloween design paper, card stock, gel pens, copics
cuddly cute SVG file
The project bin stamps
Sewing
airbrushing
dies and punches

Inside of my card, it too has sewing.

Thank you so much for stopping by, and hope you enjoyed my Halloween card for today!


Your NEXT stop for today's hop is Bonnies Wonderful Blog!!!
Hugs to all,

Cheryl


Monday, August 9, 2021

Strawberry Sweet Card for RRR

Hello everyone and Happy Monday to you all! Today I have a super Sweet card I designed for Really Reasonable Ribbon using the Gorgeous Ribbons and embellishments they carry in shop. This card has tons of layers, as you all know I love layering, and also love bears.
On my card I started with a white 6" x 6" base, then added 4 design paper layers, all have sewing and white gel dots. Next I added 3 more layers using die cuts for the doily, shaped die, and circle. I stamped a sentiment that is one of my favorites, and I will list below. Next the darling sweet Bear is a SVG file, as I just got a new Cricut Air machine, and I'm loving it! I cut here out in brown card stock, red, and tan, and distressed each piece. The eye lashes I drew on, and then added lots of white dots, and black gems. Next the strawberries were cut using a die cut from CC dies, and they were colored using copics. Lastly I added my double bows and flower embellishments to the top, and then added the inside layer. Ive been trying lately to get all the insides of my cards complete, as that way I dont have to do it later.
Really Reasonable Ribbon:


I hope you enjoyed my post for today, and thank you so much for stopping by! Have a lovely day!

Hugs to all, Cheryl
 

Wednesday, June 9, 2021

Someone I love Card w/RRR

Hello Ribbon Lovers, and Happy Wednesday to you all! Today I have this super darling card I made for Really Reasonable Ribbon using the Gorgeous Ribbons, flowers, and supplies. Hope you enjoy my post for today.
On my card I chose to use lots of layers, as I love using layers on all my cards. Each layer not only has sewing but I also added dots using a gel pen. I layered up the sentiment using different die cuts. Around the sentiment I chose to use RRR roses in pinks, and then the pink satin ribbon, Love how it turned out. All layers are popped up using the foam squares, and I also used the scotch advance tape refill for each layer. Lastly I did the inside to complete my card for today. 

Really Reasonable Ribbon Supplies:

thank you so much for stopping by and have a lovely day! 

Hugs, cheryl
 

Friday, January 8, 2021

Happy Valentine's Day

Hello everyone and Happy Friday to you all! Today I have a super fun and sweet card I made for Really Reasonable Ribbon using their beautiful Ribbons and Flowers. I love making Valentine's cards they are so much fun to create and this is my 1st one for 2021. 

This card here measures 6 x 6 and has 3 layers plus the heart layer. I added Happy Valentine's Day using The Project Bin stamps. Next I chose this sweet Kitty Bee from CottageCutz and added a little heart on her dress. I wanted to glitter her wings but completely forgot until photos were taken...heheehe I thought she would look darling with the valentines design paper with the bee on it. I then added the Delicate Stitched Satin Ribbon in white, then the mini hearts on poppy grosgrain ribbon, layered with the Cottage Rose 25mm then the Rose buds.

Supplies Used:
Cottage Cutz dies
The Project Bin Stamps
Pebbles Yours Truly design paper
white gel pen
copics to color
club scrap black ink

I hope you enjoyed my card for today! thank you for stopping by! 
Hugs to all,
Cheryl


Wednesday, June 13, 2018

Really Reasonable Ribbon June Hop


Welcome to "Really Reasonable Ribbon's" June Blog Hop!

If you arrived here from Ginny's Blog you are on the right track. If not , you will want to head back to the Really Reasonable Ribbon Blog that way you don't miss out on any of the FABULOUS Designs from the Design Team today! There is going to be lots of Beautiful projects to see today using the Purple  & Pink Mix Ribbon Assortment, so I hope you Enjoy!!!

Every month RRR comes out with the Perfect Ribbon Assortments, I just LOVE each month, and all the beautiful ribbons! This months card is using the beautiful Pink sherbert Checkered Satin, and vintage floral print Satin, along with flowers ,leaves, and adhesives.


On my card for today I chose the 2 ribbons from this months assortment, as I love them both. I thought they went perfectly with the design paper I chose. Next I used Carnations, in the pink, Mini Sweetheart Blossoms in pink, Sweetheart Blossoms in purple, and then the big purple flower is the English Roses Mixed Purple and Lilac.

Really Reasonable Ribbon Supplies Used:
Sweetheart Blossoms Mini and regular size

Sentiment is from The Project Bin Stamps and is stamped in black ink from Club Scrap, and design paper is DCWV Cherry Limeade collection. I added sewing in a eggplant color thread.


Thank you for stopping by 
hope you all are enjoying today's hop, and hope you enjoyed my post as well! :)
Your NEXT stop for today's hop is Bonnie's Wonderful Blog!!!
Hugs to all,

Cheryl

Tuesday, April 10, 2018

Feline Good Card

 Hello Crafty Friends and Happy Tuesday to you all! Today I have this super darling card made with Cheery Lynn's DARLING dies, I just LOVE this Small Cat die, and the Mirror Mirror Doily frame I used for my sentiment. Well I love it all....hehehee I always love using fancy frames , and This Cheery Lynn one is perfect!

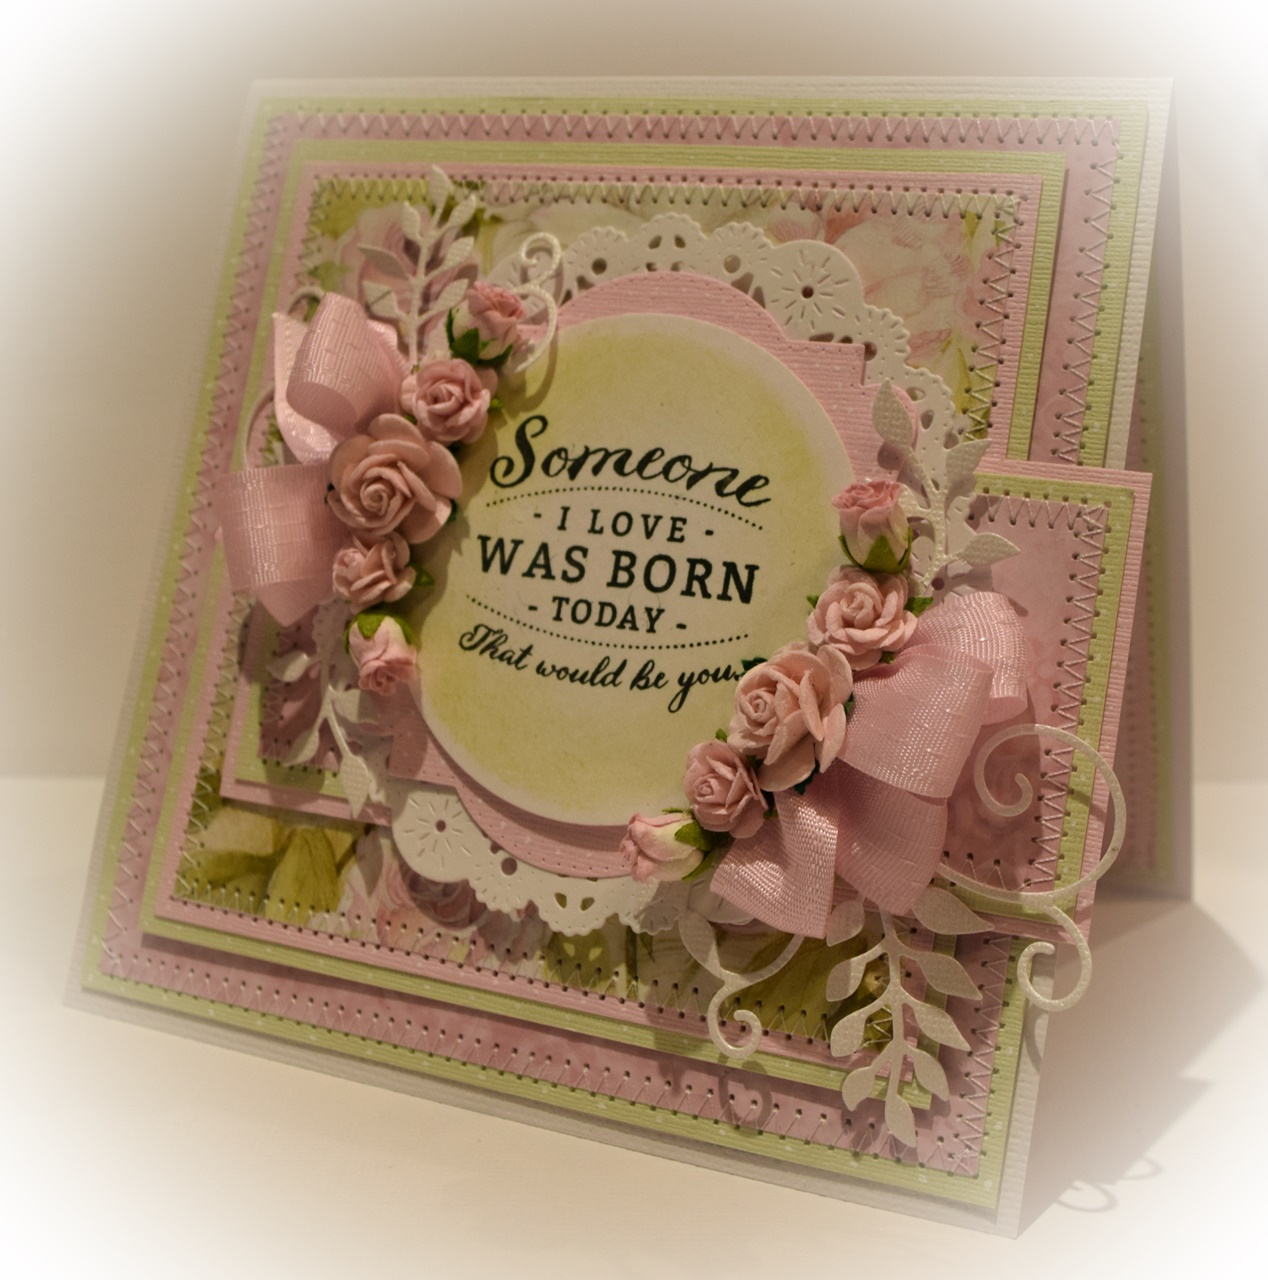
a bow made with Really Reasonable Ribbons Satin, for my embellishing on my card :)

To start with I cut my Small Cat out using the coordinating Graphic45 design paper, how perfect this kitty is, she goes perfectly with the design paper. I did add some distressing, Viva Pearl pen for an eye, nose, and on the ears and tail. Next I distressed her using red ink.

Flowers on cat- i used the Tiny Flower Kit Die, and cut out some flowers to go along with my kitty. The greenery is the Flourish #8 Die, and I just cut a piece of it, and colored it green. All pieces were glued using the Best Glue Ever found at Cheery Lynn Designs, LOVE this glue, its honestly a must have to any crafters collection!

Frame- I have to say this is one of my NEW favorites, not that its newly release, but new to my collection...hehehe Its perfect for layering, i will get a lot of use out of this one for sure. I used it to cut out a brown doily frame, its dark brown. then i used the other 2 dies to cut coordinating design paper for my sentiment frame. All 3 pieces come in this die set, love that too! Stamp is from the project bin.

Heart-Sweetheart candy die was used for this. Cut in coordinating design paper. This die is perfect to use all year round.

Butterfly In- used for the corner, its so pretty and comes out so smoothly of the die. Love that about Cheery Lynns dies, they come out so easy, no poking and trying to get the delicate pieces out.

I did add some sewing in a coordinating color to each layer. and lastly I added

Cheery Lynn Supplies Used:
B205 Butterfly In
B675 Sweetheart Candy
DL286 Mirror Mirror Doily Frame
OR01 Small Cat
Flourish #8
B376 Tiny Flower Kit
Best Glue Ever
Big sister Die cutting machine
Mini platform
Crafters Tools
Thank you so much for stopping by and have a lovely day!
Hug to all,
Cheryl

Saturday, March 10, 2018

Birthday Pop Up card


Hello Crafty friends and Happy Friday to you all! Todays Cheery Lynn Pop Up 3-D card is done on the outside and the inside, as I've used 2 of the NEW 3-D pop up dies for this. I also combined some of Cheery Lynn's other dies for my card. I am LOVING these 3-D Pop up Dies that Cheery Lynn Designs came out with, they are super fun to use!

To start with I used the Party! Pop up as the outside of the card, inside of on this inside. It can be used both ways. I then added some of the sweet Pebbles design paper to the PARTY! to coordinate with the card layers. Next I cut out the dress form, Oval, and frame all using the coordinating design paper in this line. Each front layer is sewn to give a bit of embellishing. I lastly added a Taffeta Bow to the front.

Cheery Lynn Supplies Used:
Pop Up Party B932
Pop Up Birthday B938
Antique Dress forms B882
Pierced Stacker #2 XL-20
M-7 Oval Classic-sm silver stacker layers 8
Best Glue Ever
Big Sister Die and Emboss machine
Crafters Tools S122
 For the inside I used the Happy Birthday Pop Up and just colored it with coordinating colors. super easy and fun! I should have added sewing to the inside but forgot.

Thank you for stopping by, and please let me know what you thought of my card for today :)
Hugs to all,
Cheryl

Friday, February 9, 2018

Cheery Lynn's 3-D Pop Up Valentines Day Card

 Hello Crafty Friends and Happy Friday & Happy Early Valentines Day to you all! Here is the Hearts 3-D Pop Up card I did for Valentines Day using not only the Pop up die , but a few other Cheery Lynn Dies as well. I have been enjoying my time in the craft room working with all these beautiful dies, its been really nice to get back down here crafting again. Seems like I had to long of a break...hehehehe

On this Hearts Pop Up I did the card base again in white, yes I know lots of white lately...hehehehehe I need to work on that. Anyways I did cut the hearts out again in the coordinating design paper polka dots and added them to the hearts on the top, by gluing them with The Best Glue Ever. I also stamped Happy Valentines Day.

Next I worked with 4 layers, then layered the Vintage Tile, Swans Border, and Love Tags. I added some Really Reasonable Ribbon bows and pearls and this card is complete. The design paper is from my stash and was leftover scraps I chose to use up. I'm trying to work on using up the scraps, as we get so many of those , and then they get put in a box and I end up forgetting about them :) I believe its from American Crafts

Cheery Lynn Designs Supplies Used:
CABRD13 Border#13
Vintage Tile B886
Pop Up Hearts B933
Love Tags CARA27
Best Glue Ever
Big Sister Die cutting machine


The stamped sentiment is from The Project bin, and the ribbon is old from Really Reasonable Ribbon

Thank you for looking and have a lovely day!
Hugs to all,
Cheryl

Friday, February 2, 2018

Xo's 3-D Pop Up Valentines Card


Hello everyone and Happy Friday to you all! Today's Happy Valentine 3-D Pop Up card was designed for Really Reasonable Ribbon using their beautiful Delicate Stitched Satin, Checkered Satin, and lace, along with adhesives to put my card together.

The beautiful ribbons and lace were from the "Valentine Mix"January Ribbon Club  I used the Delicate Stitched Satin for my bow, and one of the strips, next I used the Checkerboard Satin , and then the lace .

My 3-D pop up base is a Cheery Lynn die, and so are all the others used on this. I've been trying to use up my scraps from other cards I've created, so this is one of them. Love making valentines cards, they are so much fun, and i really enjoyed creating this one to share.

Really Reasonable Supplies Used:
Checkerboard Satin Hot Pink
Delicate Stitch Satin Pearl Pink
Crochet Lace
Foam tabs
Scotch tape

Other Supplies:
Sewing machine
The Project Bin Stamps
Cheery Lynn Dies Flourish frame , owl with gears
American crafts design paper
DCWV card stock


In this last photo my Mieshy Bear sneaked in on this photo...hehehee I noticed it when I was cropping it. :) she is so sweet, so I left it for this photo

Thank you for looking and have a lovely day!
Hugs to all,
Cheryl

Saturday, January 13, 2018

Really Reasonable Ribbons January Blog Hop


Welcome to "Really Reasonable Ribbon's" January Blog Hop!

If you arrived here from Ginny's Blog you are on the right track. If not , you will want to head back to the Really Reasonable Ribbon Blog that way you don't miss out on any of the FABULOUS Designs from the Design Team today! There is going to be lots of Beautiful projects to see today using January's Valentine Mix Ribbon Assortment, so I hope you Enjoy!!!

I LOVE all the Gorgeous ribbons in this months assortment "Valentine Mix", and I always LOVE each month, as Bonnie puts together an AWESOME assortment! On my card for today I did use 2 of the ribbons in this kit. I also used RRR Foam Tabs, scotch tape refill, embellishments. I also used Cotton Candy Bakers Twine for the tags to hang from

Love tags is from Cheery Lynn Designs, and the Happy Valentines Day and heart die are from The Project Bin.

Happy Valentines stamp is The project bin stamped in black ink. I distressed the white heart with a pink ink.  

Supplies Used: 
Lace from the Valentine Mix ribbon kit

I hope you all are enjoying today's hop, and hope you enjoyed my post as well! :)
Your NEXT stop for today's hop is Bonnie's Wonderful Blog!!!
Hugs to all,
Cheryl