Saturday, September 30, 2017

You're a peach.

Hello Crafty Friends, and Happy Saturday to you all!
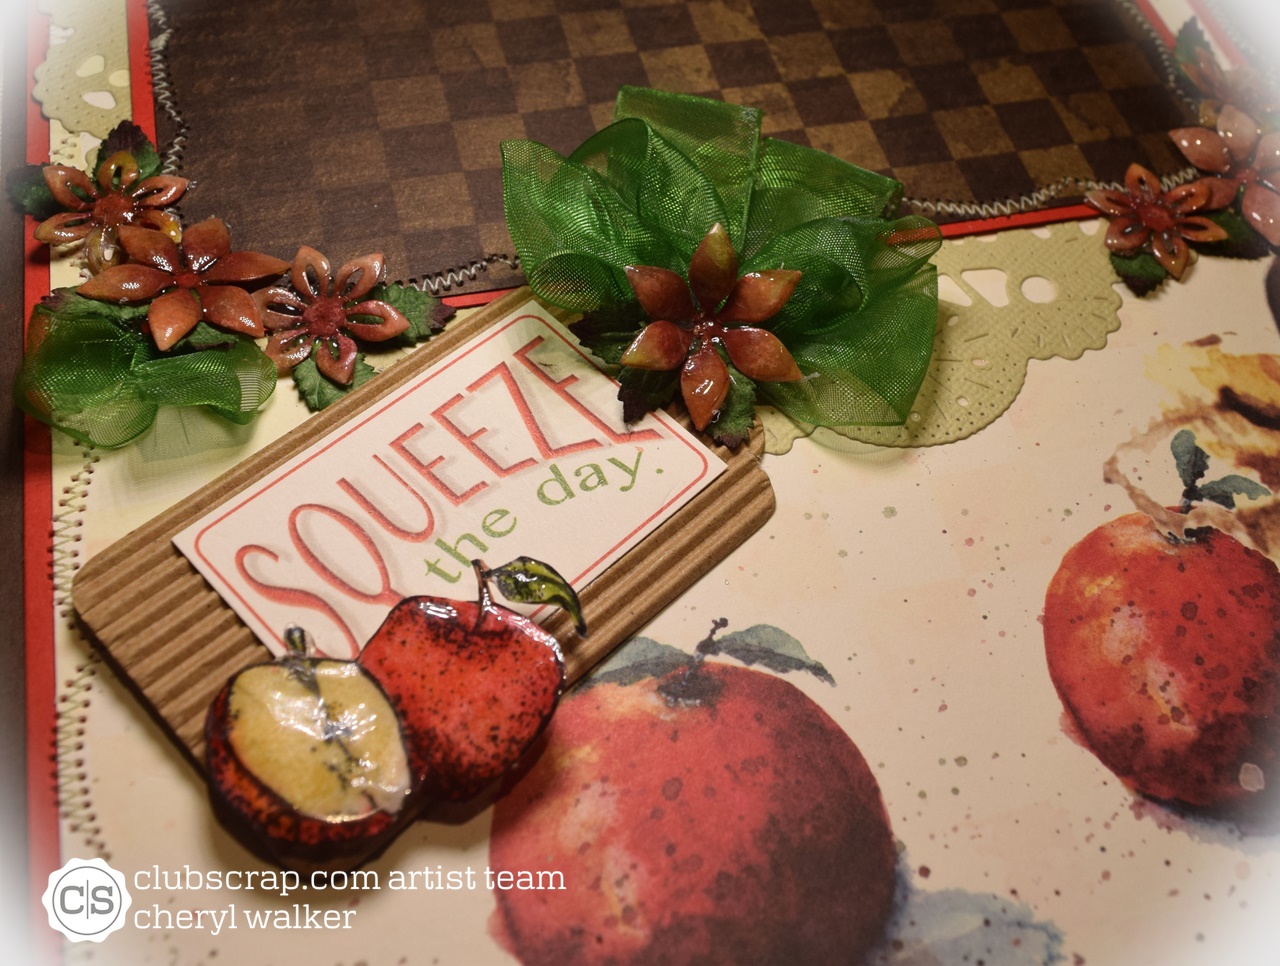
Today's SWEET card was designed for Club Scrap using the BEAUTIFUL Orchard Collection, and can I just say I'm in LOVE! This Club Kit is perfect not only for card making but also for those Layouts, and mini albums too! I love all the fruit in this kit, and all the beautiful stamp sets that go along with it. Ok enough of me rambling on....hehehehee

So for my card I chose to make another 6" x 6" card base, and then layered it up using the same piece of 12" x 12" design paper from the Orchard Deluxe Club Kit. I didn't want to cover up the beautiful design, so instead I cut a small leftover scrap piece and stamped the Because you're so sweet sentiment on it. Next I stamped the 2 peaches and colored them up using several copic markers and fussy cut them out. I used Orchards Greetings for the sentiments on the front/inside, and the Large peach. Next for the smaller peach I used that from the stamp set called Orchard Jumbo Unmounted stamps.  This Beautiful Orchard kit inspired me to stamp and finish the inside of my card for today. Normally I wait to do the insides, and don't typically stamp on the insides, just add my writing, however I love when I do the insides to match an outside of my card, so very pleased with this one! heheehe

Club Scrap Supplies Used:
Orchard Embellishment Cut-A-Parts for the piece in the bottle cap.

Other supplies used:
Really Reasonable Ribbon, 
Really Reasonable Ribbon foam squares
Sewing
Copic markers
Green card stock

Challenges:
Craftaholics R Us/Anything goes 
Frilly and Funkie/Show us your stamps
Thank you so much for looking and have a lovely day!
Hugs to all,
Cheryl

Friday, September 29, 2017

Sweet Santa Card

Hello crafty friends and Happy Friday to you all! Today I have a sweet card I made for Cheery Lynn Designs & The Project Bin Stamps. For my card today I used the  darling Santa and Elf Die set, along with a couple of other Cheery Lynn Dies. I also used the Beautiful stamp from The Project Bins Joyful Song Set.  I have to say I absolutely love this sweet Santa, as I have tons of Santa's that I decorate my home with for Christmas, So I'm a Santa Lover....hehehehehe He was super fun to make, and I did add some flower soft to his cap for some extra embellishing.

My card measures 6" x 6 1/4" that is the card base. I then layered with 3 layers of design paper all from a coordinating paper stack called peppermint by crate paper.  My sentiment is The Project Bins Joyful song stamp, and was stamped in club scrap Moss Green ink on Cheery Lynns Oval (smallest one) Stitch and Cut tool LSC-7. Next I distressed it with a red ink. I used the DL314 Quadrafoil Square Doily and framed the 3rd layer panel on my card, then cut it to size. Next I added my Santa, he was put together using Cheery Lynn's Best Glue Ever that they carry. LOVE this stuff.

All dies were cut using the Big Sister Die Cut and Emboss machine from Cheery Lynn. I LOVE this machine as its so easy to use, and love how it cuts the dies with ease and you can adjust the presser. Perfect machine!!!

Lastly I added some sewing with my machine in red thread, and then a red bow using Really Reasonable Ribbon, and a little embellishment for the center.

Cheery Lynn Supplies Used:
Santa and Elf Dies
DL314 Quadrafoil Square Doily
LSC-7 Oval Stitch and cut tool(smallest oval used for sentiment)
Best Glue Ever
Big Sister Die Cut and Emboss machine

Other Supplies Used:
Really Reasonable Ribbon
Really Reasonable Ribbon Embellishment Cabochon 
Really Reasonable Ribbons Foam Squares
The Project Bins Stamp set Joyful Song
Club Scrap Moss Green Ink
Crate Paper Peppermint
I hope you enjoyed my post for today, and thank you for stopping by!
Hugs to all,
Cheryl

Wednesday, September 27, 2017

Club Scrap Orchard Blog Hop

Hello everyone and welcome to Club Scraps September blog hop featuring the New Beautiful Orchard Deluxe kit !  If you arrived from Josette's Blog then you are in the right place , if not you will want to start from the beginning at Karen(Club Scrap blog)so you don't miss any of the wonderful inspiration from the Club Scrap Artist Team! There is also a list of the entire line up there for you with links :) Have fun & I hope you enjoy todays Hop!


Some photo's below of how I did the flowers on this page. Photo's of layout dont show the beauty of each flower like in person. But in the photo's below you can see the colors.


On my layout I used the beautiful design paper sheets and card stock from the Deluxe Orchard Kit. Love the design papers in this months kit, and the Cut A-Part sheets too! Of course i love every months kits, as they are all beautiful!

I used the 12 x 12 Deluxe Brown for the background layer and the 8 1/2" x 11" Deluxe Ivory with the pumpkins on it, for the photo matts. I then chose to use the orange card stock for the layering on my layout. The flowers were cut using the yellow card stock that comes in the deluxe kit, and then i chose to use glimmer mist in a orange and green, and then the glass flower technique. the photos for some reason don't show the flowers like what they look like in person on this layout. the pearls were all airbrushed to coordinate with my layout for today. You can find all my Glass Flower Techniques HERE! :)

Cut - A- Parts were used for the Sweet as Pie, and the It's FALL y'all! these are in the Deluxe Orchard Kit.

I had so much fun working with this months beautiful Deluxe Orchard kit, as I LOVE everything about this sweet kit! As Fall is here, its perfect for all our Scrapbooking and card making needs.

I do hope you are enjoying our hop today!
Your next stop is Deb's Blog Have fun!!! Thank you for joining us today!!
Hugs to all,
Cheryl

Sunday, September 24, 2017

Baby Shower Treats

Hello everyone and Happy Sunday to you all!
Today I'm sharing these darling little White Chocolate Reese's covered treats I made for Really Reasonable Ribbon &  Baby Shower I'm hosting on this next Saturday. I used this DARLING Ribbon Spool to make 35 bows, its so sweet! I had a lot of fun creating these, hope you enjoy todays post!

So for these sweeties, I pulled some polka brown design paper from my stash, and cut it to size for wrapping around these treats. I used scor-tape on the back side, at each end, and then attached to the treat. Next I punched out the scallop's and circles and used foam squares to attach each one. For decorating I used stickers, and the darling Baby Hands Really Reasonable Ribbon for bows, to attach bows I used hot glue. There are 35 of these on this 2 tier serving dish.

Really Reasonable Ribbon-
Baby Hands Blue Grosgrain Ribbon
Scor-Tape 3/8"
Foam Squares 3-D Tabs

Other Supplies-
Polka dot brown design paper
Polka Dot blue design paper
Alphabet Stickers, and baby boy stickers
SU! Punches for the circle and scallop
Distress ink in brown
Hot glue to add bows on.


These were super fun to create, and I made a ton of them. YIKES! I hope you enjoyed my post today, as I always enjoy creating and sharing! Thank you for stopping by, and have a lovely day!
Hugs to all,
Cheryl

Wednesday, September 20, 2017

Christmas Window Card


Hello Crafty friends and Happy Wednesday to you all!
Today's card was designed for Cheery Lynn Designs using the New Sparkle Christmas Tree 6 piece set , Poinsettia Strip, and Window die

On my card I started with the beautiful window die, and cut it out in white, and then distressed it with distress ink Vintage Photo. Next I cut the tree out in the coordinating design paper, and then used some spritz spray, but used the dabber tool to apply it to the edges instead of spraying it all over. I cut the little presents out in graphic45 coordinating design paper to go along with the theme on my card. The Poinsettia flowers were cut using a red design paper from the same stack, and then distressed with red ink, and I used the Glass Flower Technique that can be found on my blog under tutorials. I love Christmas time, and love decorating my house, so I'm looking forward to this :)

Cheery Lynn Dies Used:
Sparkle Christmas Tree 6 piece set
Window B die FRM142
Poinsettia Strip
Big Sister Machine
Best Glue Ever for flowers

Other Supplies used:
Really Reasonable Ribbon Satin
RRR embellishments
Glue Pad,
Clear Embossing Powder
Red ink, green ink, green spritz, gold gelato
Graphic45 Christmas Past paper stack
Sewing

I hope you enjoyed my post for today, and thank you so much for stopping by! Have a wonderful day!
Hugs to all,
Cheryl

Tuesday, September 19, 2017

Club Scrap September Artist Team Challenge


Hello everyone, and welcome to Club Scraps September Artist Team Challenge! This month the September challenge is to incorporate watercolor techniques into your projects by using Watercolor paints, pencils or crayons, Gelatos, dye-based inks, etc. I ended up using faber castell's Pitt artist pens, pencils, and a gelato for my flowers and apples.

You should have arrived from Debbie's blog, however if you did not , you might want to start from the beginning at Karen's Club Scrap Blog , that way you won't miss any of the Design Teams Beautiful creations today.

I LOVED making this layout using the new Orchard collection and LOVE all the beautiful design papers, cardstock and embellishment that came in this months kit. I  chose for my layout today to watercolor all flowers, and then the stamped apples and color them with pencils from faber castell. I then used the glass flower technique on all flowers and the apple image. This page was super fun and easy to create. The thing that took the longest would be handmade flowers, and even then it didn't take me long at all. My page was very simple for me as I added 2 photo matts and my embellishments. Love how the apples turned out too using this fun technique. I did add a photo to show you what the flowers look like before using the glass flower technique on them.

 In the photo above you can see how I watercolored them, and then how the look after doing the Glass flower technique on them. LOVE how the color is much deeper and bright.

Club Scrap Supplies Used:
Orchard Deluxe Club Kit
Orchard corrugated Tag
Orchard Jumbo unmounted Stamps
Orchard 12 x 12 prints
Orchard bottle caps with epoxy stickers
Ribbon and fibers that come in the deluxe kit
Orchard Embellishments Cutaparts
Permanent Jet Black ink

Other supplies-
Glue pad
clear embossing powder
Heat gun
sewing machine with green thread
faber castell
Doily from cheery lynn designs
hope you enjoyed my post for today, as I truly enjoyed creating my layout for today using the the beautiful NEW Orchard Collection! Please let me know what you think as I always enjoy reading your wonderful comments!
Thank you so much for joining us and stopping by!!!
Your NEXT stop is Josette's Blog
Hugs to all,
Cheryl

Friday, September 15, 2017

Cheery Lynn Giving Thanks Blog Hop


Hello everyone and Welcome to Cheery Lynn Designs "Giving Thanks"Blog Hop. Today all of the Cheery Lynn Designers will be showcasing the Beautiful dies from Cheery Lynn Designs. So grab yourself a cup of your favorite beverage and enjoy today's hop. You wont want to miss this one!!!

You should have arrived from Maggi's Blog.  if not you will want to start at the beginning, The Cheery Lynn Designs Blog so you don't miss any of the designers posts for today. Don't forget this is the time to stock up on your wish list as there is a 15% off saving at Cheery Lynn Designs Store. Have fun!!
Image may contain: text
So on my card for today I used the sweet new die called B901 Acorns and Leaves, and this has to be one of my many fav's for Fall. I love the darling acorns and the sweet leaves that come in this set. I also added in a leaf from B241 Rose Leaf Strip die. All pieces were cut in white then colored with copic markers.

For the layering I chose to use some of Cheery Lynn's beautiful dies, like the Royal Scandinavian Doily DL280 and then B883

Cheery Lynn Dies used:
Acorns and Leaves B901
Dusty Miller Frame Corner 2 piece set B883
Royal Scandinavian Doily DL280
Rose Leaf Strip B241
LPC4 Circle Pierce and Cut Tool LG Silver 

The Project Bin Stamps called New Leaf were used for the sentiment, and Really Reasonable Ribbon was used for the ribbon and embellishment.

Layering was done using different design paper pieces that I had scraps of. Love the look and the colors on this one, as it so reminds me of Fall.

I hope you enjoyed my CARD for today!!! Please let me know what you think of the card inside and out, as I always enjoy reading the wonderful comments!! thank you all so much!!!

Your NEXT stop on the Hop is Laurie's Blog ! Thank you for stopping by! Don't forget to stop and leave a comment on each blog as there is a GIVEAWAY as well :) Enjoy!!!
Hugs to all,
Cheryl

Thursday, September 14, 2017

We make a great pear

Hello crafty friends, and Happy Thursday to you all! Today I have a fun and simple card I designed using Really Reasonable Ribbons  Beautiful August Autumn Harvest Ribbon Assortment, along with a few embellishments, & also for Club Scrap using the BEAUTIFUL new Orchard Deluxe Collection.

On my card I chose to make my a bow using 3 of the ribbons in Really Reasonable Ribbons  Augusts Ribbon kit. I also used the same ribbons for the banners in the left hand corner. The design papers and stamps I ended up using are all from Club Scraps September Orchard Kit. The Flowers I used were already cut, and colored, I just had to put them together for my card. And the centers have a 10mm pearl embellishment. Leaves were already done, so I just had to add them. Made for a fast card, as i didnt end up doing any sewing on this one, kinda shocking....hehehehe I do love how it turned out, as I love all the beautiful ribbons and design papers I chose for this one.

The sentiment was stamped using black ink, and then i distressed around the oval using an orange and light brown. The pear was stamped 2 times and cut out once, I colored it using copic markers.

The yellow layer was just distressed using scissors and ink,

Big bow was made using the Tangerine Taffeta , leaves grosgrain, and green satin, along with a sweet crystal embellishment.

All layers were put together using Really Reasonable Ribbons Scor-tape, and foam squares.

Really Reasonable Ribbon Supplies Used:
White flat back pearls 10mm
Mixed colored rhinestone flower
Scor-Tape
3-D thin foam tabs
Ribbons-Assortment , or Green checkerboard Satin, Random Autumn Leaves Grosgrain , Tangerine Taffeta Ribbon

Club Scrap Supplies Used:
Orchard Greetings unmounted stamps for the sentiment & pear image
Deluxe Yellow design paper
Deluxe Brown Design paper for the background and fancy frame
Yellow 12 x 12 plain paper

Cheery Lynn Design Dies -
Cheery Lynn Oval Classic & Pierced stacker #2
Gardenia strip

Thank you for looking and have a lovely day!
Hugs to all,
Cheryl

Wednesday, September 13, 2017

Really Reasonable Ribbon September Hop


Welcome to "Really Reasonable Ribbon's" September Blog Hop!


If you arrived here from Ginny's Blog you are on the right track. If not , you will want to head back to the Really Reasonable Ribbon Blog that way you don't miss out on any of the FABULOUS Designs from the Design Team today! There is going to be lots of Beautiful projects to see today using September Ribbon Assortment, so I hope you Enjoy!!!

I LOVE all the Halloween ribbons in this months assortment , and I always LOVE each month, as Bonnie puts together an AWESOME assortment! On my card for today I did use 2 of the ribbons and  in this kit. I also used RRR Foam Tabs  & 1" Scor-Tape for the layers, also used some embellishments! It was a hard choice as I wanted to use them all!
 For my card I chose to use some design papers from American Crafts, then layered with some leftover card stock, as I'm trying to use these scraps up :)

The Ribbons I chose are the checked and the sweet spider ribbon from this months assortment. Love them all, it was hard to choose what ones I wanted to use until I picked out the stamps and the kitties, then I knew! :) love when that happens. I made 2 bows, and then hot glued them to each other. The embellishments I chose are from Really Reasonable Ribbon as well, I wanted to use the glitzy Rhinestone one for the center of my bow, and then the covered buttons for the card.

The stamps used are from The project Bin stamps and came from the set called "Creepy Halloween". I just stamped them in black using the Mini Misti tool, and love how I could place them where I wanted using this, and stamping several times to get the desired look.

The kitties are from cheery Lynn Designs Dies, and I colored them with copic markers, I think they turned out pretty cute, might have to try coloring some more of these up, as I can use the practice.

I had fun designing this sweet Halloween card for todays hop!
I hope you all are enjoying today's hop, and hope you enjoyed my post as well! :)
Your NEXT stop for today's hop is Bonnie's Wonderful Blog!!!

Hugs to all,
Cheryl

Saturday, September 9, 2017

Merry Christmoose

Hello crafty friends, and Happy Saturday to you all! Hope you are enjoying your weekend and getting your craft on :) hehehhe
Today's card is a Merry Christmoose card created using the SWEET Cheery Lynn Dies. The DARLING moose is one of the new release, and mixed with some of Cheery Lynn's other beautiful dies. I will list them all below for you. I absolutely am LOVING all the dies in this newest release, and if you havent had a chance to see them, be sure to check them out here at the Cheery Lynn Designs store.

So for this sweet card , it measures 6" x 6" and I used a white card base. Next I chose to use a kraft color card stock, along with a green for matting all the layers of design paper. The design paper I chose to use for my card today is from Recollections Winter Wonderland, its an oldie but goody :) I added some green sewing to each panel on my card.

Layering the main panel-
I used Cheery Lynn's Pierced Stacker #2 XL20 cut out the kraft card stock with this one, for the oval i used M-7 Oval Classic and cut out the coordinating design paper. For my sweet Moose I used the NEW B923 Merry Christmoose die, and cut him out all in white, then colored with different copic markers. I did add some white gel dots to his antlers, ear ,and tail.
Flowers- were cut using another design paper from this collection and cut using Cheery Lynns Poinsettia Strip, I then added some gold stamens from RRR to the centers. The greenery was done using the poinsettia strip and some of the design paper, then i used for the branches B846 Christmas Bell 7, its the branch in this set.

Merry Christmoose was colored and then i added a bit of glitter. Ribbon is Gingham from Really Reasonable Ribbon.

Cheery Lynn Dies used-
Merry Christmoose
Christmas Bell 7
Poinsettia Strip
Oval Classic M7
Pierce Stacker  #2 XL20
 I really enjoyed creating this sweet card. I love making the clusters with Cheery Lynn Dies, and love how the Poinsettia's look done in a white glitter design paper.
Thank you for looking and hope you enjoy the rest of your day!
hugs
Cheryl

Friday, September 8, 2017

Autumn

Hello everyone , today I have a card I created for The Project Bin Stamps using their beautiful "New Leaf" stamp set for this sentiment. I did choose to use the Ombre effect like what Iv'e done before in one of my tutorials for stamping. You can find them here.

On my card for today I went with some old design paper I found in one of my paper trays. Love when you go shopping in your craft room and find stuff you havent used....LOL hehehehe I think I had bought these stacks at the warehouse sale for American crafts, got them for super cheap,like 1.80 for 30? sheets of the same design. crazy!

Stamping- so for the stamping I used the mini Misti tool and then some SU! markers to color my stamp and keep stamping, love how this tool allows you to do that without messing up.

Cheery Lynn Die- so i cut these out using white card stock, then colored with several copic markers to achieve this look. All dies came in this set called B901 Acorns and Leaves. LOVE this set, and will be using it again very soon.

Ribbon and embellishments are from Really Reasonable Ribbon. I used the Tangerine Taffeta ribbon, and then an cabachon 

Today's card is pretty simple and easy to make. I hope you enjoyed my post! :)
Thank you so much for looking and have a lovely weekend!
Hugs to all,
Cheryl

Monday, September 4, 2017

happy HALLOWEEN!

Hello everyone, and Happy Labor Day to you all!
Today I have a sweet little card I created for Really Reasonable Ribbon using the beautiful Brown Satin, and the sweet little itsy bitsy spider grosgrain ribbon from RRR Store. Love the Halloween ribbon you will find here under the holiday ribbons, its absolutely darling, and these spiders are the cutest spookiest little guys you have ever seen...hehehe coming from the gal who hates spiders......hehehehehehe O'my!


Anyways for my card today I chose to use a card base I had previously cut using the cricut machine. I have some of these set aside so I can use them. I then added a cheery lynn doily DL102 French pastry cut using the design paper from Tricks and Treats pebbles stack. The flowers are also a design paper polka dots cut out using CLD Tea Rose Small strip die. I did use the Glass Flower Technique and it can be found here on my blog under Tutorials. I have several videos on this using different techniques on the flowers then doing the glass technique, super fun!

The little tag is also from the same paper collection
Really Reasonable Ribbon Supplies used:
Brown Satin 7/8" Ribbon
Itsy Bitsy Spider Grosgrain Ribbon
Embellishments Covered buttons black
3-D Foam Sqaures
Brown Leaves

Thank you so much for stopping by and have a lovely day!
Hugs to all,
Cheryl

Friday, September 1, 2017

Have a Creepy Halloween!

Hello everyone and Happy Friday to you all!
Today I have a quick post to share, as my card was designed for The Project Bin & Really Reasonable Ribbons Anything Goes with Ribbon challenge. To Join us for Really Reasonable Ribbons Challenge, please visit the Blog Here! To visit The Project Bins Blog for Inspiration, it can be found Here!  Hope you enjoy this Spookalicious card for today :)

On my card I chose to use The Project Bins Creepy Halloween Stamp set for the sentiment. All dies are from Cheery Lynn Design Dies, and Ribbons used are from Really Reasonable Ribbon.

Ribbons are from Really Reasonable Ribbons Ribbon club for this month

The design paper is Pebbles Tricks N Treats 6 x 6 paper stack.

I did a little dusting on the kitty and the sentiment circle.

Thank you for looking and have a lovely day!
Hugs to all,
Cheryl