Showing posts with label My video Tutorials. Show all posts

Wednesday, May 10, 2023

Shabby Chic Poppers for Mother's Day

 
Hello everyone and Happy Wednesday to you all! Today I have some darling shabby chic Mother's Day poppers I made to add to my table setting for Mother's Day. These were designed for The Robins Nest Creative using the beautiful dew drops they carry.

To Start

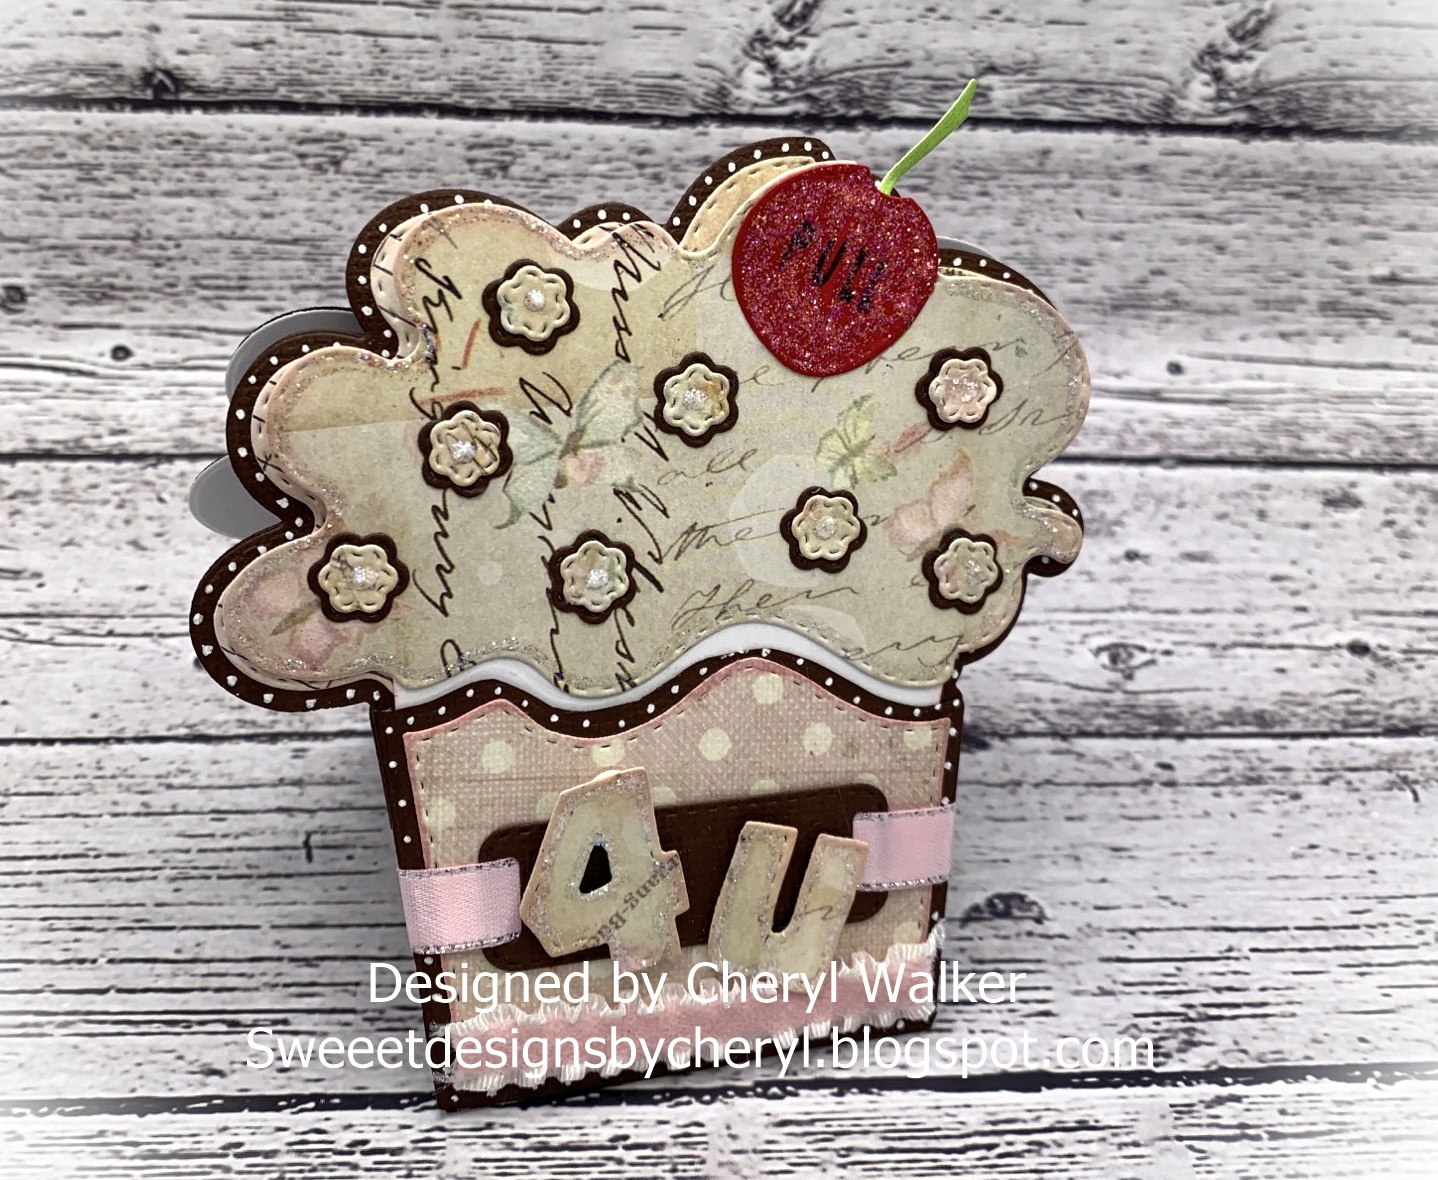
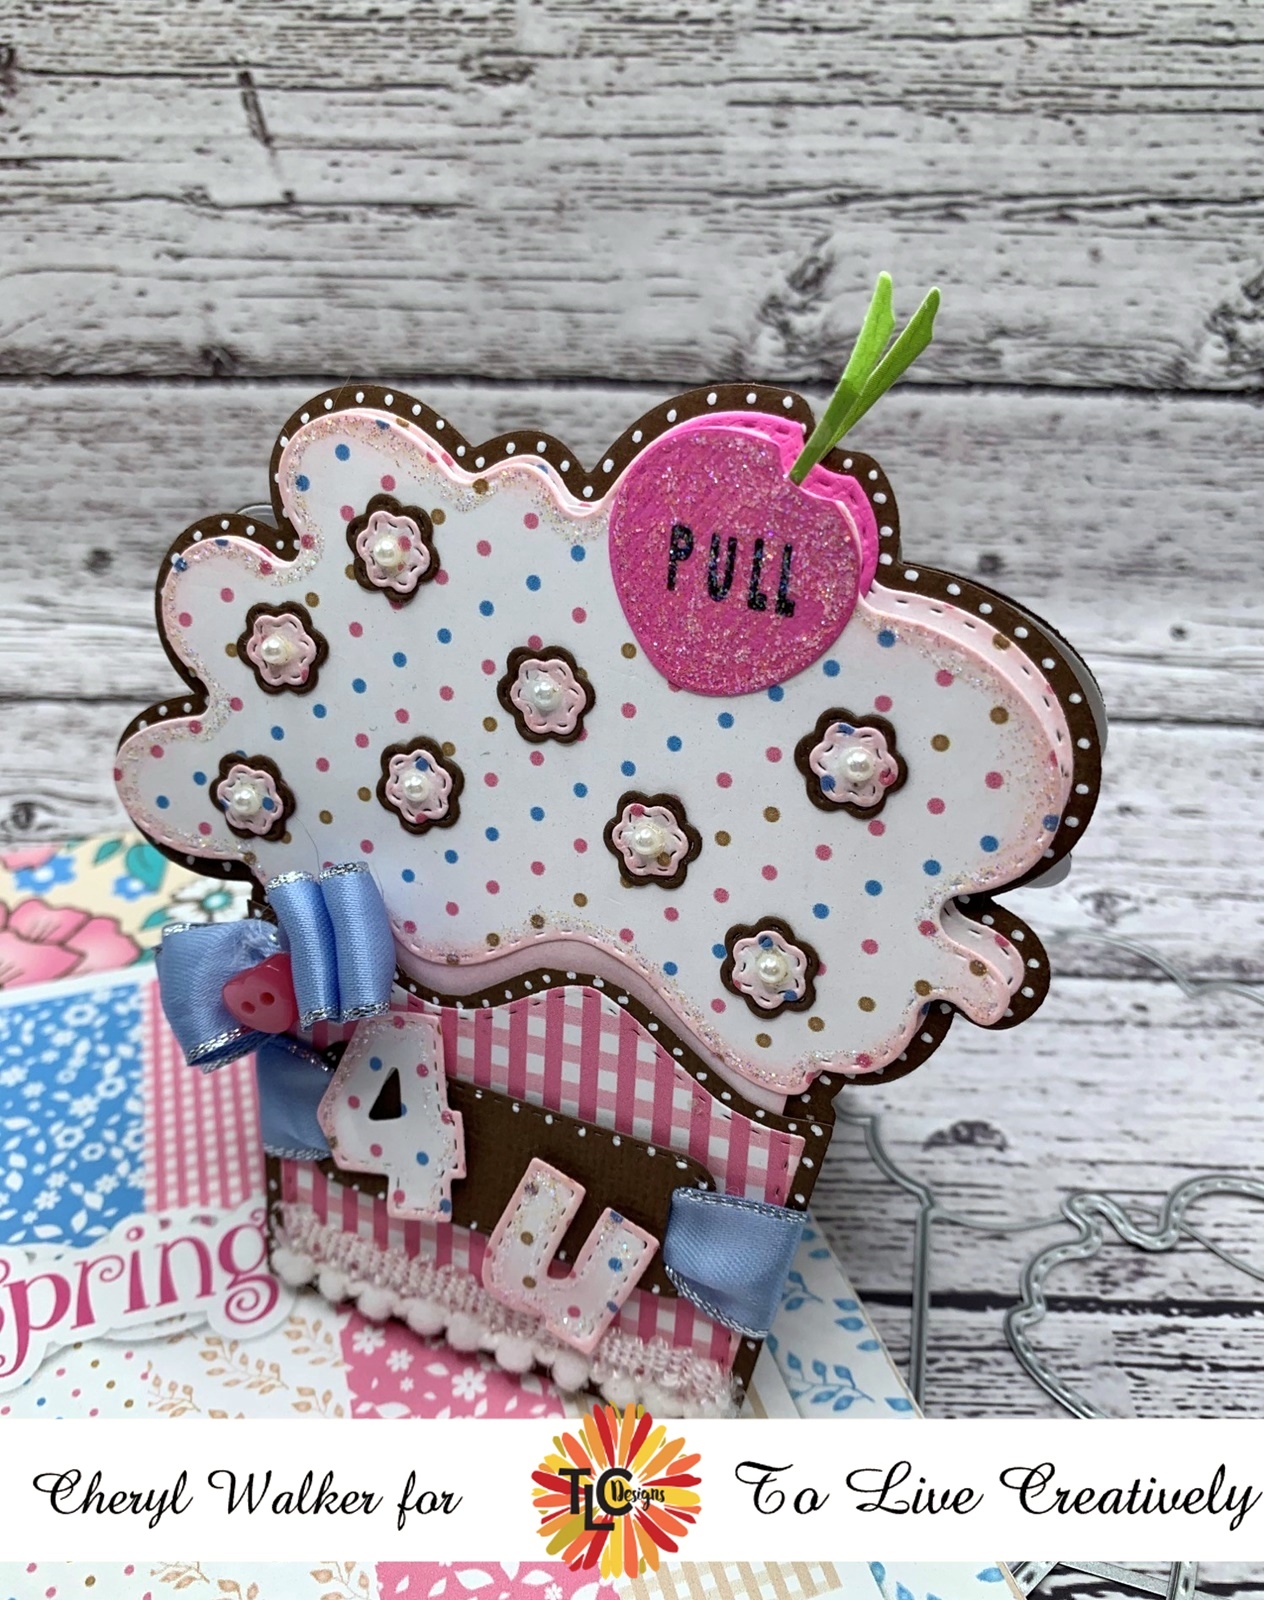
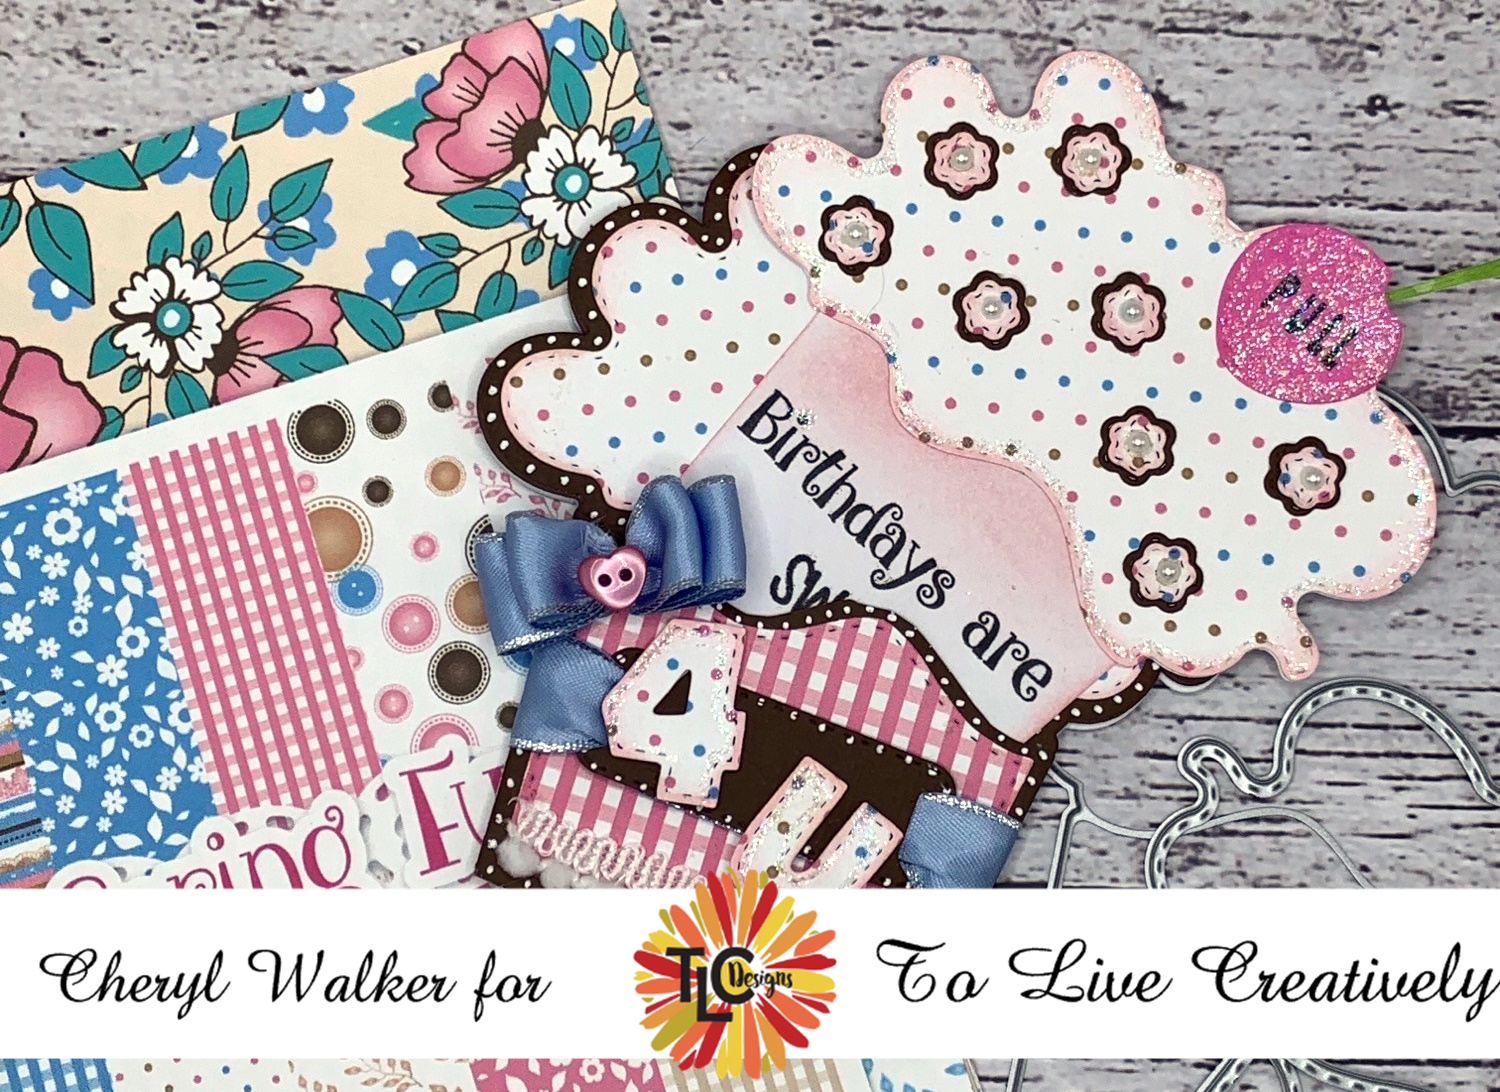
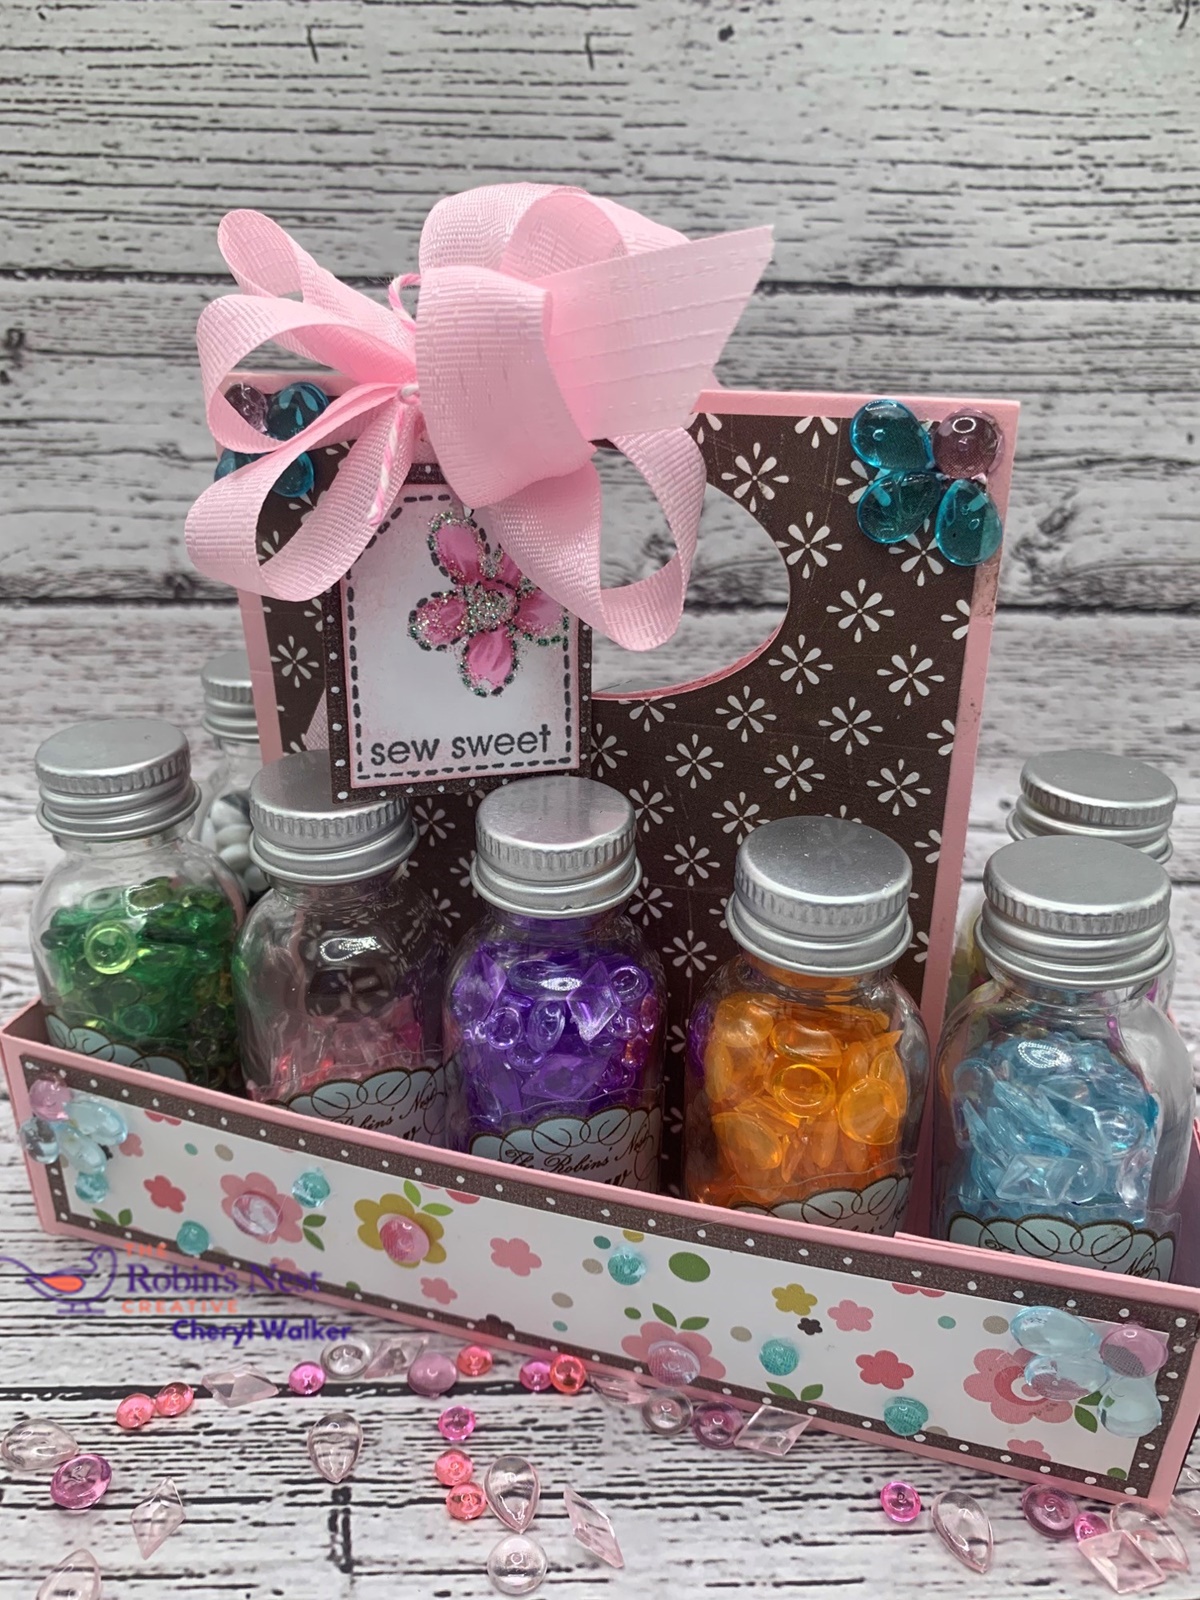
To start I made this box small so it could hold some goodies for my table setting I'm doing for Mother's Day. I picked some pretty Design paper that I bought years ago its K &Company. Next I picked my die cuts, and it was a flourish that I have and some ready to go, and then picked my flowers they are from RRR and are absolutely beautiful.

Decorating My Shabby Chic Box using dew drops

I started with adding My design paper to my Box before putting together, that made it easy. Then once together I added my flourish and Hot glued my flowers on, that helped hold the flourish in place. For the dew drops I used the light pink dew drops in the tear drop shape, and then green dew drops in different sizes. Then I added lots of Really Reasonable Ribbon to close the sides and made bows.  I love how the dew drops add that extra embellishing that my poppers here needed.

I  added a tag to the side that says A Little Something , and distress it so it will coordinate with this box, as these will be part of the gifts on my table. I cant wait to do my Mother's Day Table setting, will be fun!. I do hope you enjoyed my post today and please let me know what you think in the comments below.

I do hope you enjoyed my post for today and I also have a video on making these a well. You can see the video here ---> HERE ON YOUTUBE
Hugs to all,

Cheryl


Tuesday, April 25, 2023

Mother's Day Paper cracker/Favor box tutorial

 
Hello everyone and happy Tuesday to you all! Today I have this fun favor I made for Really Reasonable Ribbon using the gorgeous flowers, ribbon and embellishments. Also made these for my table setting for Mother’s Day. 

I do have a video tutorial on this Popper/cracker favor and it can be seen here 

Items used are Really Reasonable Ribbon Delicate stitched satin Peony for the ties on both ends . The lace is Gabrielle , it’s beautiful! I used 2 tone pink with dusty pink centers for the 3 (10mm, 15mm,20mm) , sweetheart blossoms . The design paper I chose is the K & Company 

I made these to put on my table setting for mothers day this year, and thought these would be so pretty on the place setting for each of the moms. I think I;m going to add some truffles to the inside of them. They are super fun to make and if you havent tried to make them yet, you can watch my VIDEO here on them.


Thank you so much for looking and have a lovely day!
hugs to all,
Cheryl

Monday, March 13, 2023

Really Reasonable Ribbon March Hop & video tutorial


Welcome to "Really Reasonable Ribbon's  March” Blog Hop if you arrived here from Kathy's Blog you are on the right track. If not , you will want to head back to the Really Reasonable Ribbon Blog that way you don't miss out on any of the FABULOUS Designs from the Design Team today! There is going to be lots of Beautiful projects to see for Easter, So each DT member will showcase an Easter design. 

Be sure to comment on the blog hop post on the RRR Blog for a chance to win a $10 gift certificate to Really Reasonable Ribbon 
Today's Project is an Easter Fun Fold Treat / Favor box I made , and I do have a tutorial on this and it can be found HERE , these are super fun to make and perfect for gift giving, or even table favors. this one is the medium size box. 

I used Really Reasonable Ribbons beautiful Swiss Dots in Light Pink 3/8" and  7/8"  I also used the scor tape, and then a little heart embellishment both from RRR . The Panda is KaDoodle Bug Designs. Design paper piece on front is from Echo Park Easter collection. dies used are cheery lynn dies


Be sure to comment on the blog hop post on the RRR Blog for a chance to win a $10 gift certificate to Really Reasonable Ribbon 


Thank you so much for stopping by, and hope you enjoyed my Easter Box for today.


Your NEXT stop for today's hop is Bonnies Wonderful Blog!!!
Hugs to all,

Cheryl


Tuesday, March 7, 2023

Fun Easter Box and videos

Hello everyone and happy Tuesday to you all! Today I have another fun Hexagon Milk Carton Box I made for KaDoodle Bug Designs and Really Reasonable Ribbon 🎀 using the tutorial below. 

Easter Bunny Bear can be found here


Also this next video has the decorating on this box today! 

Happy crafting!


Thursday, March 2, 2023

Panda Milk Carton box with Lid

Hello crafty friends and Happy Thursday to you all! Today I have another fun Milk Carton box, this one is tall, and super fun to make! Love making these in different sizes. This one has flap lid, super fun! I designed this one for KaDoodle Bug Designs using the darling Cutie KaToodles Panda, love her! I have videos on the panda and showing how I put her together and inked her up. you can find it below on this post.

The design paper I used is from Pebbles its called Ever After, and its darling! I thought it would look so cute on this with the panda and fence, eggs, and grass. super fun to make! My ribbon is from Really Reasonable Ribbon, and it worked perfect this box.


Thank you so much for stopping by and have a lovely day!
Hugs to all,
Cheryl


Wednesday, March 1, 2023

Easter Hexagon Milk Carton box & Video

 
Hello crafty friends, and Happy Wednesday to you all! Today I have a fun Easter Hexagon Treat/Gift box to share that I made for KaDoodle Bug Designs.I used the darling Cutie KaToodles Chick. Isnt she darling? I do have a video tutorial on the box, and the chick, and will put the one here for easy viewing.
Love how easy these are to make. You could also prep them and keep them for later , and then decorate. Love that! I also used my ribbon from Really Reasonable Ribbon, love using the satin on these, and to make my bows.

Video Tutorial on Milk Carton Hexagon box.

Thank you so much for stopping by and have a lovely day!
Hugs to all,
Cheryl


Friday, February 24, 2023

Fun Fold Easter Treat box card /Video

Hello crafty friends and Happy Friday to you all! Todays fun fold gift box/tag card was designed for Really Reasonable Ribbon using their gorgeous ribbons, ric rac and then heart embellishment.Also Designed for KaDoodle Bug Designs using the darling little Easter Bunny Bear. I Love making this sweet little fun fold gift box/tag card, they are super addicting as you get 2 out of 1 12 x 12 card stock. 

So for the front of my box I used some Ric Rac along the pocket that holds the tag, or gift card, then used the Delicate Stitched Ribbon and created a bow for the pocket. The Satin Swiss Dots in yellow I used for the tag. I did punch out the scalloped circle and the circle, and then added some eggs that I cut with a die. The carrots I found at Walmart and thought they were so stinking cute and had to buy them for the grandkids. I was thinking I would use them somehow in some treat bag/box, and then thought of this. they work perfect! Now I wish I would have bought more bags, as I didn't see them there this past week. My little Bunny Bear is an svg file that I pieced together and did up the eyes and all. Now I want to make somemore of these, so I'm off again to craft.

Really Reasonable Ribbon

SVG Easter Bunny Bear Kadoodle bug designs

video tutorial on how to construct the Fun Fold Treat Box/Tag or Gift Card Holder


Tutorial on Paper Pieced Easter Bunny Bear from KaDoodle Bug Designs


Thank you so much for stopping by and have a lovely day! I do hope you enjoyed my post today! Happy Crafting!

Hugs,

Cheryl


Tuesday, February 21, 2023

Tri Fold Message card/Envelope video

Hello crafty friends and Happy Tuesday to you all! Today's post is a short one with Cards and envelopes that I designed for KaDoodle Bug Designs using the darling Chocolate Covered Strawberry Bear,a nd the Valentine Patch Bears. I do have a video on both, and how I made the card and matching envelopes. 

Chocolate Covered Strawberry Bear

Valentine Patch Bears

Ribbons used are Really Reasonable Ribon Gingham

 Tri Fold Card Tutorial and Craft with me(Decorating)

Hope you enjoyed my post for today, of course its a short one, but I have been busy with lots coming soon!

Hugs to all,

Cheryl

Wednesday, September 28, 2022

Gift card Purse/video

Hello crafty friends and happy Wednesday to you all! Today's gift card purse was designed for The Robins Nest using the beautiful dew drops on my purse and flowers. I do have a video on this, and lots of photos over at The Robins Nest Blog. See my video below. Happy crafting to all!

My video on purse


Thank you for stopping by and have a lovely day!

Hugs to all,

Cheryl
 

Tuesday, September 13, 2022

Twinkling Alicorn & Video tutorial

 
Hello everyone and happy Tuesday to you all! Today's interactive card was designed for TLC Designs using the darling Alicorn stamp set, and interactive dies. Love this! Also I will be having 2 post for today, so be sure to check back later for another. Video Tutorial is here

  • First for my card I started with a white card stock 6" x 12" scored in half to make a 6" x 6" card base. 
  • Next design papers I chose are from the Blooming Medley Slimline design papers, and were cut as follows- purple is 2" x 4"(black is 2 1/4" x 4 1/4") floral is 3" x 4 3/4"(black is 3 1/4" x 5") pink is 2 1/4" x 4 1/4"(black is 2 1/2" x 4 1/2") layer using scor tape, or tape runner and then added sewing. I staggered these doing the purple and pink on bottom and then popping up the floral. 
  • Next I cut out my TLC Designs Tiny Vine Oval pieces in white and black, then using the die on the white to give an edge, and then did my stenciling using the TLC Designs Happy Bloom day & Clouds stencil. I did airbrush these clouds using the copic airbrushing system.
  •  Next I used the See You in the Center Interactive die set to create my moving pieces for the Alicorn and clouds. 
  • Now I hot glued my flowers and vines on , and lastly I stamped the Twinkling and the "with Alicorn Specialness using a stamping misti tool.
  •  Inside was airbrushed as well, using the stencil 
TLC Designs supplies used:

Thank you for stopping by and have a lovely day!
hugs,
Cheryl

Wednesday, August 31, 2022

Sweet Cupcake Card w/tag and video

Hello crafty friends and happy Wednesday to you all! Today I have another cupcake card using the darling cupcake die from TLC Designs, using Cherry On Top Die. This is a pocket card I created using the cupcake die and also creating a tag out of it as well. I show how to do all this in my Video Tutorial, and you can see it here. I've also put the video below at the bottom to see as well.

  • For the cupcake card you will need card base cut at 4 1/2" x 10" fold in half you will be using the large cupcake die for this part and for a white inside piece for writing. Please see video for instructions on this part.
  • Card layer 1 cut card stock large cupcake, cut wrapper design paper, cute icing design paper, cut card stock using large die for bottom part this will be your pocket.
  • tag- cut cardstock using large cupcake this will be white (video shows how to cut this before adding icing), then cut 2 icings one for front and one for back, cut 2 cherries and 2 stems
  • decorate- I chose to use the darling little flowers and layered them and then added pearls to the centers. I did use stickles for adding accents and also my white paint pen. Lastly I added ribbon, and a little heart button embellishment.

VIDEO on how to make the cupcake card

Thank you so much for stopping by and have a lovely day!
Hugs to all,
Cheryl


Wednesday, August 24, 2022

Fall fun Sweet Sunflowers & Video tutorial

 
Hello crafty friends and happy Wednesday to you all! Today's card was designed for The Robins Nest Creative using the beautiful dew drop in my Faux Glass Sunflowers, I do have a video on making these today as well as putting together my card. I do Hope you enjoy! please let me know what you think.

To start with I chose all my papers, and then card stock.
  • first layer- 5 3/4 x 5 3/4 this is the craft one, next is 5 1/2 x 5 1/2 for the wine, gingham blue is  5 1/4 x 5 1/4
  • second layer- 3" x 5" craft, 2 3/4 x 4 3/4" wine , 2 1/2" x 4 1/2" sunflower dp,
  • third layer- 4" x 4 1/4" craft, 3 3/4" x 4" wine, 3 1/2 x 3 3/4" blue design paper
  • 4th layer- 3 3/4" x 3 3/4" craft,  3 1/2" x 3 1/2" wine, 3 1/4" x 3 1/4" sunflower design paper
  • 5 th layer - is oval decorate frame and oval layers with sentiment. choose any for this layer.
  • 6th layer- sunflowers(VIDEO on this) and sweet Ticket to fall fun SVG file all put together
  • lastly I added The Robins Nest dew drops to the 2 corners making flowers.
  • inside was done using TLC stencil
Robins Nest Dew drops can be found here Yellow and brown 

other supplies are as follows- svg is scrapping bug designs, sunflower is cottagecutz, oval frames are old Justrite, tlc designs for stencil on inside. design paper is echo park.


Thank you so much for stopping by and have a lovely day!

Tuesday, August 23, 2022

TLC Turtle-icous Memorydex and video on coloring

Hello everyone and Happy Tuesday to you all! Today's Memorydex card was designed for TLC Designs using the darling Turtle-icous stamp set, along with their gorgeous design paper and a few dies. I also have a fun video on how I colored this sweet turtle up. She is one of my many favorites from TLC Designs.

  • First I started with my memorydex card base in black, then cut the design paper from TLC Designs Something Bloomed Slimline design paper pack. I added my dots.
  • Next I cut out my ovals from the Loving Petals Square set, one in black, and then one in white. I did leave the die on the white one after cutting to use as a template to dust some green, it will leave a white edge when doing this, love that. I lastly stamped my sentiment using one from the stamp set. and then added dots to the black.
  • Now I stamped my turtle , snail and flower using black ink, and then colored them all up using copics. I do have a video on the turtle and coloring her.
  • I now cut out my vine using the Tiny Vine oval die set, this is cut in green. I now placed my fussing cut images where I wanted them and then added my vine and flowers.

TLC Designs Supplies Used:


 Video on coloring turtle


Thank you for stopping by today and have a lovely day!

Hugs to all, Cheryl

Tuesday, August 16, 2022

Sweet Alicorn Easel card & videos

Hello crafty friends and Happy Tuesday to you all! Todays sweet little Easel card was designed for TLC Designs using their darling Alicorn stamp set. Absolutely love this sweet set and cant wait to stamp up more of these. 


For my card I chose to use the Tiny Vines Oval die set from TLC , and the darling Snow Family Fun design paper pack. Love this! I absolutely love all the design papers in this set, as they are all so pretty and can be used for other than the holidays. I wanted to make a small easel card. This one is super small, it measures about 3 1/2" x 4 1/4" 


My sweet Alicorn was colored using copic markers and I do have a video here on it. I absolutely love this little darling she is so sweet. There are 3 different ones in this stamp set to choose from and all sorts of sentiments and little butterflies, stars, bugs and such. So much fun! 

TLC Designs supplies used:


Thank you so much for stopping by and have a lovely day!
Hugs to all,
Cheryl

Tuesday, August 2, 2022

TLC cupcake card w/pocket video

Hello crafty friends and happy Tuesday to you all! Today I have a fun project using the darling cupcake die from TLC Designs, using Cherry On Top Die. This is a pocket card I created using the cupcake die and also creating a tag out of it as well. I show how to do all this in my Video Tutorial, and you can see it here.

  • For the cupcake card you will need card base cut at 4 1/2" x 10" fold in half you will be using the large cupcake die for this part and for a white inside piece for writing. Please see video for instructions on this part.
  • Card layer 1 cut card stock large cupcake, cut wrapper design paper, cute icing design paper, cut card stock using large die for bottom part this will be your pocket.
  • tag- cut cardstock using large cupcake this will be white (video shows how to cut this before adding icing), then cut 2 icings one for front and one for back, cut 2 cherries and 2 stems
  • decorate- I chose to use the darling little flowers and layered them and then added pearls to the centers. I did use stickles for adding accents and also my white paint pen. Lastly I added ribbon, and a little heart button embellishment.


Video tutorial on cupcake card with pocket

Thank you so much for stopping by and have a lovely day!

Hugs to all, Cheryl

Friday, July 29, 2022

Panda Birthday wishes / Sewing Video tutorial

Hello crafty friends and Happy Friday to you all! Todays super fun Birthday card was designed for my granddaughter for her birthday this weekend. I also I have a video on Sewing and will have one up shortly on how I decorated this beauty. Hope you enjoy! Hugs to all!


Video showing how I sew on my card layers.
Video on putting my card together and decorating 


Have a lovely weekend!
hugs


Wednesday, July 27, 2022

The Robins Nest Dew Drop Caddy/Video tutorial

 
Hello everyone and happy Wednesday to you all! Todays project is a Dew Drop Caddy I designed for The Robins Nest Creative to hold the Dew drop jars. I used card stock, design paper, red tape, dew drops, ribbon, and stamps.

I have 2 videos , one is a tutorial, and the other shows decorating it. Hope you enjoy!


Video's and more photos can be seen on The Robins Nest Creative Blog here.
Hugs to all,
Cheryl