Friday, November 18, 2016

Happy Turkey Day

 Hello everyone and Happy Friday to all!
I LOVE the colors of fall! Love all the trees, leaves, and of course decorating for this season too! While I LOVE cooking a good turkey for Thanksgiving, I am not that fond of eating him....hehehehehe I do Love the stuffing and all the side dishes, just not a big fan of turkey. However I am a big fan of this DARLING Cheery Lynn Turkey, as he is absolutely too cute!!!! I did airbrush this little guy :) had fun with that! I hope you enjoy todays post!

So to start with I started with a 6" x 6" card base

Base Layer cut at 6" x 12" and score at 6" to create a 6" x 6" card
Layer 1- cut brown shimmer card stock at 5 3/4" x 5 3/4", then dp at 5 1/2"x 5 1/2" (add sewing)
Layer 2- Cut brown at 5" x 5" then dp(design paper) at 4 3/4"x 4 3/4"
Layer 3- Cheery Lynn Corner Dies CABD17
Layer 4- Cheery Lynn Pierced Stacker #2 XL-20 dies( I used 5" x 3 3/4" brown) , (4 1/8" x 3 1/8" plaid design paper) , ( 1 3/4" x 1 3/8" for the white sentiment layer)

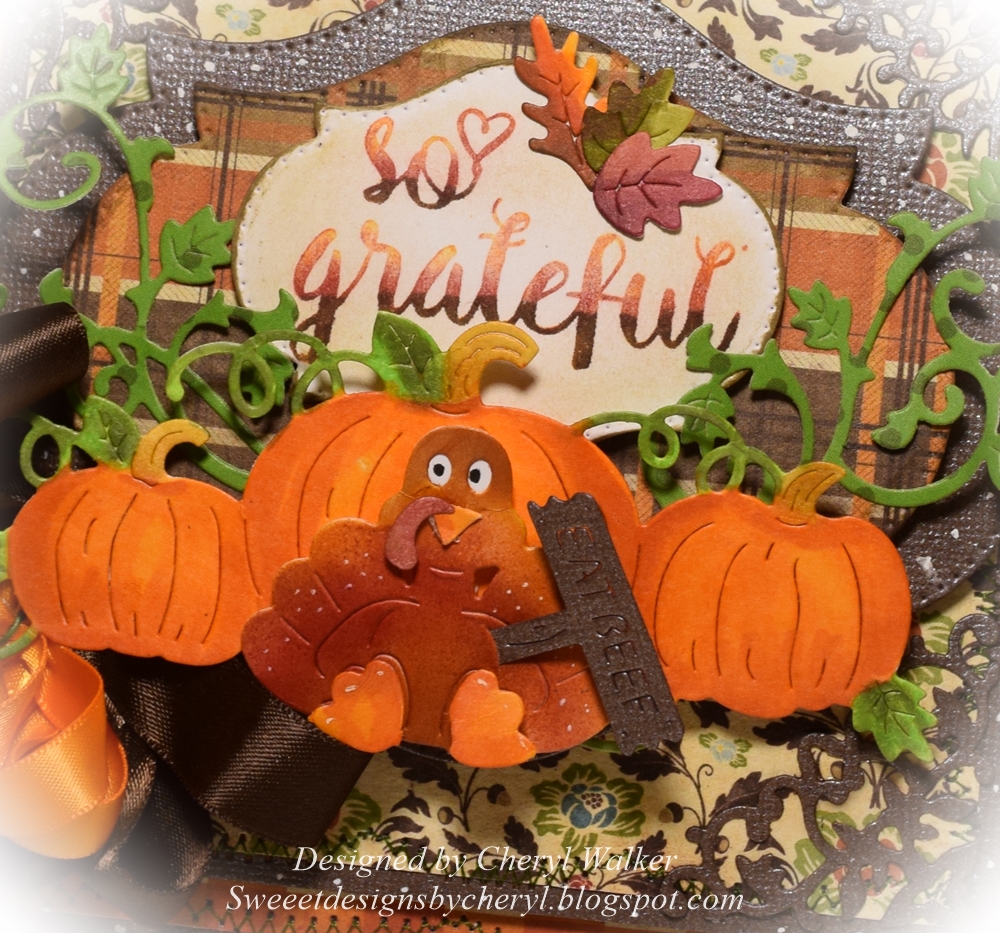
Pumpkins - Cheery Lynn Fall Pumpkin dies B827 were colored using copic markers. The green vines were cut using a green polka dot design paper.
TurkeyCheery Lynn Designs Happy Turkey Day Dies B826 was cut out using white card stock and then airbrushed using different shades of copic markers. I did cut the Eat Beef sign in the coordinating brown shimmer card stock. Leaves from this die were colored with copic markers as well.

Ribbon- Really Reasonable Ribbons Brown Shimmer Satin. and Orange Satin

Sentiment- The Project Bin Autumn's Calling
Cheery Lynn Dies used:
Cheery Lynn Corner Dies CABD17
Cheery Lynn Designs Happy Turkey Day Die set B826
Cheery Lynn Designs Fall Pumpkin Patch Die Set B827
Cheery Lynn Designs Pierced Stacker #2 XL-20 die set

I really had a LOT of FUN creating this fall card for today, hope you enjoyed my post, please do let me know what you think! :)
Have a wonderful weekend, and thank you for stopping by!
hugs to all,
Cheryl

Wednesday, November 16, 2016

Christmas Cutie

 Hello everyone, and Happy Wednesday to all!
Today's card is using the Sweet Coffee Shy Bear from I Brake for Stamps. However she is used on my card as a Christmas Cutie with her hot cocoa  :) Too cute!! I LOVE coloring up these darling stamped Shy Bears, they are the cutest ever!
 Coffee Shy Bear was colored using copics and stampinup markers. I wanted to use this for a Christmas card, so I just colored her mug red and added some holly and a Christmas tree. The design paper is from AC and ive had it for a long time now. I think it goes perfect with this image.
My card was created for these challenges listed below.

Challenges:
The Crafters Café/Christmas comes early
Crafting Musketeers /Christmas Wishes
Cute as a Button Challenge/Christmas
Open Minded Crafting Challenges/Christmas
To see all Shy Bears from I Brake For Stamps, please visit the store here. Also to SAVE 10% use coupon code SAVE10CHERYL at checkout.
Thank you for looking and have a lovely day!
hugs to all,
Cheryl

Monday, November 14, 2016

Wishing You Chrismas Card

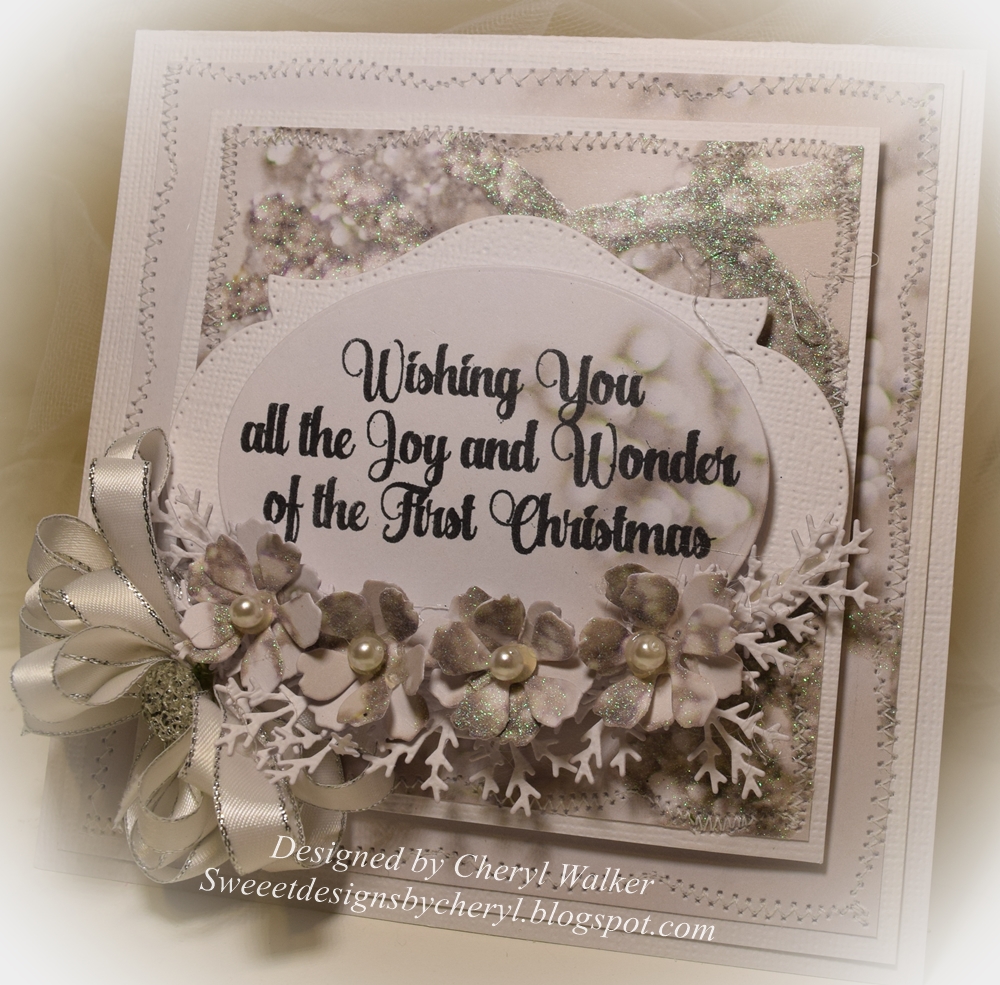
 Hello everyone,  Today I have a Christmas card designed for Really Reasonable Ribbon & The Project Bin. I used the  Beautiful Satin with Metallic edge assortment, and the sentiment from TPB Luke 2 stamp set. I love this time of year, prepping for Christmas, getting lots of cards done, and pretty soon I will start decorating my home :) cant wait!

On my card I used the White Satin with Metallic edge from this assortment here, to create my big bow. My bow was done in 2 different pieces and then hot glued to each other on my card. I did add a RRR embellishment its the 12mm flatbacked round acrylic rhinestone.
 My sentiment is from The Project Bin called Luke 2!

The flowers and branches were created using Cheery Lynn dies, the flowers are Tea Rose Small, and the branched are B216 Wreath Strip,and I did add some vintage pearls to the centers. This paper is absolutely beautiful and makes for a beautiful Christmas card.

The top 2 layers of my card are popped up using Really Reasonable Ribbons Foam Tabs.


I hope you enjoyed my card for today! Thank you for stopping by, and have a lovely day!
hugs to all,
Cheryl

Sunday, November 13, 2016

Really Reasonable Ribbon Blog hop/Christmas Tags

 Welcome to "Really Reasonable Ribbon's" November Blog Hop!
If you arrived here from Judy's Blog  you are on the right track. If not , you will want to head back to the Really Reasonable Ribbon Blog that way you don't miss out on any of the FABULOUS Designs from the Design Team today!


 I absolutely LOVE this months ribbon assortment, as all the colors & Ribbons are GORGEOUS! For my tags I used the browns, and then the pink and green. LOVE how they work perfect with all the design papers I used.

I also used the New Cabochons, and then the flower embellishments from Really Reasonable Ribbon. I also popped up each layer using RRR Foam Tabs.
 Tags were made using Cheery Lynns Pierced Stacker #2 XL-20 dies. I also used the Oval dies called Oval Classic SM Silver Stacker Layers 8 dies M-7. The design papers I chose are from American Crafts On the left is the Pebbles collection, and on the right is Bundled Up from AC Crate Paper line. LOVE both of these, and how they go so well with the ribbons. These tags are super fun to create! I also added some Poinsettia's and those were created with Cheery Lynn Designs Poinsettia Strip.

The little chipboard pieces and tags are also from American Crafts. I bought them at the warehouse sale a couple of years back. I thought they would be so cute on the tags.
Your NEXT stop for today's hop is Bonnie's Wonderful Blog!!!

Hugs to all,
Cheryl

Wednesday, November 9, 2016

Shy Bears Harvest Time!


Hello everyone and Happy Wednesday to all! Today I have a super fun Harvest card I created for I Brake for Stamps. I chose for this card to use this DARLING "Harvest Shy Bear", isn't he just too cute??!!!! I LOVE these bears, and I Brake for stamps has a large collection of them.


I love this time of year, as all the leaves on the trees are changing and of course now we are loosing them all, but  it looks so beautiful. I hate to see it all leave, then we will have ugly upon us until snow comes. I have to say though summer is my favorite, and then Fall! So when I colored him up (Harvest Shy Bear)I chose to use some fall colors and then some blue. I LOVE the blue on this one! The paper line I chose for this is an old one called Autumn Harvest by Bazzill.
 I also added a tad bit of stickles to the leaves as I wanted some glitz to my image.

I also made a BIG bow using Really Reasonable Ribbon for my card today, they are leftover ribbons :) I did add a cabochon to the center of my bow.

For the Frames I used Cheery Lynn Design Dies Pierced Stacker #3 XL-21

To see all the DARLING shy bears that I Brake for Stamps has, please visit here! 
 
Use Coupon Code SAVE10CHERYL at checkout to save on your order from I Brake For Stamps!


I hope you enjoyed my post for today, and thank you for stopping by!
Hugs to all,
Cheryl

Tuesday, November 8, 2016

Welcome Christmas Poinsettia Easel Card

 Hello everyone, Today I am super ECITED to be sharing my 1st post for Cheery Lynn Designs using all their beautiful dies. My Poinsettia Christmas Wishes Easel card (card base & layers)was created using all Cheery Lynn Dies!  Hope you enjoy my post for today :)
 
I absolutely LOVE making Christmas cards, and I love how easy this card came together for todays post. Basically you just cut and layer all pieces, and I have posted each one below for you. Super fun! The only pieces that have a different technique would be my Poinsettia flowers and the Holly Leaves, but I do love doing the glass technique on those too :)  

Layer 1-the card base I used Cheery Lynn's Pierced Sacker #3 XL-21 die set. I cut out in white card stock 1 piece using the largest die in this set, and then folded in half another piece to cut for the easel part of my card today.
Layer 2- Circle layers I cut my 2 design paper(one for outside, and one for inside) circles from the LPC4 Circle Pierce and Cut tool -LG Silver Pierce Tool(circle 4")
Layer 3- Pierced Stacker #2 I used the 4 1/8" x 3 1/8" for the layer 3 cut in a green polka dot paper for the outside card layer. I also cut one for the inside it is cut using the 2 1/2" x 1 7/8"
Layer 4- M-7 Oval Classic -SM Silver Stacker Layer 8 or the Christmas striped design paper on the front.
Last layer 5- is the B682 Quadrafoil Tag cut in a green embossed polka dot card stock, and then a white card stock for the seniment.
Poinsettias cut in polka dot design paper using Cheery LynnB324 Poinsettia Strip die. I then used some ink to distress the edges of the flowers and then my Glass Flower Technique. Lastly adding a gold pearl to the center of each poinsettia. The leaves are from the Cheery Lynn Designs Christmas Bell 7 die.

Bow is created using Really Reasonable Ribbons Shimmer Satin.

Sentiment is JustRite Papercraft Inside and Outside Christmas Sentiments I also used  Large Oval Christmas Wishes


Cheery Lynn Design Dies Used:
 
Challenges:
Deep Ocean Challenge/Die cuts
Craft-Dee Bowz /Anything goes with a handmade bow
Crafty Hazelnuts Christmas Challenge/Anything Christmas goes
Crafty Catz/Anything Goes
Crafty Ribbons/Anything Goes with Ribbon or lace

I hope you enjoyed my card for today, thank you for stopping by!!
Have a lovely day!
hugs to all,
Cheryl

Friday, November 4, 2016

Christmas Wishes Tag

 Hello everyone and Happy Friday to all! Today's Tag was designed for Really Reasonable Ribbons Tag Challenge & for Cheery Lynn Designs. I absolutely LOVED creating this tag, as I don't do tags very often, so this was a nice challenge for me. Might just have to create more :) I think these would be nice on a gift. I did use all Cheery Lynn Dies, and Really Reasonable Ribbon!
This tag was pretty simple. I started with
Cheery Lynn Pierced Stacker #2 using the 3 largest sizes. then I used
Cheery Lynn Oval Classic -SM Silver Stacker Layer 8 for my oval, then I layered with
Cherry Lynn B547 Paris Signs 1 cutting it 2 times once in black, and once in white

Poinsettias are cut using:
Cheery Lynn B324 Poinsettia strip 6 piece die

Sentiment was stampd using JustRite Papercrafts Inside and Outside Christmas Sentiments

Bows were done using the Beautiful Ribbon from Really Reasonable Ribbon called "Plaid Ribbon Christmas Traditions"
I used Jute string for the tag to tie to a gift
All layers were popped up using Really Reasonable Ribbons Foam Tabs
I hope you will join us for this super fun challenge! If you would like to join in, please visit us here, cant wait to see your tags!!!
hugs to all,
Cheryl

Thursday, November 3, 2016

Christmas Blessings Doily Fancy Fold

 
Hello everyone ,
Today I have a  Doily Fancy Fold card I created for Really Reasonable Ribbon using the Gorgeous Christmas Ribbon called "Plaid Ribbon Christmas Red/Green/Gold& For Cheery Lynn Designs using all their beautiful dies! The ribbon I used is absolutely beautiful, and makes for some Gorgeous bows(easy to create too). The Cheery Lynn dies made this card come together quickly! My sentiment is from The Project Bin and stamped up beautifully :)
I am having so much fun creating Christmas cards this year, and this one was a super fun one to create. Might have to do some more of this kind :)


My card was created using 4 doilies, 6 circles, 1 frame, and 1 oval. This one has Really Reasonable Ribbon to tie it closed. Above you can see it un-tied. My bow is made up using the Plaid Christmas ribbon and I made 2 bows, and glued them to each other. Next I hot glued a RRR Embellishment to the center. LOVE this card!!

For the Sentiment I used The Project Bin Luke 2 Sentiment stamped in green ink using the Mini Misti tool. 

In the center of my bow I used one of Really Reasonable Ribbons beautiful embellishments called Mixed color Flower shaped flatback round acrylic rhinestone embellishment in red.


All dies used are Cheery Lynn Dies
M -7 Oval Classic SM silver Stacker Layer 8
B846 Christmas Bell 7
DL260 Priscilla Doily
XL-20 Pierced Stacker #2
LPC 4 Circle Pierce & Cut Tool

 I hope you enjoyed my post for today! Thank you for stopping by, and have a lovely day!
hugs to all,
Cheryl
 

Wednesday, November 2, 2016

Super SWEET Candle Shy Bear

 Hello everyone, and Happy Wednesday to all!
Its hard to believe we are already in November, WOW!!! Pretty soon I will be starting to decorate for Christmas as that takes me some time to do. Not sure I will put everything out this year as it takes me days to do.

Anyways for my card I decided to use this DARLING Candle Shy Bear, i think they are absolutely too CUTE, and I LOVED coloring this one. There are tons to choose from in the I Brake For Stamps Store, makes me want them ALL!!!! hehehehehe anyways you can find them here. Have fun!!!

Im trying to get done some Christmas cards so I can hand them out this year. Not sure if I will get too many mailed out. But I do like to give some in person.
 For my Shy Bear, I colored him in copics, isn't he just the sweetest??!!! I love this one, and had fun coloring up the holly and berries too. For the santa cap, I used some stickles on the part that is white to give a little glitz.

Each layer has sewing on it. I did use some Christmas design paper from American Crafts. I also added a big big bow made using Really Reasonable Ribbon Plaid Ribbon, and some gold Bead Berry spray.
My green frame is a Cheery Lynn Die called Pierced Stacker #3 set I also used the circle Pierce tool set found here.
To SAVE 10% off your order at I Brake For Stamps, use Coupon Code SAVE10CHERYL at checkout! Have fun!!
I hope you enjoyed my post for today! Thank you for stopping by, and have a lovely day!
hugs to all,
Cheryl

Tuesday, November 1, 2016

Cheery Lynn Designs November Blog Hop

 
 Hello everyone and welcome to Cheery Lynn Designs November Blog hop featuring the NEW Cheery Lynn Shaker Card Maker KIT! Today is also a super exciting day for me, as this is my 1st post as a designer with Cheery Lynn Designs! Woohooooooo
 
Today each of the Cheery Lynn Designers will be focusing on using 1 of 9 kits to share with you today. I chose to use the Heart Shaker Card Kit K107K to share with you today on my Fancy Fold Card. I absolutely LOVE this kit!!!

You should have arrived from Maggi's Blog Here , if not you will want to start at the beginning, The Cheery Lynn Designs Blog so you don't miss any of the designers posts for today.


So for my Fancy Fold Doily Shaker card I used all Cheery Lynn Design Dies. I absolutely LOVE all these dies, and how easy they are to use. Makes for a super fun project and crafty time :)
Cheery Lynn Dies used:
DL206 Priscilla Doily(4) cuts of these for the card base
LPC4 Cheery Lynn Designs circle pierce and cut tool(2.5 circle) for base of card
LPC4(4" circle) for inside and back of card base
K107K Heart Shaker Card Maker Kit for the front of my card( entire kit makes the heart and shaker part)
Pierced Stacker #2 die (4 1/8" x 3 1/8") for the front layer
B154 Medium Rose die(for the flowers) cut 8 flowers and 4 leaf pieces

Flowers are done with my Glass Flower Technique found in my tutorials 
 
Ribbon used is from Really Reasonable Ribbon and is the Stitched Satin :)
Pearls are vintage and from my stash.
Design paper is K & Company Brenda Walton and the pink is from Pebbles and American Crafts called Ever After.
 

I hope you enjoyed my post for today!!! Please let me know what you think of my card, as I always enjoy reading the wonderful comments!! thank you all so much!!!
Be sure to also leave a comment answering one or more of the questions on the Cheery Lynn blog to be entered to win.
 
Your NEXT stop on the Hop is Blog Christina's ! Hope you have enjoyed today's hop and Thank you for stopping by!
Hugs to all,
Cheryl