Tuesday, October 12, 2010

Really Reasonable Ribbon Blog Hop

Hello everyone and Welcome to the RRR Blog Hop for October! Be sure to grab a cup of cocoa,tea,coffee, or whatever else you would like, and enjoy todays show! Today Im going to be sharing 2 cards with you!
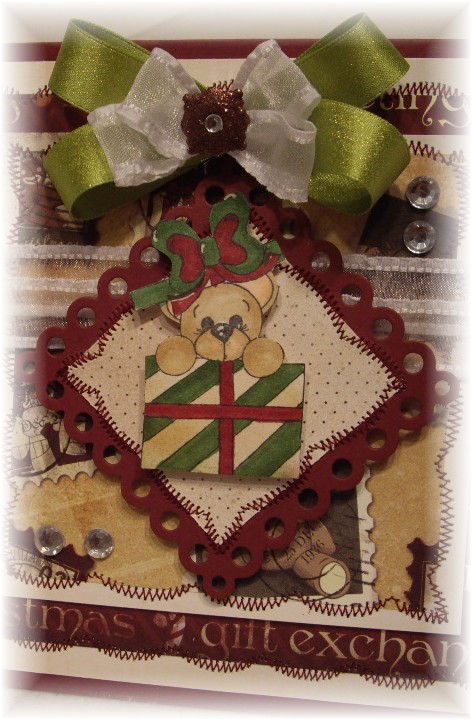
1st Card- Suprise Bear

For this card I used Really Reasonable Ribbon for my bows, and both of these were in the Monthly Ribbon Club Assortment! You can find the picture below, it shows all the beautiful ribbons that you can use! I also used the white ruffled edge ribbon as a double border across the 1 panel.

 My image is from The Pixie Cottage Stamps(I love bears). I colored her with copics and then cut her out! I also used spellbinders frames(these are new). Ive added sewing & gems to complete this card!
Supplies Used:
Really Reasonable Ribbons-Monthly Ribbon Kit
Stamp -Suprise Bear from Michelles Scrapbooking and More
Gems,sewing
Dp is from Karen foster Designs
Cream dp is from Basicgrey "Manilla"
Cardstock is AC
This is the Beautiful Ribbon Club Assortment! I love all the ribbons that come in this set! Here is a link to RRR

2nd Card- Poinsettia Wishes
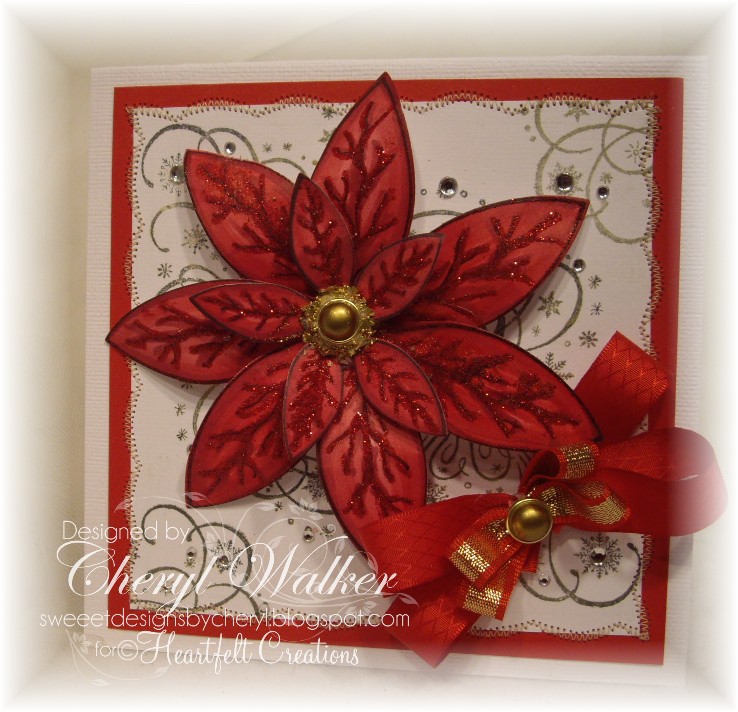
 Here is another card designed for todays Hop! I really wanted to use the Gold and red Ribbon so I put together this Beautiful Poinsettia Card to share!
Supplies Used:
Ribbons RRR -Red/Gold, and red from the Monthly Ribbon Club assortment!
Gems
Stamps used are Heartfelt Creations(HCPC3345 Snowflake Medley Swirl,and HCPC3316 Poinsettia Petals)
Red Glitter,gem,Gala Glitz
sewing

Here is the complete Lineup for todays Hop
Cheryl(Me)

Thank you for joining us for todays hop & have a nice day!
Hugs,
Cheryl

Bookmark

Hello everyone and Happy Tuesday! Today Im sharing my Ribbon Bookmark with you! I love making these, they are super fun to make and are perfect to give as gifts!!


for the main part of the bookmark I used 1.5" ribbon called Circus Dots Grosgrain Dark Brown from Really Reasonable Ribbon. Bonnie carries a TON of Beautiful ribbons to choose from. Here is a link to all the Polka Dot ribbons!!


Next I used a thiner 3/8" Polka Dot brown ribbon called "LineDots Grosgrain dark brown ribbon" to make the small bow on the large 1" Pink Satin Bow!


There are sooo Many Beautiful Satin ribbons to choose from, I just love them all!!!! You can see all of the Satin ribbons HERE!!!

All ribbons used are from Really Reasonable Ribbon

Next I used the Spellbinder frames from Michelles Scrapbook & More to make the 2 square frames,stamped my verse and airbrushed. Next I added the bows along with the darling pink Large Fabric brads! for the centers!

Stamp used is from Heartfelt Creations and is HCPC 3311 Hope In The Lord Pre-cut!
Challenges:
Secret Crafter Saturday Challenge/Distressing
Ellephantastic/Anything Goes
Totally Paper Crafts/Buttons and Bows
If the Shoe Fits/Distress
Papertake Weekly/3 of a kind(3 ribbons!)
Pile it on(things in 3's)Ribbons, I used 3

Thank you for looking and have a lovely day!'
Hugs,
Cheryl

Monday, October 11, 2010

LPSC89 Live your Dreams

Todays card was designed for Little Paper Shops Color Challenge!
And several other challenges as well! All listed below.
To Join us for Little Paper Shops LPSC89 visit us HERE
All other challenges :
Crafty Pad/Make something for a friend!
Gingerloft/Bling
Sweet Stampin/Bling
Stamp Something/Dies
Totally PaperCrafts/Buttons and Bows
Creative Cottage/Bling
Paper Playtime/Ribbonss &Bows
Wild Orchid/Stitching
Fresh Brewed/girly
My Sheri/in stitches

 Supplies Used:
Stamps-Little Paper Shop"A Dream"
Dp- K&Company/Cardstock AC
Ribbon-Really Reasonable Ribbon
Spellbinders Frames-Michelles Scrapbooking and More
swirls,button and sewing!

For my card I stamped the image on the spellbinder frame, then popped it off the larger frame, then off my card. All panels have sewing, except the spellbinder main image. I added some flourishes,button, and a bow to complete my card!

Thank you for looking and have a lovely day!
Hugs,
Cheryl


Sunday, October 10, 2010

Mr.Boots in the Tree

Boots Christmas Tree! This darling stamp was named after My Cat Boots and can be found at Alota Rubber Stamps HERE! :) thank you Helene, I think that is sooo SWEEET!!! And so does Boots!!! :) hehehehe

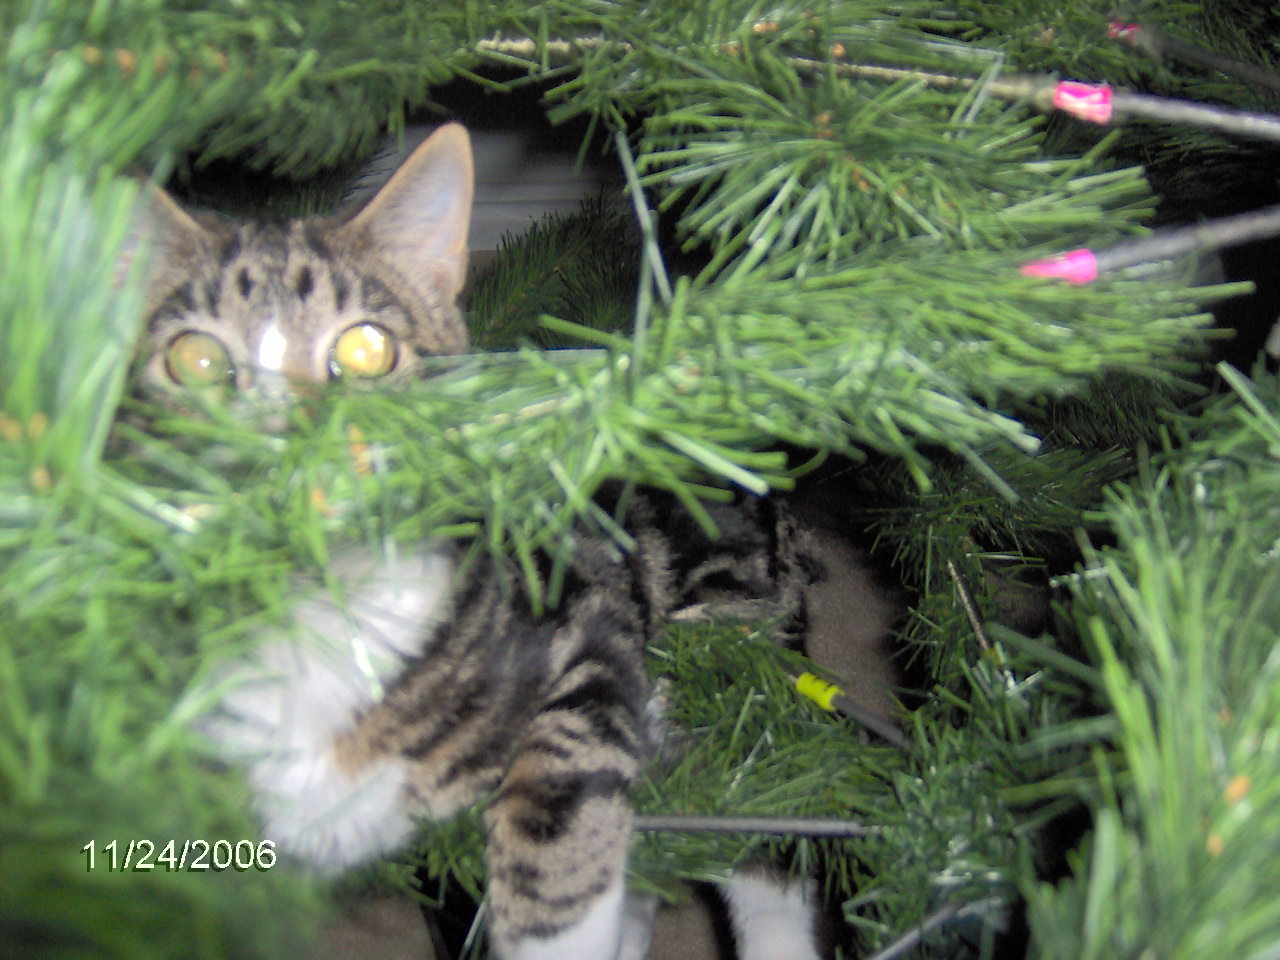
Below I've added some Christmas Tree pictures from 2006 with boots in the tree!!!

Here is Mr.Boots when he was a baby, he LOVED being in our Christmas Tree, so we Cound Not Decorate it, since he would have broke all my glass ornaments climbing this tree!!!LOL


Here is another Picture of our tree!! This was in 2006
of course Boots was a baby then :)

This Darling Stamp is from Alota Rubber stamps, and I was sooo excited to see it named after Boots my kitty!!! reminds me of him when he was little :)
supplies Used:
Stamp-Boots Christmas Tree(Alota Rubber Stamps)
copics to color
ribbons from RRR
sewing,buttons and embossing


Thank you for looking and have a lovely day!
Hugs,
Cheryl

Saturday, October 9, 2010

Toy Story LO

Hello everyone todays post is a Scrapbook Page I created using the Toy Story Cartridge from Scrapbookpal.com! Its been a LONG time since ive done 12 x 12 pages, and it feels good to be doing them again!

I didnt add any pictures to my page, but the circle and the other mat can be used for pictures. I left the title blank too.


Supplies Used:
Cricut Expressions Machine
12 x 12 mat
Toy Story Cartridge
ATG700 tape gun
sticklescrystal
copicsRV11
Pearls,ribbon and sewing
Instructions:


For BoPeep
White cardstock cut at 5"(this is your base for bopeep)
Pink Cardstock cut at 5" (this is top of dress)
skin color cardstock< cut at 5" (for face and arm)
Pink cardstock Layer 1 OFF-cut at 5"( for dress dots and part of hat)
Layer 2 ONwhite cut at 5" (for dress layers)
Layer 2 ONBlue cut at 5"(for her legs)
Layer 3 ONyellow cut 5"(for hair)
Black 5"
Put together layer the white part of dress with foam squares, bottom of the white dress just glued on. once little bopeep is put together then add her to the black shadow with foam squares. I lastly added stickles to her dress and cap, and then pearls
For Sheep

Pink cut @ 2 1/2 "
Black cut at 2 1/2 "
Pink for Face and Leges cut at 2 1/2"
white for body
Put together I added foam squares between the black and pink body, and then foam squares to the pink face. I then airbrushed using the RV11 copic and added pearls around the body
Page Layers:

12 x 12 black
11 1/2 x 11 1/2 white
11 x 11 pink design paper
5 x 11 polka dot dp for middle panel & I then added lace to both sides of the panel
Glue layers together and then added sewing
Next is Photo Mat:

5 1/2 x 4 3/4 black (for photo mat)
5 1/4 x 4 1/2 Pink layer
5 x 4 1/4 white( I added airbrushing in pink RV11 copic then added sewing
Circle Frame:
Is from Spellbinders Scallope circle and circle added airbrushing and sewing
Title Frame:
5 3/4 x 1 3/4 black
5 1/2 x 1 1/2 white-added airbrusing rv11 copic and then sewing
Lastly I aded some ribbons for my bows, and flowers to complete my page!


Thank you for looking and have a lovely weekend!
Hugs,
Cheryl

Thursday, October 7, 2010

I Believe in you(Video on Funky Fold)

"I Believe in you" Funky fold card was designed for Heartfelt Creations and updated Video on the Funky Fold and Inside is below!
I love making the funky fold cards and Im LOVING Heartfelt Creations Flowers and leaves with matching diecuts! These are sooo much fun and soooo easy to use! Emma Lou has some wonderful videos that you can view on the Heartfelt Creations Blog HERE!
Supplies:

6 x 12 for easel card(see video for details) Ive encluded links to each product used from HC
HCPC 3318 Daisy Patch Flowers (used Largest and 3 smallest from here)
HCPC 3314 Elegant Single Leaves ( stamped 13 leaves in 3 different sizes)
HCPC 3323 Large Elegant Word Background for dp (design paper)
HCPC 3304 Posy Patch Swirls(for sentiment and swirls on frame)
HCD 703 Daisy Patch diecuts
HCD 704 Perfect Petals Diecuts
Scallop Circle Large 415222
Standard Circle Large 354806
1.) I stamped flowers from HCPC 3318, 2 large flowers, 5 medium,2 small, 3 smallest in a blue ink, then colored with 2 different shades of copics (then cut with matching dies) then put together and added beads for centers. Set aside


2.) Stamped leaves HCPC 3314 in Olive and colored with copics(then cut with matching dies) I stamped 13 leaves in different sizes. Put leave clusters together and set aside.

3.) Cut pieces for layering on card and then stamped large background in blue again on faint blue design paper, and layer with blue cardstock, then added sewing.

4.) For circle I laid the flowers and leaves where I thought they would look best, and then moved to stamp sentiment from HCPC 3304. I added swirls as well, and then airbrushed now attach white circle to blue scallop circle. Lastly I glued flowers on and added leave clusters in place and set this piece aside for later.

5.) Now I put my card together and added my flower frame to middle of card. Then I added flourishes in pearls, and my bows with butterfly to complete my card!
Measurements for the panels on the card:

Challenges:
Freshly Brewed/Anything Girly
Paper Sundaes/Something from your stash(the beads)
No Time to Stamp/something in 3's
Raise the Bar/Flowers,2 ribbon,lots of leaves

Here is Funky Fold Re-make Video #1
My 1st video is here on the funky fold and I had converted the measurements for the fold from another site to inches :) I did all the measurements for the layers and inside myself! You can watch that video below this one!!
to show you how to do the funky fold for cardbase only
Funky Fold Video #2
To show you all the measurements for the outside layers and inside Layers


Measurements:
6x12 for easel card
Middle Panel- 4 3/4 x 3 1/4 (blue cardstock)
4 1/2x 3 (design paper)
2 Sides Panels-you will need 2 of each-
4 3/4 x 1"(Blue cardstock)
4 1/2 x 3/4"(design Paper)
Bottom Panel-
5 3/4" x 3/4"(cardstock)
5 1/2 x 1/2"(design paper)
Inside Panel
5 1/2 x 5 1/2 (Blue Cardstock)
5 x 5 (design Paper)
I hope both my video's are helpful, and sorry my post is sooo LATE today, but I had to make another 2 videos since I couldnt upload my last video :( I waited hours for it to upload and it never did !!
NOTE:if my Video #1 isnt working please view my 1st video HERE on the funky Fold :) Thank you!!!
Hugs to all,
Cheryl

Monday, October 4, 2010

Bathing Beauty

Another Bathing Beauty card! Ok so this week the ABC Toys and Crafts DT is focusing on Designs by Leere
On my card I used Bathing Beauty Girl,she is stamped in memento black ink, and colored her with copics and used stickles for glitz on the bubbles! I used the spellbinders frames to cut her out.


Thank you for looking and have a lovely day!!!
Hugs,
Cheryl

Tyson's Present!

Hello everyone sorry im sooo late with todays post!!! Todays card was designed for Little Paper Shops Sketch ChallengeLPSC88! Thank you Pam for this wonderful sketch hun!!!
On my card I used Tyson's Present from Little Paper Shop! I think he is sooo CUTE looking inside his present :)
Today Pam has challenged us to use her Wonderful Sketch! 1 random winner from this weeks challenge will win Katie Mushroom Digi!  
For more info Please visit Little Paper Shop Blog

Other Challenges that ive entered my card into:
Creative Inspiration/Christmas in September
Catch the Bug/Anything Goes
Marks Finest Papers/Buttons & Bows
Sweet STampin/Punches
Stamp Scrap Doodle/Anything Goes
No Time To Stamp/Something in 3's(my buttons)
STamp Something(celebrations)Christmas

Thank you for looking and have a lovely day!
Hugs,
Cheryl

Thursday, September 30, 2010

Last Day

Hello everyone today is the Last Day for the 20% off SALE at ABC Toys and Crafts!!!
USE COUPON CODE : ABC20CW at checkout and
 SAVE 20% off your entire order on
Spellbinders(New ones too)
Crafty Secrets(My favorite)
Hero Arts
Penny Black
stampavie
Scorpal
Slice & Cards
Sizzix
and Much Much More!


Dont forget your coupon code
ABC20CW at checkout

I will be back shortly with my Inky Impressions Post!!!
Hugs,
Cheryl

Wednesday, September 29, 2010

Heartfelt Creations New Releases

Winter Wonderland!!! Today I get to share with you my card I designed for Heartfelt Creations. this was my card for the Finalist round! And I made it! Im sooo excited to be designing for this Wonderful Company, and will be sharing TONS of projects with you!

This collection is an absolute must have. You will easily achieve cards that will create warm and fuzzy feelings for young and old alike. The Winter Wonderland Collection features 9 new PreCut Stamp Sets. These sets coordinate with the exclusive new Heartfelt Creations Holly-Ornament Die made by Spellbinders and 1 existing Snowflake Wonder Spellbinder Shapeabilities
To view all new products HERE!!!

To celebrate the new release Heartfelt Creations will be giving away the complete release valued at $159.00 to two lucky winners.
To see more details on how to enter to win Visit the Heartfelt Creations BLOG
Thank you for looking and have a lovely day!

To see some of the DT cards please visit the Heartfelt Creations Blog Here
Hugs,
Cheryl