Hello everyone, Today I wanted to share this beautiful shabby chic card I created for Really Reasonable Ribbon using the Taffeta Ribbon, Sweetheart flowers, and Pearls from the Really Reasonable Ribbon Store! I had so much fun creating this, and Love how it turned out. Hope you enjoy my post for today!
.
The Ribbon I used the blue topaz taffeta ribbon from Decembers kit., it can also be found here in the Really Reasonable Ribbon store.. I made 2 big bows from the Taffeta ribbon, and added pearls to the centers.
Window die is from Cheery Lynn Designs, and was cut with a cream card stock, and then I added some branches to the bottom, and different colored Sweetheart Blossoms
The design paper is from Bazzill
Thank you for looking and have a lovely day!!
hugs to all,
Cheryl
Wednesday, February 22, 2017
Friday, February 17, 2017
Happy Birthday
Today's card was designed for Cheery Lynn Design & The Project Bin, using the Beautiful dies and stamps they carry. I wanted my card to have a Spring feel, and this delivers just that :) It was also created for Really Reasonable Ribbons Challenge this week, to create a Birthday, wedding, baby, or some kind of occasion card. Mine is a Birthday!
On my card I used lots of darling dies from Cheery Lynn, and I am loving them all on this one!!! I also used The Project Bin sentiment stamp from the set called "Born Yesterday" this set is all about Birthdays!
Cheery Lynn Dies Used:
B527 Bunnies( brown polka dot) I also added a bow, flower, and viva pearl pen to this cutie
B682 Quadrafoil Tag , cut using the Pink hearts design paper.
LPC4 Circle Pierce set cut out brown card stock, and tree dp from Pebbles
DL280 Royal Scandinavian Doily, cut out in white card stock and layered on card front
B180 Princess Tree , cut out in green card stock, and matching design paper, and layered. I also added some flowers , and branches to this one.
B216 Wreath Strip used as branches under the tree for a filler
I absolutely LOVE the way this card turned out. I love all the layers , and colors, its perfect for a spring birthday!
The tree was super fun to work with, and I will have to do another of this one soon! I love the wreath strip pieces behind it, as it gives some dimension and fills in. I added the little hearts in the dp, thought it would be cute. I lastly added some flower embellishments to this!
My Big Bow was created using Really Reasonable Ribbons February Ribbon monthly kit. I also used some RRR for the bunny bow. LOVE how cute this bunny is! All embellishments are also from RRR
Sewing was done using a very light pink thread and my sewing machine.
I hope you enjoyed my post for today! Please leave a comment letting me know what you think, I truly enjoy reading them!
Hugs to all,
Cheryl
Monday, February 13, 2017
Really Reasonable Ribbons February Hop
Welcome to "Really Reasonable Ribbon's" February Blog Hop!
If you arrived here from Judy's Blog you are on the right track. If not , you will want to head back to the Really Reasonable Ribbon Blog that way you don't miss out on any of the FABULOUS Designs from the Design Team today! There is going to be lots of Beautiful projects to see today, Enjoy!!!
I LOVE all the ribbons in this months assortment! they are Gorgeous!!! I used one of ribbons out of this months assortment, and then a lace from RRR. I also used lots of Really Reasonable Ribbon Embellishments as well.
I have been addicted to making these Tri Shutter Fold this past week, so decided to make one for todays blog hop. I do have a Video Tutorial on this fold and you can view that here. I love this months ribbon assortment and colors, and chose to use the beautiful green polka dots on this card. I also used RRR Embellishments on my flowers , and for the leaves. LOVE these leaves, they are so sweet and perfect for adding layers.
I hope you all are enjoying today's hop, and hope you enjoyed my post as well! :)
Your NEXT stop for today's hop is Bonnie's Wonderful Blog!!!Hugs to all,
Cheryl
Sunday, February 12, 2017
Thanks Gift Bag
Hello everyone , and Happy Sunday to all!
Today I wanted to share a super fun and easy Gift Bag I made for Really Reasonable Ribbon using ribbon, Lace, flowers, & Embellishments all from RRR.
I love when you can make a last minute project and it comes together quickly, and its super fun to make. This is one of those projects that took me no time at all to create. I added my Lace 1st using RRR lace and Hot glue gun. Next I used a Cheery Lynn doily as my layer with a circle design paper piece. Both are popped up using RRR Foam tabs.
My bow was created using this months Ribbon Club Assortment, the swirl pink satin, and I added a big Half Backed pearl to the center. The flowers and embellishments were all glued on using hot glue gun, This sweet gift bag was so fun to create, and perfect to give to someone with either treats, gift card, or some fun crafting goodies.
Really Reasonable Ribbon Supplies Used:
February Pink & Green Mix club assortment
Theresa white crocheted lace
Cherry Blossoms
Sweetheart Blossoms
Embellishments
Other supplies:
AC gift bag
Cheery Lynn dies
tag piece
Rub on alphabets
Martha Stewart branch punch
Today I wanted to share a super fun and easy Gift Bag I made for Really Reasonable Ribbon using ribbon, Lace, flowers, & Embellishments all from RRR.
I love when you can make a last minute project and it comes together quickly, and its super fun to make. This is one of those projects that took me no time at all to create. I added my Lace 1st using RRR lace and Hot glue gun. Next I used a Cheery Lynn doily as my layer with a circle design paper piece. Both are popped up using RRR Foam tabs.
My bow was created using this months Ribbon Club Assortment, the swirl pink satin, and I added a big Half Backed pearl to the center. The flowers and embellishments were all glued on using hot glue gun, This sweet gift bag was so fun to create, and perfect to give to someone with either treats, gift card, or some fun crafting goodies.
Really Reasonable Ribbon Supplies Used:
February Pink & Green Mix club assortment
Theresa white crocheted lace
Cherry Blossoms
Sweetheart Blossoms
Embellishments
Other supplies:
AC gift bag
Cheery Lynn dies
tag piece
Rub on alphabets
Martha Stewart branch punch
Thank you for looking and have a lovely day!
hugs to all,
Cheryl
Friday, February 10, 2017
All 9 Lives/Tri Shutter Fold
Hello everyone, and Happy Friday to all!! Today I have another fun Tri Shutter fold (Video Here)card that I designed for The Project Bin using the DARLING new release called "Feline Good" , I LOVE this darling stamp & die set, its so sweet!
I absolutely LOVE making this fold, its super fun and super easy to create. On this card here I chose to use American crafts design paper, The Project Bin stamps & coordinating dies, Cheery Lynn dies, and Really Reasonable Ribbon ,embellishments, and flowers.
My kitty was stamped on the coordinating design paper, and then cut out using the matching die. I stamped my sentiment on the design paper using club scraps black ink.
Flowers are from Really Reasonable Ribbon and the branches are from Martha Stewarts punch. The little gems I used to embellish are from a green gem pack.
Challenges:
As you like it challenge/Ribbon or Lace? I choose ribbons, as it makes for easy bows!
Creative Knockouts/Flower Power
Simon Says challenge/Cute
Scrappy Land challenge/Anything goes
I hope you enjoyed my card for today!!! Thank you so much for looking and have a super awesome weekend!
VIDEO tutorial can be found here!
Hugs to all,
Cheryl
I absolutely LOVE making this fold, its super fun and super easy to create. On this card here I chose to use American crafts design paper, The Project Bin stamps & coordinating dies, Cheery Lynn dies, and Really Reasonable Ribbon ,embellishments, and flowers.
My kitty was stamped on the coordinating design paper, and then cut out using the matching die. I stamped my sentiment on the design paper using club scraps black ink.
Flowers are from Really Reasonable Ribbon and the branches are from Martha Stewarts punch. The little gems I used to embellish are from a green gem pack.
Challenges:
As you like it challenge/Ribbon or Lace? I choose ribbons, as it makes for easy bows!
Creative Knockouts/Flower Power
Simon Says challenge/Cute
Scrappy Land challenge/Anything goes
I hope you enjoyed my card for today!!! Thank you so much for looking and have a super awesome weekend!
VIDEO tutorial can be found here!
Hugs to all,
Cheryl
Thursday, February 9, 2017
Club Scrap Fancy Fold Challenge & Video Tutorial
Todays card & Scrapbook layout were created for Club Scraps Technique Challenge "Fancy Folds"for cards and layouts, that I'm hosting right now on the Club Scrap Blog. I do have 2 video tutorials that you can view. 1 is on the Tri-Shutter Fold card, and can be found here on yesterdays post. The other is at the bottom of this post.
I absolutely LOVE LOVE LOVE this months club kit, its called Succulents and its absolutely Gorgeous! I used the design paper, and stamps on my card. All dies used are from Cheery Lynn Designs. Ribbon and pearls are Really Reasonable Ribbon.
OMGOSH this design paper on my layout is absolutely Gorgeous, and I did not wan to cover it up. I LOVE it! In my video you will see how I created the folds for photo's on this. Flowers were designed using Cheery Lynn Sweet William Strip die . The card stock on my layout, is a deep wine, and I love it too. I also used the cut a-parts for this as well.
If you would like to do a different fold like the waterfall, please visit Kay's post here on Club Scrap for that fun fold!
Succulents Deluxe Kit for the design papers, Card stock, Cut a-parts.
Video on layout below.
Thank you for stopping by, hope you have a lovely day!!
Hugs to all,
Cheryl
Wednesday, February 8, 2017
Tri Fold Shutter Card & Video Tutorial
Hello everyone, and Happy Wednesday to all!
I'm Super excited to share my Tri - Fold shutter card and Video tutorial made for Cheery Lynn Designs & Club Scrap! It seems like forever since I've done a tutorial, and this one I kept simple, as I didn't have time to add photo's and all that to it. However I do Love this fold!! Hope you do too!!
Card measures 4" x 6" and I used the Score-pal & Cutter for this one.
All design paper & Succulents Jumbo Un-mounted Stamps are from Club Scraps Succulents kit. All dies are from Cheery Lynn, and I will list them below :)
Cheery Lynn Dies used:
XL19 Pierced STacker #1
LPC4 Circle Pierce and Cut Tool LG Silver Pierce Tool(for circle)
B216 wreath Strip
B307 Sweet Williams Strip DL113AB Small Exotic Butterflies #2
Really Reasonable Ribbon satin , and pearls for the flowers.
My Sweet William Strip flowers were cut using the coordinating design paper, and spritzed with pearl mist, then shaped and dried. I added pearl to the centers.
Exotic Butterfly- was cut using coordinating Succulents dp, then misted and I added some embellishments to it. The back was cut using a brown shimmer card stock.
Wreath Strip- was cut using the green design paper in this kit, and I LOVE how they look with the flowers
Succulents Stamp sentiment was stamped in Club Scrap black ink.
Hugs to all,
Cheryl
I'm Super excited to share my Tri - Fold shutter card and Video tutorial made for Cheery Lynn Designs & Club Scrap! It seems like forever since I've done a tutorial, and this one I kept simple, as I didn't have time to add photo's and all that to it. However I do Love this fold!! Hope you do too!!
Card measures 4" x 6" and I used the Score-pal & Cutter for this one.
All design paper & Succulents Jumbo Un-mounted Stamps are from Club Scraps Succulents kit. All dies are from Cheery Lynn, and I will list them below :)
Cheery Lynn Dies used:
XL19 Pierced STacker #1
LPC4 Circle Pierce and Cut Tool LG Silver Pierce Tool(for circle)
B216 wreath Strip
B307 Sweet Williams Strip DL113AB Small Exotic Butterflies #2
Really Reasonable Ribbon satin , and pearls for the flowers.
My Sweet William Strip flowers were cut using the coordinating design paper, and spritzed with pearl mist, then shaped and dried. I added pearl to the centers.
Exotic Butterfly- was cut using coordinating Succulents dp, then misted and I added some embellishments to it. The back was cut using a brown shimmer card stock.
Wreath Strip- was cut using the green design paper in this kit, and I LOVE how they look with the flowers
Succulents Stamp sentiment was stamped in Club Scrap black ink.
I hope you enjoy my little video tutorial below :)
Thank you for looking and have a lovely day!
Cheryl
Saturday, February 4, 2017
Friends
Hello everyone, Today I have a sweet card I created for Really Reasonable Ribbon using their BEAUTIFUL Satin Ribbon & Gorgeous Embellishments. I LOVE the way this card turned out , as everything worked so well together.
On my card here, I chose to use this beautiful Winter Birds tag designed by Ginny, I absolutely love the darling bird, its beautiful and perfect for layering!!! You can find it here in her Etsy Shop. I cut it out and distressed it. Then I added some flowers that I created using CheeryLynn dies & My glass flower technique that can be found here. I did cut some branches using a branch punch, and added in Really Reasonable Ribbons Antique bronze leaf charms, love how these look on here.
For my big Bow, I chose to use Really Reasonable Ribbons Satin, and I love all the different types of satin you can choose from at RRR. I used a gold and a wine, they match perfect for my card today.
For embellishments I chose to use the flat backed pearls, love using them on my bows, and layers of my cards. I also will use them in the center of flowers, but on these flowers I chose some vintage beads.. for my tag and friends tag, I used the foam tabs to give a 3-D look.
I hope you enjoyed my post for today! Thank you for stopping by, and have a super awesome day!
Hugs,
Cheryl
Friday, February 3, 2017
Hearts, Hearts, & More Hearts
Hello everyone, and Happy Friday to all!!
Today is Really Reasonable Ribbons Heart Challenge. The challenge is to use hearts, and that I did for this card here. I chose to use The Project Bins super darling In My Heart Stamp Set & Coordinating dies. and Really Reasonable Ribbon embellishments, flowers, and ribbon. LOVE how soft and pretty this card is. Details below.
So I started the 1st layer 5 x 5 white card stock, and used Martha Stewarts punch around the page, Next I layered 2 layers of design paper over that. Both have HEARTS for our challenge. :)
Next is another layer with the white card stock, then pink design paper, and lastly the Project Bins Heart die, and stamp.
Embellished with Really Reasonable Ribbons Heart embellies, sweetheart blossoms, and Delicate Stitched ribbon. To add dimension I used RRR foam tabs.
Need a simple and fast card?this one is it! No sewing, no handmade flowers, just simple cuts, and layering and stamping! LOVE how fast it went together.
Thank you for stopping by! Hope you have a super AWESOME weekend!!
Hugs to all,
Cheryl
Today is Really Reasonable Ribbons Heart Challenge. The challenge is to use hearts, and that I did for this card here. I chose to use The Project Bins super darling In My Heart Stamp Set & Coordinating dies. and Really Reasonable Ribbon embellishments, flowers, and ribbon. LOVE how soft and pretty this card is. Details below.
So I started the 1st layer 5 x 5 white card stock, and used Martha Stewarts punch around the page, Next I layered 2 layers of design paper over that. Both have HEARTS for our challenge. :)
Next is another layer with the white card stock, then pink design paper, and lastly the Project Bins Heart die, and stamp.
Embellished with Really Reasonable Ribbons Heart embellies, sweetheart blossoms, and Delicate Stitched ribbon. To add dimension I used RRR foam tabs.
Need a simple and fast card?this one is it! No sewing, no handmade flowers, just simple cuts, and layering and stamping! LOVE how fast it went together.
Thank you for stopping by! Hope you have a super AWESOME weekend!!
Hugs to all,
Cheryl
Tuesday, January 31, 2017
Club Scrap January Artist Team Challenge
Hello everyone, and welcome to Club Scraps January Artist Team Challenge! This month the January Challenge was to use the Faux Batik technique for one of our projects, as this months Color Me Happy Club Kit was inspired by this.. So I chose the technique using stamps and ink :)
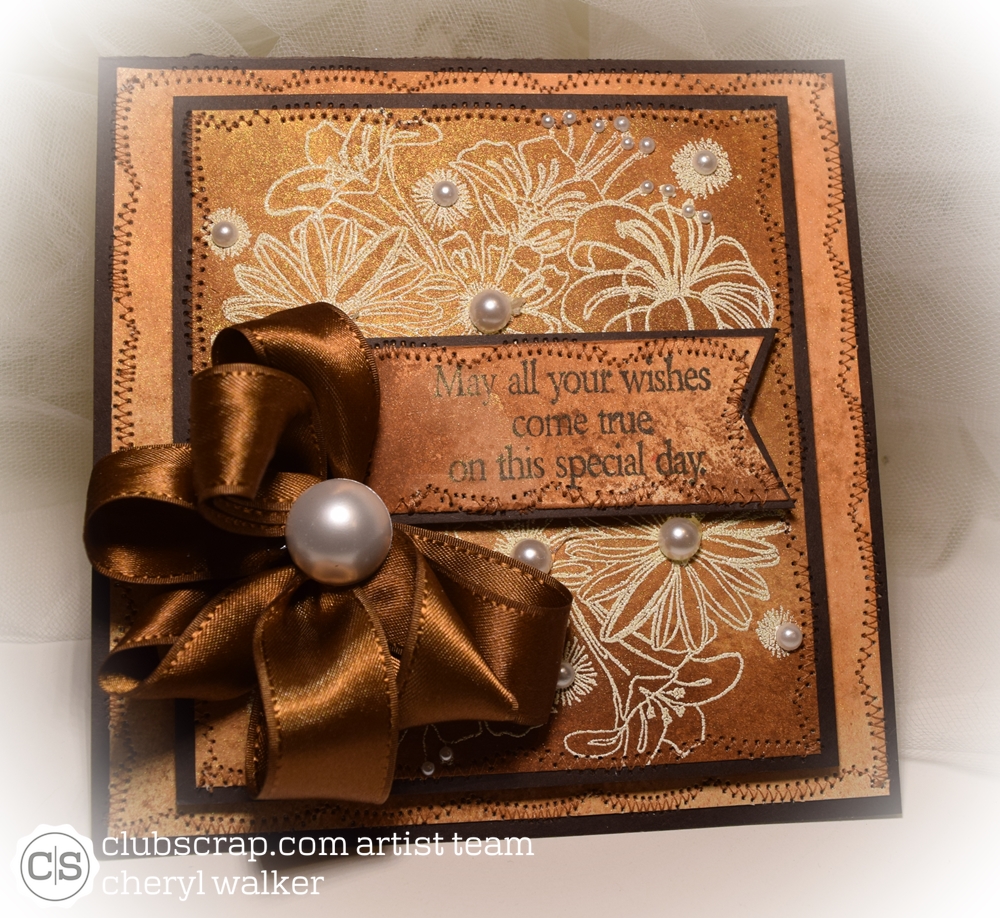
1st card here I chose the white card stock from Januarys Color Me Happy Club Kit. I stamped my Floral stamp from the Club Scrap Girlfriends set, in the Glue Pad and then added vintage ice embossing powder, and heated. Next I sprayed Gold, Walnut Gold, Walnut ink Antiquing Solution,and tiger lily on the backing, using the Batik technique.
The sentiment is from Oct 2016 Club Scraps Literature Greetings, it is stamped in club scrap black ink.
The back layer on this card was done with just sprays, no stamps. I did add some pearls to give dimension to my card. Also added some ribbon and a pearl/ all brown card stock on this card is also from the Color Me happy Deluxe Club Kit!
2nd Card -sweet fairy , I chose fun colors to use the Batik technique and the darling Club Scrap Enchanted Forest Set. I LOVE how this one turned out. it was my 1st card made for today.
I used Memento Pear Tart, Memento Angel Pink, Brilliance Orchid, Brilliance Purple, Brilliance Lavender all to create the Batik Technique. LOVE the results of this one.
Background design paper was created using Shades of Winter design paper, and using a distressing on it, no stamping.
On this card here I chose the brown shimmer text weight card stock from the Literature Deluxe Club kit. I LOVE this brown card stock, its absolutely gorgeous in person. The ribbon is from January Color Me Happy Deluxe Kit. I added some sewing, and a cabochon to the card. The Thank you is a tag I had on hand.
Thank you so much for joining us and stopping by!!!
Your NEXT stop is Debbie's Blog!
Hope you enjoyed todays hop!
Hugs to all,
Cheryl
Subscribe to:
Posts (Atom)