Showing posts with label Club Scrap. Show all posts

Saturday, July 13, 2019

Really Reasonable Ribbon July Blog Hop

Welcome to "Really Reasonable Ribbon's"July” Blog Hop
if you arrived here from Ginny's Blog you are on the right track. If not , you will want to head back to the Really Reasonable Ribbon Blog that way you don't miss out on any of the FABULOUS Designs from the Design Team today! There is going to be lots of Beautiful projects to see today using the July Ribbon Assortment, so I hope you Enjoy!!!
For my card today I used some sweet design papers left over from a club scrap box , and then used the cheery Lynn sunflower die, and I ended up doing the glass embossing technique on it.I do have tutorials under my tutorial tab at the top of my blog. On this one, I airbrushed and spritzed the flowers to get this look, then did the technique on it.

 For my bows I used the beautiful Really Reasonable Ribbons that come in this months kit. I also used a heart embellishment as well.

The dots were done with white gel pen, and I added a tag that I just distressed with ink. My card was put together using scotch advanced tape, and some scor tape as well.

Thank you so much for stopping by, and hope you enjoyed my card for today! 

Your NEXT stop for today's hop is Karens wonderful blog!!!
Hugs to all,
Cheryl

Wednesday, June 13, 2018

Really Reasonable Ribbon June Hop


Welcome to "Really Reasonable Ribbon's" June Blog Hop!

If you arrived here from Ginny's Blog you are on the right track. If not , you will want to head back to the Really Reasonable Ribbon Blog that way you don't miss out on any of the FABULOUS Designs from the Design Team today! There is going to be lots of Beautiful projects to see today using the Purple  & Pink Mix Ribbon Assortment, so I hope you Enjoy!!!

Every month RRR comes out with the Perfect Ribbon Assortments, I just LOVE each month, and all the beautiful ribbons! This months card is using the beautiful Pink sherbert Checkered Satin, and vintage floral print Satin, along with flowers ,leaves, and adhesives.


On my card for today I chose the 2 ribbons from this months assortment, as I love them both. I thought they went perfectly with the design paper I chose. Next I used Carnations, in the pink, Mini Sweetheart Blossoms in pink, Sweetheart Blossoms in purple, and then the big purple flower is the English Roses Mixed Purple and Lilac.

Really Reasonable Ribbon Supplies Used:
Sweetheart Blossoms Mini and regular size

Sentiment is from The Project Bin Stamps and is stamped in black ink from Club Scrap, and design paper is DCWV Cherry Limeade collection. I added sewing in a eggplant color thread.


Thank you for stopping by 
hope you all are enjoying today's hop, and hope you enjoyed my post as well! :)
Your NEXT stop for today's hop is Bonnie's Wonderful Blog!!!
Hugs to all,

Cheryl

Saturday, December 9, 2017

Merry Christmoose


Hello everyone and Happy Saturday to you all! Today I have a simple Christmas card designed for Cheery Lynn Designs  & Club scrap called Merry Christmoose..hehehe isn't the moose just too cute!!?? This card took less than 25 minutes to create, as its just the one layer, and then die cuts, so super easy to create!

The Moose and wording were all cut out in white card stock then colored with copics. I glued them together using the Best Glue Ever that Cheery Lynn carries. Next I cut my Quadrafoil Square Doily out in red card stock, and then used the LPC4 Circle Pierce and Cut tool die for the white, and distressed it using ink.

I glued ribbon on to the 1 layer, and then added my die cuts using foam tabs by Really Reasonable Ribbon. The Ribbon and embellishment are also from there.
Card stock and design paper are both from Club Scraps Scandinavian Holiday, except the red, its from Bazzill
Card measures 6" x 6"

Cheery Lynn Designs Supplies Used:
B923 Merry Christmoose 6 piece die set
LPC4 Circle Pierce and Cut
Quadrafoil Square Doily
Best Glue Ever
Big Sister die cutting machine


I love when you can create super cute and easy cards, and this one turned out pretty cute I say. The design paper I used is Club scraps Scandinavian Christmas.

Thank you for looking and have a lovely day!
Hugs to all ,
Cheryl

Wednesday, November 29, 2017

Club Scrap Trattoria Blog Hop


  Hello everyone and welcome to Club Scraps November blog hop featuring the New Beautiful Trattoria Deluxe kit !  If you arrived from Jennifer's Blog then you are in the right place , if not you will want to start from the beginning at Karen(Club Scrap blog)so you don't miss any of the wonderful inspiration from the Club Scrap Artist Team! There is also a list of the entire line up there for you with links :) Have fun & I hope you enjoy todays Hop!

On my layout I started with the Brown Card stock from the Deluxe Trattoria Kit, then used the Deluxe Ivory Herb 12 x 12 design paper, and added my sewing. Now for the photo Mat's I chose the Deluxe green print 8 1/2" x 11" and the brown photo mat's that are pre-cut for you. I also added sewing in green to these.

Flowers were done using Cheery lynns Sweet Williams Strip and the Red card stock from the kit. I did distress each flower using Club Scraps Hybrid Ruby ink for the petals, and then added some Pearls from Really Reasonable Ribbon to each. The greenery behind the flowers are cut with Cheery Lynn's Flourish #8 and Club Scraps Green card stock. Flowers were put together using Cheery Lynn's Best Glue Ever

For the little Olive You tag -
I cut it using Cheery Lynns Dutch Daisy Tag and brown card stock. Next I used the same cream card stock that I cut the French Pastry Mega Doily with for my tag. I did stamp the Olive You sentiment from the Trattoria Greetings Unmounted stamp set. It was stamped in Club scraps Black ink

Corner brackets were cut using Cheery Lynn's B883 Dusty Miller Frames

Ribbons, pearls, foam tabs all from Really Reasonable Ribbon

I do hope you are enjoying our hop today!

Your next stop is Deb's Blog Have fun!!! Thank you for joining us today!!
Hugs to all,
Cheryl

Friday, November 24, 2017

Club Scrap November Artist Team Challenge


Hello everyone, and welcome to Club Scraps November Artist Team Challenge! This month the September challenge is to incorporate 3different Club Scrap kits into your projects by using products from each.  I ended up using Trattoria , Scandinavian Holiday, and Christmas Thyme kits for my layout today.

You should have arrived from Debbie's blog, however if you did not , you might want to start from the beginning at Karen's Club Scrap Blog , that way you won't miss any of the Design Teams Beautiful creations today.

 for my layout i chose to use the design paper from the Christmas Thyme collection, its absolutely darling! I love this design. I then used the photo mats from the different collections, and added a few of the family photos i had left from 2014 Christmas. The Poinsettia's are from Cheery Lynn dies, and i added some glitter glue to the centers. The ribbons i used are from Trattoria Collection, along with the little bows that are on top of the tree, and the house. I love the way the layout turned out, and it will be cherished for years.

 Club Scrap Supplies Used:
Trattoria Club Kit- Red and Green Ribbons, Bows, Photo Matts green, 12 x 12 green- Scandinavian Holiday Club Kit- Stamps, Scalloped tag , Cut aparts for "The Magic of Christmas"- Christmas Thyme Club Kit- 12 x 12 printed design paper, 12 x 12 wine card stock , Charm 
Sunflower Kit- Diamond stickers 

hope you enjoyed my post for today, as I truly enjoyed creating my layout for today using the the beautiful kits from Club Scrap! Please let me know what you think as I always enjoy reading your wonderful comments!
Thank you so much for joining us and stopping by!!!
Your NEXT stop is Jennifer's Blog
Hugs to all,
Cheryl

Tuesday, November 14, 2017

Merry Christmas with Club Scrap & RRR

Hello Crafty Friends and Tuesday to you all!
Today's card was created for Club Scrap & Really Reasonable Ribbon. Love this new Scandinavian Holiday Collection and the Country Holiday Ribbon, both look beautiful together!


Stamps and design paper are all from the Scandinavian Holiday set from Club scrap. I did stamp the deer, Merry Christmas and snowflakes from the stamp set. Next the design paper was cut from the 12 x 12 sheet of design paper. Back blue card stock was stamped using a blue ink and snowflake stamp. I added some embellishments and beautiful Really Reasonable Ribbon in a Delicate Stitch blue ribbon.
Club Scrap Supplies used:
Design Paper From The Scandinavian Holiday Collection
Red Card stock
Scandinavian Holiday Jumbo unmounted rubber stamps
Really Reasonable Ribbon Supplies:
Delicate Stitched Ribbon
Covered Buttons
Rhinestones
Foam Tabs
Foam Tabs thin
Scor-Tape


Thank you so much for looking and have a lovely day!
Hugs to all,
Cheryl

Wednesday, October 25, 2017

Club Scrap Scandinavia Hop

 Hello everyone and welcome to Club Scraps October blog hop featuring the New Beautiful Scandinavia Deluxe kit !  If you arrived from Josette's Blog then you are in the right place , if not you will want to start from the beginning at Karen(Club Scrap blog)so you don't miss any of the wonderful inspiration from the Club Scrap Artist Team! There is also a list of the entire line up there for you with links :) Have fun & I hope you enjoy todays Hop!


On my layout for today i used the blue print 12 x12 for my background layer, next I layered it with the red 12 x 12 card stock, and added sewing. For layering on it i used the cut a-part for a banner across the bottom, and then cut out a large Cheery Lynn Doily using white card stock. 

Photo mat's were done using the  8 1/2" x 11" design paper sheet and cut it down to fit the pre-cut Red photo mat's, i also added sewing to these.

Flowers and vines were cut using cheery lynn dies, and the green and red card stock from the Deluxe kit. I did distress the edges of the flowers using red ink, and added some white gel dots, along with pearls to the centers of each flower.

I love this months collection, and the colors in it are perfect! love all the beautiful designs too!
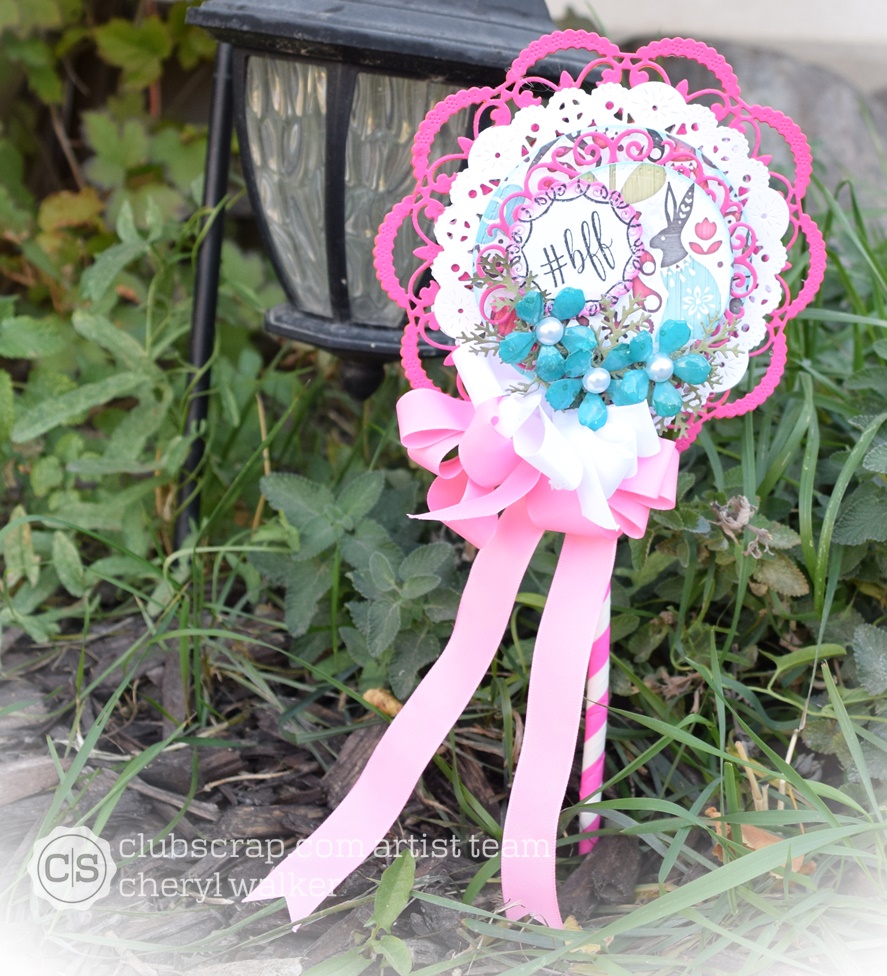
EXTRA SHARE- My Lollipop Card was already posted to my blog on Friday, but i wanted to share it today as well as it uses some of the new Scandinavia collection along with the pink from the Club Scrap Paradise collection, love how it works perfectly with this months kit. I did use lots of dies, and the Glass Flower technique on the Lollipop card! For all details on this please visit Here.
 
 I do hope you are enjoying our hop today!

Your next stop is Deb's Blog Have fun!!! Thank you for joining us today!!
Hugs to all,
Cheryl


Wednesday, October 18, 2017

BE YOU


Hello Crafty friends and Happy Wednesday to you all!
Today I have a sweet card I made for Club Scrap using the beautiful new October Deluxe Scandinavia Club Kit. I'm LOVING all the stamps in this set, and on my card for today I used Scandinavia Art Nouveau & Jumbo Unmounted set to stamp with.

To start with I layered my card using the 12" x 12" grey sheet of card stock, love this one, as it has a little weave embossing on it , its layered with the 12 x 12 pink card stock from the kit as well. Then I chose the DARLING 12" x 12" print and layered it with just the pink. For my main stamped panel I used the Mini Misti tool and that way I could place my stamps as I went, and keep stamping using different color pens.

Flowers were done using the 12" x 12" printed sheet and Cheery Lynn's Shasta Daisy die. I then distressed the edges using SU! cool Caribbean ink pad. For the centers of my flowers I used Really Reasonable Ribbons embellishments. 
Lastly I punched out some branches using the Martha Stewart punch.
I had a lot of fun stamping these darling stamps up, and using the Mini Misti tool to do it. Love how it keeps everything in place, so you can stamp multiple times. Also LOVING Club Scraps sweet design paper with the darling animals on it. I had to place the top panel over to the side, so you could see the sweet owl on this paper. Cant wait to share some of my other projects with you all using this darling release.
Hope you enjoyed my card for today, and thank you so much for stopping by!
Hugs to all,
Cheryl

Saturday, September 30, 2017

You're a peach.

Hello Crafty Friends, and Happy Saturday to you all!
Today's SWEET card was designed for Club Scrap using the BEAUTIFUL Orchard Collection, and can I just say I'm in LOVE! This Club Kit is perfect not only for card making but also for those Layouts, and mini albums too! I love all the fruit in this kit, and all the beautiful stamp sets that go along with it. Ok enough of me rambling on....hehehehee

So for my card I chose to make another 6" x 6" card base, and then layered it up using the same piece of 12" x 12" design paper from the Orchard Deluxe Club Kit. I didn't want to cover up the beautiful design, so instead I cut a small leftover scrap piece and stamped the Because you're so sweet sentiment on it. Next I stamped the 2 peaches and colored them up using several copic markers and fussy cut them out. I used Orchards Greetings for the sentiments on the front/inside, and the Large peach. Next for the smaller peach I used that from the stamp set called Orchard Jumbo Unmounted stamps.  This Beautiful Orchard kit inspired me to stamp and finish the inside of my card for today. Normally I wait to do the insides, and don't typically stamp on the insides, just add my writing, however I love when I do the insides to match an outside of my card, so very pleased with this one! heheehe

Club Scrap Supplies Used:
Orchard Embellishment Cut-A-Parts for the piece in the bottle cap.

Other supplies used:
Really Reasonable Ribbon, 
Really Reasonable Ribbon foam squares
Sewing
Copic markers
Green card stock

Challenges:
Craftaholics R Us/Anything goes 
Frilly and Funkie/Show us your stamps
Thank you so much for looking and have a lovely day!
Hugs to all,
Cheryl

Friday, September 29, 2017

Sweet Santa Card

Hello crafty friends and Happy Friday to you all! Today I have a sweet card I made for Cheery Lynn Designs & The Project Bin Stamps. For my card today I used the  darling Santa and Elf Die set, along with a couple of other Cheery Lynn Dies. I also used the Beautiful stamp from The Project Bins Joyful Song Set.  I have to say I absolutely love this sweet Santa, as I have tons of Santa's that I decorate my home with for Christmas, So I'm a Santa Lover....hehehehehe He was super fun to make, and I did add some flower soft to his cap for some extra embellishing.

My card measures 6" x 6 1/4" that is the card base. I then layered with 3 layers of design paper all from a coordinating paper stack called peppermint by crate paper.  My sentiment is The Project Bins Joyful song stamp, and was stamped in club scrap Moss Green ink on Cheery Lynns Oval (smallest one) Stitch and Cut tool LSC-7. Next I distressed it with a red ink. I used the DL314 Quadrafoil Square Doily and framed the 3rd layer panel on my card, then cut it to size. Next I added my Santa, he was put together using Cheery Lynn's Best Glue Ever that they carry. LOVE this stuff.

All dies were cut using the Big Sister Die Cut and Emboss machine from Cheery Lynn. I LOVE this machine as its so easy to use, and love how it cuts the dies with ease and you can adjust the presser. Perfect machine!!!

Lastly I added some sewing with my machine in red thread, and then a red bow using Really Reasonable Ribbon, and a little embellishment for the center.

Cheery Lynn Supplies Used:
Santa and Elf Dies
DL314 Quadrafoil Square Doily
LSC-7 Oval Stitch and cut tool(smallest oval used for sentiment)
Best Glue Ever
Big Sister Die Cut and Emboss machine

Other Supplies Used:
Really Reasonable Ribbon
Really Reasonable Ribbon Embellishment Cabochon 
Really Reasonable Ribbons Foam Squares
The Project Bins Stamp set Joyful Song
Club Scrap Moss Green Ink
Crate Paper Peppermint
I hope you enjoyed my post for today, and thank you for stopping by!
Hugs to all,
Cheryl

Wednesday, September 27, 2017

Club Scrap Orchard Blog Hop

Hello everyone and welcome to Club Scraps September blog hop featuring the New Beautiful Orchard Deluxe kit !  If you arrived from Josette's Blog then you are in the right place , if not you will want to start from the beginning at Karen(Club Scrap blog)so you don't miss any of the wonderful inspiration from the Club Scrap Artist Team! There is also a list of the entire line up there for you with links :) Have fun & I hope you enjoy todays Hop!


Some photo's below of how I did the flowers on this page. Photo's of layout dont show the beauty of each flower like in person. But in the photo's below you can see the colors.


On my layout I used the beautiful design paper sheets and card stock from the Deluxe Orchard Kit. Love the design papers in this months kit, and the Cut A-Part sheets too! Of course i love every months kits, as they are all beautiful!

I used the 12 x 12 Deluxe Brown for the background layer and the 8 1/2" x 11" Deluxe Ivory with the pumpkins on it, for the photo matts. I then chose to use the orange card stock for the layering on my layout. The flowers were cut using the yellow card stock that comes in the deluxe kit, and then i chose to use glimmer mist in a orange and green, and then the glass flower technique. the photos for some reason don't show the flowers like what they look like in person on this layout. the pearls were all airbrushed to coordinate with my layout for today. You can find all my Glass Flower Techniques HERE! :)

Cut - A- Parts were used for the Sweet as Pie, and the It's FALL y'all! these are in the Deluxe Orchard Kit.

I had so much fun working with this months beautiful Deluxe Orchard kit, as I LOVE everything about this sweet kit! As Fall is here, its perfect for all our Scrapbooking and card making needs.

I do hope you are enjoying our hop today!
Your next stop is Deb's Blog Have fun!!! Thank you for joining us today!!
Hugs to all,
Cheryl
Tuesday, September 19, 2017

Club Scrap September Artist Team Challenge


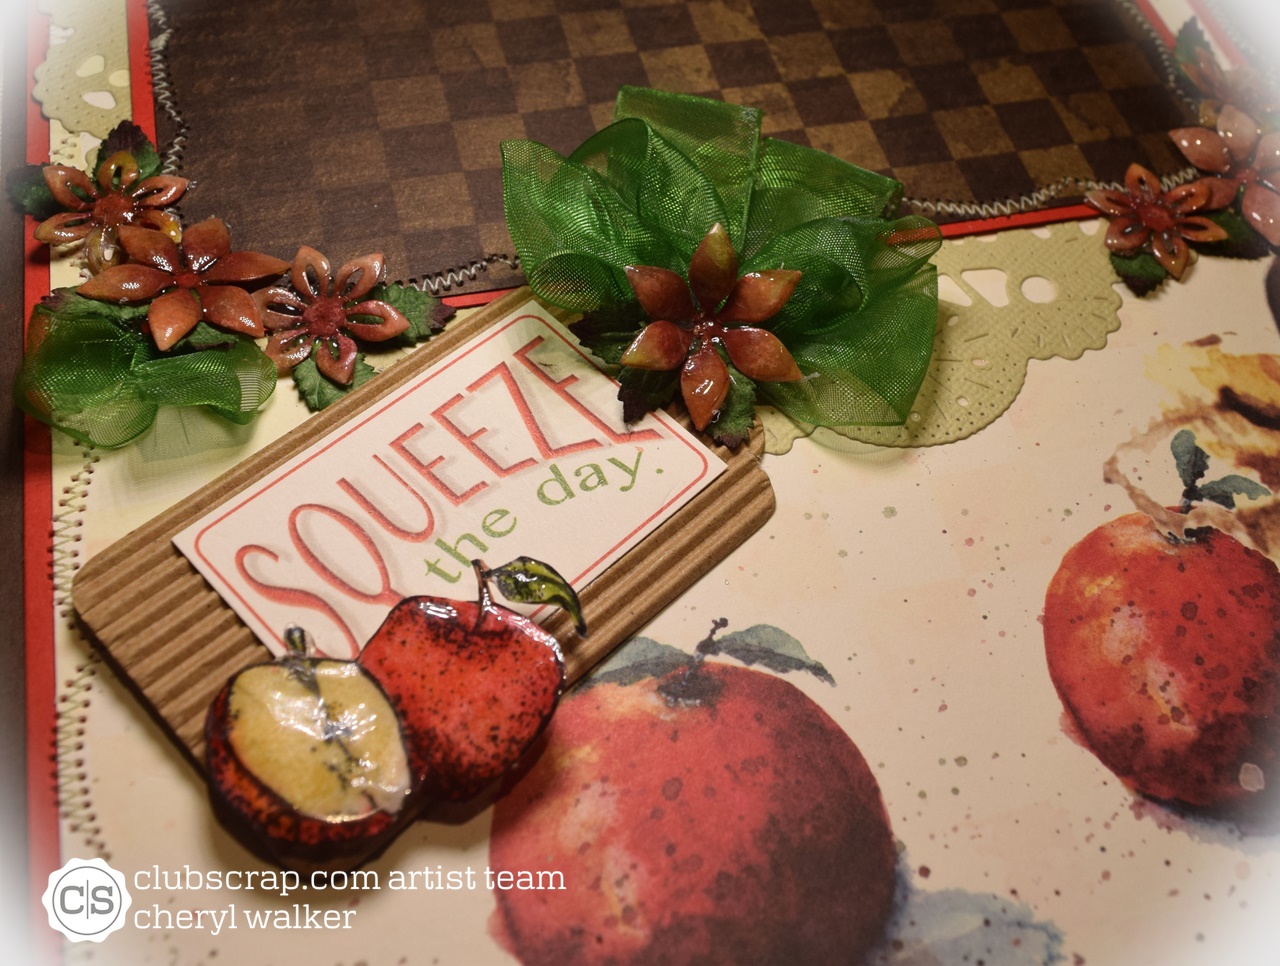
Hello everyone, and welcome to Club Scraps September Artist Team Challenge! This month the September challenge is to incorporate watercolor techniques into your projects by using Watercolor paints, pencils or crayons, Gelatos, dye-based inks, etc. I ended up using faber castell's Pitt artist pens, pencils, and a gelato for my flowers and apples.

You should have arrived from Debbie's blog, however if you did not , you might want to start from the beginning at Karen's Club Scrap Blog , that way you won't miss any of the Design Teams Beautiful creations today.

I LOVED making this layout using the new Orchard collection and LOVE all the beautiful design papers, cardstock and embellishment that came in this months kit. I  chose for my layout today to watercolor all flowers, and then the stamped apples and color them with pencils from faber castell. I then used the glass flower technique on all flowers and the apple image. This page was super fun and easy to create. The thing that took the longest would be handmade flowers, and even then it didn't take me long at all. My page was very simple for me as I added 2 photo matts and my embellishments. Love how the apples turned out too using this fun technique. I did add a photo to show you what the flowers look like before using the glass flower technique on them.

 In the photo above you can see how I watercolored them, and then how the look after doing the Glass flower technique on them. LOVE how the color is much deeper and bright.

Club Scrap Supplies Used:
Orchard Deluxe Club Kit
Orchard corrugated Tag
Orchard Jumbo unmounted Stamps
Orchard 12 x 12 prints
Orchard bottle caps with epoxy stickers
Ribbon and fibers that come in the deluxe kit
Orchard Embellishments Cutaparts
Permanent Jet Black ink

Other supplies-
Glue pad
clear embossing powder
Heat gun
sewing machine with green thread
faber castell
Doily from cheery lynn designs
hope you enjoyed my post for today, as I truly enjoyed creating my layout for today using the the beautiful NEW Orchard Collection! Please let me know what you think as I always enjoy reading your wonderful comments!
Thank you so much for joining us and stopping by!!!
Your NEXT stop is Josette's Blog
Hugs to all,
Cheryl