Showing posts with label Tutorial on sky made with spellbinders and airbrushing. Show all posts

Friday, May 1, 2015

Time is of the essence

Hello everyone, today's card was designed for the Scrapping Cottage and SCS Way to use it challenge. The challenge was all about "TIME"! And was for Thursdays Challenge on Splitcoaststampers.
 
On my card I used the Beautiful CottageCutz Elegant Butterfly, and airbrushed it using the Copic Markers. Love the way it turned out! I also added some glitter to the flourishes on this, where the orange is.
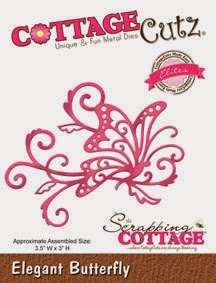
http://www.scrappingcottage.com/cottagecutzelegantbutterflyelites.aspx
The design paper I used is from American Crafts Crate Paper line Acorn Avenue. I got a ton of this in a box back when I was working the warehouse sale, so I figured I better start using some of it up... hehehehe
 
The Ribbon and Button are both from Really Reasonable Ribbon. The black piece of ribbon was leftover, so I wanted to use it for my card today. Lastly I added some half back pearls to my card, and some sewing.
This card was super simple and quick to make!!

I hope you enjoyed my post for today! Thank you for looking and have a lovely day!
Hugs to all,
Cheryl

Wednesday, December 9, 2009

Inky Impressions Snowflake Challenge & Tutorial

Hello everyone today I wanted to share with you 2 cards I made for the Inky Impressions Snowflake Challenge!! Hope you will join us for the Super Fun Snowflake challenge!!!! Link is above!!:)

On my card I used DARLING Lili's Stuffed bunny stamp from Inky Impressions, and copics to color her.


My tutorial will be on how I used the SPELLBINDERS PENDANT TO MAKE A SNOWFLAKE!


Crazy I dont own 1 snowflake die cut! So I started to look to see what I was going to do, and had my pendant out and thought it would work perfect!!
Its super easy, all you need to do is cut out 2 pendants of the large one.


And put them together , then you can cut 2 of the smaller one and put them together just like i did the bigger ones, and then add to the center of the large snowflake!! :)


Next I airbrushed the sky, awhile back I had come across Dawns blog who had done a sky with a templete she had made along time ago by hand. I wanted to try a different look, and love the look of this one too!


You just continue to make your pattern with the spellbinder and then fill in as you go along


Here are the 2 smaller pendants for the center of the large snowflake


and it almost all put together


Now I bought these mini ornaments at hobby lobby and wanted to use them like i do the buttons, so I took my Shank remover(for removing the shanks off the backs of the buttons) and cut the top off of the ornament so I could use it in the center :)


And my card all done!!


Here is another card for todays Snowflake Challenge!!!!
~~~~~~~~~~~~~~~~~~~~~~~~~~~~~~~~~~~~~~~~~~

On this card I used the Darling Rachel Gingerbread Christmas Digi(younger years) there is also another Rachel and she is super pretty tooo!!!! You can find them both HERE
I colored with copics, and added stickles to the tree skirt!
The die cut behind the circle is from Quickutz and is a limited edition for Hobby Lobby only. I used 2 of the frames and cut them to get 4 pieces!!
Snowflakes used:
Ribbon,
dp
snowflake ornaments(center of bows)
snowflake border punch
snowflake embossing folder

Thank you for looking and have a nice day!!!!!
Hugs,
Cheryl