Showing posts with label Cricut Air 2. Show all posts

Friday, August 30, 2024

Thankful card with RRR


Hello crafty friends and Happy Friday to you all! Today Im sharing this darling card I created for Really Reasonable Ribbon and a challenge on Facebook. I used the gorgeous satin crosshatch ribbon you can find here on sale right now.  I also used the scor-tape to put my card together and then the foam squares to attach all layers. The little mouse is an svg file and the design papers are from pebbles family ties stack.

Sunflower centers are done with a chunky glitter from WOW glitter.
Really Reasonable Ribbon Supplies_

The challenge I entered into was with MAD and they sent me a file to cut out the card and mouse, just thought it was so cute I had to join in, as its not too often I join in challenges. what do you think?
Thank you so very much for stopping by and have a lovely day!
Hugs to all, Cheryl 


Sunday, July 14, 2024

Christmas in July Layout 5

Hello crafty friends , Im back with another 2 page Layout to share for my christmas in July challenge this month. Ive challenged myself to get at least 10 2page layouts done for July. So far I have 5 2 page layouts and 1 single layout done and in my album. this one here is using the darling nutcracker from Cuddly Cute Designs


Saturday, July 13, 2024

Really Reasonable Ribbon July Blog Hop


Welcome to "Really Reasonable Ribbon's JULY” Blog Hop if you arrived here from Kathy's Blog you are on the right track. If not , you will want to head back to the Really Reasonable Ribbon Blog that way you don't miss out on any of the FABULOUS Designs from the Design Team today! There is going to be lots of Beautiful projects to see using Christmas theme  for this month, So each DT member will showcase something using Christmas this month.

Be sure to comment on the blog hop post on the RRR Blog for a chance to win a $10 gift certificate to Really Reasonable Ribbon 


On the photos above I used the scor-tape to add my ribbon for a border. Love how this plaid looks on my pages. You can really see below in the photo.

So for my pages today I chose to use lots of scor - Tape for putting everything together. The design papers I used are from Echo Park, and the title and the Carols are from Cuddly Cute Designs and are cut with the cricut machine and then inked and glued together. Im currently working on Christmas in July and this is my 5th layout done for July. I have challenged myself to get 10 plus 2 page layouts done in July for my album. Almost there!


Be sure to comment on the blog hop post on the RRR Blog for a chance to win a $10 gift certificate to Really Reasonable Ribbon
Your NEXT stop for today's hop is Bonnies Wonderful Blog!!!
Hugs to all,

Cheryl

Tuesday, May 14, 2024

Dough Much fun LO

Hello everyone and Happy Tuesday to you all! Todays post is a super quick one as I just wanted to share my Dough Much Fun page I designed using the darling SVG files from Marjorie Ann Designs. Aren't they darling? I just love how these pages turned out. 

I had some photos from the day I babysat this little cutie and we played with Playdoh, and he made the hamburger and I helped him with that, we had sooo much fun! So I just had to scrap these pages. I did add a journaling tag to the top backside where they can see if they pull the page out a bit. My writing isnt the prettiest so I didn't want it on the front. Anyways I hope you enjoy seeing my pages!


Hugs to all, Cheryl 
 

Wednesday, April 3, 2024

KaDoodle Bug Designs New Bunny/ 2 page LO

Hello crafty friends, and Happy wednesday to you all! Today Im sharing these 2 Bunny pages I created for KaDoodle Bug Designs using the new Bunny Files. Just love these darling new bunnies!
SVG's -Carrot stand bunny I paper pieced, inked, and added some whiskers, lashes and shadowing. Bottoms Up bunny has some flower soft on his cottontail. Extra carrots, I cut when cutting the files so I could add them to my pages as embellishments .

Layers- I did add sewing to all layers, and I thought it would look so cute with some white accents like the border punched edges and the big white doily.


Thank you so very much for stopping by! Hugs to all! Cheryl 


Thursday, February 15, 2024

I love you!


Hello crafty friends, and Happy Thursday to you all! Today I wanted to share this darling card I made using the SVG file from KaDoodle Bug Designs. Melissa has come out with some new cutting files to create card sketches from and I love them! I also used the darling Little Love Bugs SVG as well.

So to start with I did add some extra layers of circles using the one provided. So I added the pink and white one, just by duplicating the red circle twice and making them smaller. Next I made an extra square, the design paper one, using the same method as I described above. I love how fun and simple this card was to make.

My Little Love Bugs girl was done in design space as well, and I added some extra layers of wings, and for her eyes. 

Files can be found here
Little Love bugs-Little Love Bugs
Square Heart  Card-Square Heart Card


I hope you enjoyed my post today!
Hugs to all,
Cheryl

Monday, April 25, 2022

Springtime/Easter Treat Container


Hello Crafty friends and Happy Monday to all! Today I have some super cute Easter teat containers I had made for the grandkids for Easter, My last Easter post for the year, but how fun these were to make, and can be used as spring gift giving as well.

So these containers are recycled and I added some border punches, and design paper to each one. Next I cut out some shaped frames, and layered those with coordinating papers. The darling SVG files were cut using my cricut and distressed using inks, and then highlighted using white paint pens. Of course I had to add Really Reasonable Ribbons to each box, and love how the big bows look I used 3 different satins, one is the Delicate stitched in Delphinium , Next I used the Diamond Satin in Porcelain Blue, and then Hot pink Satin double faced. all links are provided below for easy finding. Next My tags were done using the StampinUp! stamp and coordinating punches. these were so much fun to make for my grandkids and they loved them! 
I still have several of these recycled boxes left to decorated for different holidays or birthdays would be cute too.
Really Reasonable Ribbon supplies used:
others: scales and cottontails SVG,  scrapping bug designs cotton tail express, design paper, hot glue, white paint pen, sewing, stampinup! stamps and punches

Thank you for stopping by and have a lovely day!
hugs to all,
cheryl


Friday, April 1, 2022

Berry Sweet Gnome

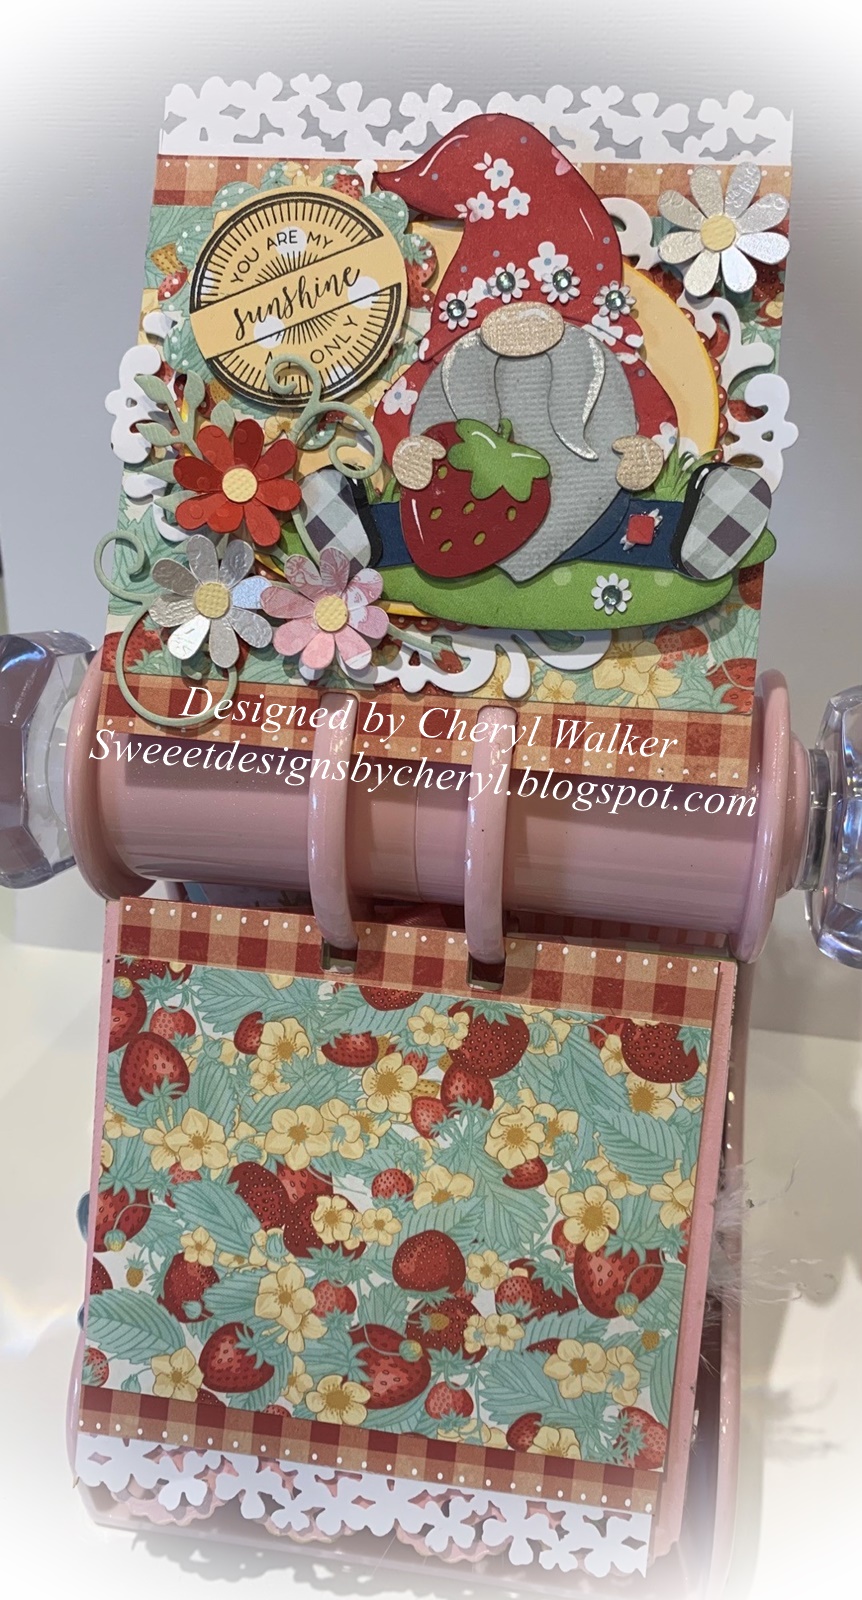
 Crafty friends I have another post for today, as I just couldnt wait to share this darling gnome that I did using an SVG file I bought from Marjorie Ann. Isn't he just the cutest!? Remember any of the Memorydex layouts will also work on a card base as well.  Anyways I will keep this post super short.

I had some leftover red card stock, it was kinda short and small, so I decided to add a border punch to the edges. Next I covered using the checked, and strawberry design papers, and then added a few frames to get my layers. I stamped the sentiment from StampinUp! and then used the flowers that came in the SVG file. Love this one, and cant wait to choose a photo to go on it.

Hope you all have a lovely weekend! Hugs to you!

Cheryl

Monday, March 28, 2022

You're Some Bunny Special Card

Hello crafty friends and Happy Monday to you all! Today I'm sharing a quick post as I made this darling card using the sweet some Bunny Special SVG file from KadoodleBug. I bought so many of these darling files and am hoping to use more before Easter, and share with you all.
Just love that darling bunny face, she is so cute! I had this sweet sentiment and not even sure where I bought this from, but it went perfectly with this sweet bunny. I did airbrush my heart using 3 colors to coordinate with the design paper. All the beautiful flowers can be found at Really Reasonable Ribbon, as well as the gorgeous Delicate stitched Satin ribbon. The heart die cuts are all old ones from CheeryLynn, and not sure if they are even available anymore. My design papers are the same ones I used on another Memorydex card I made a couple weeks back, and its from American Crafts Warehouse sale.

 Thank you for stopping by and have a wonderful day! Hugs!

Friday, March 25, 2022

Close Your Little Peepers Card

Hello crafty friends and Happy Friday to you all! Today I made a Gift card similar to the Memorydex one I did a week or so ago. This one was designed for Really Reasonable Ribbon using the Beautiful Flowers, Ribbons, and pearls they carry in the shop. Also no sewing on this one, shocking right?
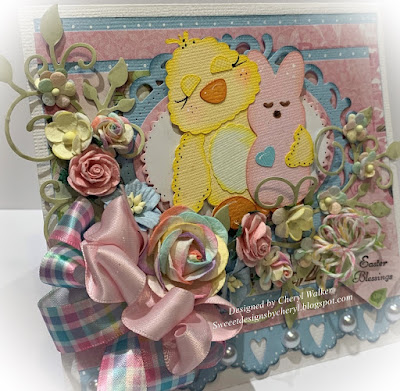
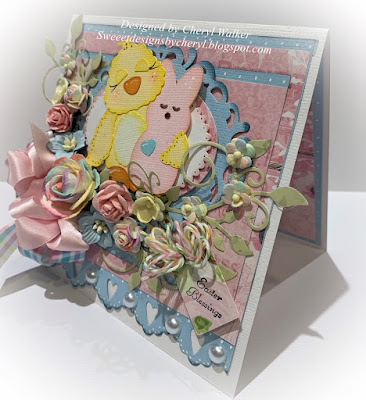
So for my card I chose to use some layers of design paper I had left over from my memorydex card, and then used the blue card stock that was leftover as well. I used a die cut for the bottom of my large layer, and added some distressing , dots, and half backed pearls(base blue measures 5 1/4" x 5 1/3") I then added another layer on top of that one that measures 5" x 3 3/4"  , and layered on that is a frame, with oval cut outs. I then used this darling "Close your little Peepers: SVG file I bought from Kadoodlebug. Once I had all my layers, then I added the double bow, swirl floral die cuts in green, and all my flowers. Lastly I added my tag and bakers twine in three different colors. Super fun card to put together, and came together quickly. There is no sewing on this card, and I did do the inside for writing. All items used on my card will be linked below for easy finding. 

Really Reasonable Ribbon:


 I hope you enjoyed my post for today! Thank you so much for stopping by and have a lovely weekend!

Hugs to all,Cheryl

Thursday, March 10, 2022

Somebunny Special

Hello everyone and happy Thursday to you all! Today I'm sharing another Memorydex card I designed. I'm slowly working on these and will add photos to the backs of them all, that way I can view them while crafting. This is my 2nd card made for the Memorydex spinner, and I'm loving them a ton. I love this little "Some Bunny Special" SVG file I bought from Kadoodlebug Designs. Hope you enjoy my short post today! thank you for stopping by!
So for my Memorydex card I cut my own template and then did my layers. I added doilys, shaped die cuts, and even used some old punches I've had. I added some ribbon, flowers, embellishments and a fun little tag that I airbrushed. Isn't this bunny just absolutely darling!? I distressed her, and added some eyelashes, and some white paint. super fun!

Supplies Used:

  • Really Reasonable Ribbon Flowers
  • SVG Somebunny Special file
  • Old CheeryLynn die
  • Punches
  • butterfly embellishment
  • stampinup tag punches
  • Alota Easter greetings
  • hot glue gun, tape runner, foam tabs, stickles, white paint pen, black pen, distress inks, copics, airbrushing system, cricut cutter

Thank you again for stopping by and have a wonderful day!

Hugs, Cheryl
 

Wednesday, February 16, 2022

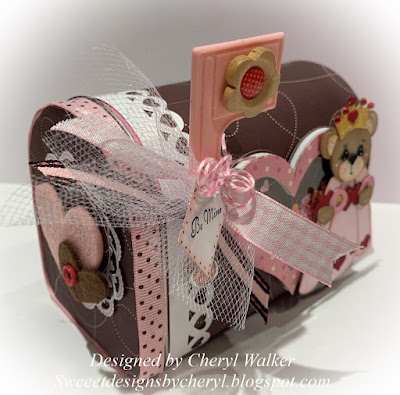
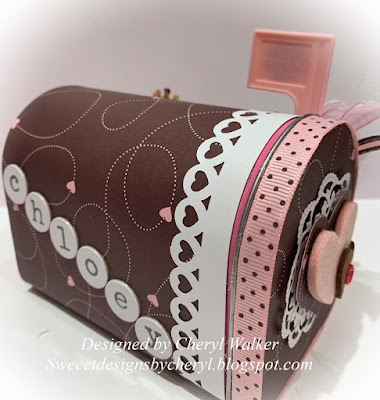
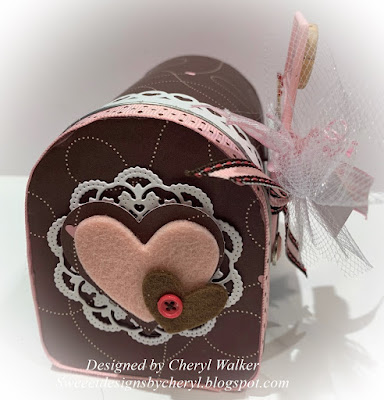
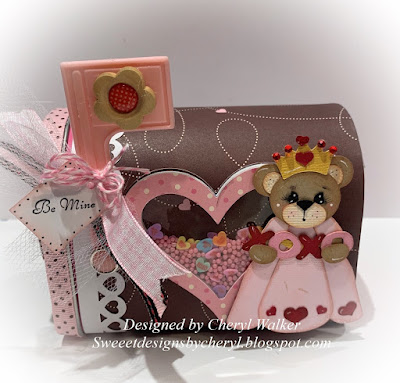
Decorated Mailbox for Valentines Day


Hello everyone, and Happy Wednesday to you all! Today I'm sharing a super fun Decorated mailbox I designed for my Granddaughter for Valentines Day. These are so much fun to do. I made 3 and will post the others this week as well.
Mailbox came from Walmart. I bought tons of them. I then decorated the box using design paper, and border punch trim, Really Reasonable Ribbons, and some die cuts, chipboard pieces for the names, embellishments 3-D. I used Scor-Tape to adhere the design paper & Border, then used the foam tabs for the heart die cut on the front and the side. I used hot glue to glue the ribbon around the front door part. Super fun!

On the side I used The Makers Movement heart shaker, the little princess is from Kadoodlebug designs cut on my cricut


Supplies used:

Really Reasonable Ribbon 


Thank you so much for stopping by! Have a lovely day!
Hugs,
Cheryl


Monday, October 11, 2021

Halloween Treat Bags

 
Hello everyone and Happy Monday to you all! today I have these darling treat bags I made using this darling SVG file Scare Bear Witch that I cut out using the cricut machine. Isn't she Darling? These were made for my granddaughters as I will give them to them for Halloween filled with candy.
these little bears were cut using different color card stock, and then distressed by me. I added all eyelashes, and dots and all. I fell in love with this little file, and bought lots of them! heehehe the tag is hanging using a Pear Shaped Metal clip from Really Reasonable Ribbon. the Happy Halloween tag is from StampinUp! as well as the for you. The pumpkin is a felt embellishment sticker type. I added RRR beads, stemans and ribbon. The doily and all the other shapes are from My Makers Movement the the witch is on.

for the bags, I just used a 12" x 12" piece of design paper and my score board, and started scoring and came up with these. The tops are held closed with the paperclip that has the ribbons on it.

I hope you enjoyed my treat bags for today! thank you for stopping by! Hugs!

Wednesday, August 18, 2021

Happy Happy Birthday w /RRR

Hello everyone and Happy Monday to you all. Todays card was designed for my youngest Granddaughter for her 2nd Birthday & Really Reasonable Ribbon using the Gorgeous Ribbons they carry. She Loved it, and so did her mommy.
For my card today I chose to do some cute layers using design papers I just bought, and this sweet SVG file from Marjorie Ann, cut it out on my New Cricut Air Machine and loved making her. The bear pieces were all airbrushed using the copic airbrushing system and my air compressor. Next I cut out the number two using a die , and added it to the little bear. Super fun, however I need practice on these eyes, they kind of were a mess as the pen went through the glue. Next the Happy Happy Birthday stamp is from SU! and I used a punch for the scalloped circles. The bows were made using Really Reasonable Ribbons Gorgeous Satins, and I will list them below for easy finding.

Really Reasonable Ribbon:


 Thank you for stopping by and have a lovely day! Hugs to all, Cheryl

Friday, August 13, 2021

Really Reasonable Ribbon August Blog Hop

 Welcome to "Really Reasonable Ribbon's  August” Blog Hop if you arrived here from Kathy's Blog you are on the right track. If not , you will want to head back to the Really Reasonable Ribbon Blog that way you don't miss out on any of the FABULOUS Designs from the Design Team today! There is going to be lots of Beautiful projects to see today using the Autumn Ribbon Assortment, so I hope you Enjoy


For my card today I started with cutting and putting together 3 different layers, all sewn using my sewing machine. Next I added white dots to each layer. The sentiment frames were cut out using dies, and then I stamped my sentiment on one. The sweet Spider bear is an SVG file that I cut out all in white on my Cricut Air machine ,and then colored the spider body in black copic, and airbrushed the bears face with the copic airbrushing system. I then added eyelashes and some highlights to her face, and then  added white and black dots. My bows were done using 2 different ribbons from this months assortment, I love this months assortment as all the ribbons are absolutely gorgeous! I added stamens , flowers, and some branches to complete my card for today. All the flowers were also dusted using black and orange ink, and the rosebuds were air bushed.


Really Reasonable Ribbon supplies used:
Chrysanthemums dusted black
Rose buds airbrushed black
Cherry Blossoms dusted in orange

other supplies
halloween design paper, card stock, gel pens, copics
cuddly cute SVG file
The project bin stamps
Sewing
airbrushing
dies and punches

Inside of my card, it too has sewing.

Thank you so much for stopping by, and hope you enjoyed my Halloween card for today!


Your NEXT stop for today's hop is Bonnies Wonderful Blog!!!
Hugs to all,

Cheryl


Monday, August 9, 2021

Strawberry Sweet Card for RRR

Hello everyone and Happy Monday to you all! Today I have a super Sweet card I designed for Really Reasonable Ribbon using the Gorgeous Ribbons and embellishments they carry in shop. This card has tons of layers, as you all know I love layering, and also love bears.
On my card I started with a white 6" x 6" base, then added 4 design paper layers, all have sewing and white gel dots. Next I added 3 more layers using die cuts for the doily, shaped die, and circle. I stamped a sentiment that is one of my favorites, and I will list below. Next the darling sweet Bear is a SVG file, as I just got a new Cricut Air machine, and I'm loving it! I cut here out in brown card stock, red, and tan, and distressed each piece. The eye lashes I drew on, and then added lots of white dots, and black gems. Next the strawberries were cut using a die cut from CC dies, and they were colored using copics. Lastly I added my double bows and flower embellishments to the top, and then added the inside layer. Ive been trying lately to get all the insides of my cards complete, as that way I dont have to do it later.
Really Reasonable Ribbon:


I hope you enjoyed my post for today, and thank you so much for stopping by! Have a lovely day!

Hugs to all, Cheryl