Showing posts with label Stampin Up. Show all posts

Wednesday, April 26, 2023

Shabby Chic Mother's Day boxes

Hello crafty friends and Happy Wednesday to you all! Todays project was designed for The Robins Nest Creative using dew drops to decorate my Gift box. 

To Start

To start I made this box small so it could hold some goodies for my table setting I'm doing for Mother's Day. I picked some pretty Design paper that I bought years ago its K &Company. Next I picked my die cuts, and it was a flourish that I have and some ready to go, and then picked my flowers they are from RRR and are absolutely beautiful.

Decorating My Shabby Chic Box using dew drops

I started with adding My design paper to my Box before putting together, that made it easy. Then once together I added my flourish and Hot glued my flowers on, that helped hold the flourish in place. For the dew drops I used the light pink dew drops in the tear drop shape, and then green dew drops in different sizes. I also added the diamond shaped ones to the lid, as I thought they added that little extra to my box. Then I added lots of Really Reasonable Ribbon to close the top, and for my double bow. I love how the dew drops add that extra embellishing that my box here needed.

think later on I will add a tag to the top that says Happy Mothers Day, and distress it so it will coordinate with this box, as these will be part of the gifts on my table. I cant wait to do my Mother's Day Table setting, will be fun!. I do hope you enjoyed my post today and please let me know what you think in the comments below.


Items used:
The Robins Nest Dew drops in pinks and greens
K&Company old design paper pack
Card Stock AC, and StampinUp!
Really Reasonable Ribbon (Peony Delicate Stitched)
Really Reasonable Ribbon flowers (Open Roses, and Sweetheart Blossoms)
Hot Glue
Art Glitter Glue
Scor-Tape (Really Reasonable Ribbon)

Thank you so much for stopping by and hope you enjoyed my post for today. happy crafting to all

Hugs ,Cheryl


Friday, January 13, 2023

Really Reasonable Ribbon January blog hop

 
Welcome to "Really Reasonable Ribbon's  January” Blog Hop if you arrived here from Kathy's Blog you are on the right track. If not , you will want to head back to the Really Reasonable Ribbon Blog that way you don't miss out on any of the FABULOUS Designs from the Design Team today! There is going to be lots of Beautiful projects to see today using the Sweetheart Ribbon Assortment, so I hope you Enjoy

Today's project is a treat holder for Valentines day. It holds 3 Ghirardelli chocolates. I started with a piece of card stock that measures 3 1/2" x 10 1/4" then score at 1" , 5 1/2, 6". then fold up at the bottom, and the fold down at the top scores. Next I cut out my design paper piece for the top and it measures 3 1/2" x 3 1/2" then cut a heart out of that using a die. Next I placed a light pink behind it using the 1/8" scor tape to hold it. Then attach the main front piece to the treat base using scor-tape. now I added some other hearts using foam tabs, and the gorgeous delicate satin from this months ribbon assortment to make my bow and add ribbon to the top folded piece. I tied my tag on using the twine.  I also used the pink twine, and then some Gabrielle Lace along the bottom. I lastly added a pearl shape heart to the top sticker heart.

Thank you so much for stopping by, and hope you enjoyed my Halloween Scare Bear card for today.

Your NEXT stop for today's hop is Bonnies Wonderful Blog!!!
Hugs to all,

Cheryl

Wednesday, November 16, 2022

KBD Santa Mouse Christmas Tag

Hello crafty friends and Happy Wednesday to you all! Today I have an extra post using this darling KaDoodle Bug Designs Cutie KaToodles -Sitting Santa Mouse SVG file that I cut on my cricut and distressed and put together. Love how cute he is on this tag.
Super easy and fun tag to create using card stock and a piece of scrap design paper. I did add some white Paint dots, some Really Reasonable Ribbon Plaid Christmas Red/Green 3/8", a little stampinUp! tag, and then Merry Christmas was stamped using Makers Movement warm wishes stamp set. I will have a video coming soon on how I put him together.

Thank you for stopping by and if you would like to see any of my current videos, you can view those here YOUTUBE.
Hugs to all,
Cheryl


Friday, September 9, 2022

Sweet Happy Birthday card

 
Hello crafty friends and Happy Friday to you all! Today's happy birthday card was designed for Really Reasonable Ribbon and for a friend who needed a birthday card so I made 2 for her to choose from. I'm loving these colors together and have used this design paper and flowers on other items as well. 
so for my card I chose to use 3 different design papers for the front, and then the chevron for the inside. I added 5 layers to the front, and then decorated using the gorgeous flowers from Really Reasonable Ribbon. I love the large chrysanthemums that RRR has to offer, and there are so many colors and assortments to choose from. Next I chose to use the Red Open roses, and then the yellow cherry blossoms, white sweetheart blossoms, and rose buds. I hot glued all my flowers on top of my two bows made with the Chevron twill and swiss dots ribbons. For the 2 corners I used dew drops from The Robins Nest to create some flowers. Love making these for my cards. Lastly I added dots and sewing to all layers.
Really Reasonable Ribbon supplies used:
Open Roses Mixed Color 20mm for the greenish blue color
other items used, hot glue, sewing machine, The Robins Nest dew drops, stamps from stampinup!, dies, ink, white paint pen

Thank you so much for stopping by and have a lovely day!
hugs to all,
Cheryl


Friday, August 26, 2022

Alicorn - You're a rare find!

Hello crafty friends and happy Friday to you all! Today's card was designed for Really Reasonable Ribbon using the gorgeous Delicate Satin ribbon, and beautiful Rainbow flowers, I will list all that I used below. Also I used this sweet Alicorn stamp from TLC Designs, isnt she just darling!? 
You know me, I love doing the insides of my cards, and this one was done using TLC Designs Stencil to create a border on the inside.
For my card I chose to use this darling Rainbow to dreamland Recollections dp pack. I thought it would work perfectly with the alicorn and RRR Rainbow flowers and ribbon.

To start with I picked the papers I wanted, and then cut and layered them all. Next I chose my dies, and stamp. I stamped up Alicorn in black ink, and then colored her using copics. for her body I used Unicorn stickles and that's how she shimmers so pretty. I then fussy cut her out. Next I picked all my flowers, and on this one I chose the Pastel Rainbow Open roses in 20mm, 15mm, and 10mm, now that large flower is Chelsea Rose in rainbow colors. I also used the Mini Sweetheart blossoms in Rainbow for filler flowers, and lastly I used the Rose buds in Pink and blue. I will post links to all below for easy finding. for the sentiment I stamped it on a white card stock and then dusted or distressed in blue , yellow and pink ink to give a little rainbow feel. lastly I added some Daisy pearls to the corners.

Really Reasonable Ribbon supplies used:


I hope you enjoyed my post for today, please let me know what you think as I always love hearing from you. Thank you so much for stopping by and hugs to you all, Cheryl


Friday, August 12, 2022

Floral Delight 3-D sewing machine

Hello everyone and happy Friday to all! Today I'm sharing another one of these darling 3-D sewing machine boxes that I made. I found the tutorial on youtube and you can see it here as well. Her name is Krisiannes crafty adventures, she will show how to construct the box. I added my own touches to it. Hope you enjoy!
I decorated using Really Reasonable Ribbons flowers, and ribbon, half backed pearls, and even the darling daisy flower embellishments. for the handwheel I chose to use a small ribbon spool, and added matching dp to it. I also used spellbinders dies to create that. for the front tension wheel, thread stitch regulator , and thread stitch pattern. Next I also made my needle and faceplate using silver shimmery card stock. for the wheels I chose scrap diva die.


this sewing machine has several places to put things for storage or gift giving. super fun and addicting to make. Ive made 4 so far and will be making more.

Thank you for stopping by and have a lovely day! Hugs to all!
 

Monday, August 8, 2022

3-D Sewing machine with storage

Hello crafty friends and Happy Monday to you all! Today I have this super darling sewing machine storage box that I made for Really Reasonable Ribbon, and to keep on my work area. Love making these and will have many more to share on my blog . Ive used lots of Really Reasonable Ribbon flowers and ribbon on this and will list items below.


In the picture above you see both drawers, there is also a storage box under the spool of thread. And another storage under the base. super fun. I used this darling strawberry design paper and card stock. Then used punches, dies , buttons, and such to decorated. I loved using all the RRR flowers and will list them below for you.

Really Reasonable Ribbon 
Flowers-
Ribbons-
Extras-
White flat backed pearl n a 10mm or 12mm for top of spool
the sewing machine tutorial is on youtube from Kristiannes crafty adventures
Thank yo so much for stopping by and have a lovely day!
Hugs to all,

Wednesday, July 27, 2022

The Robins Nest Dew Drop Caddy/Video tutorial

 
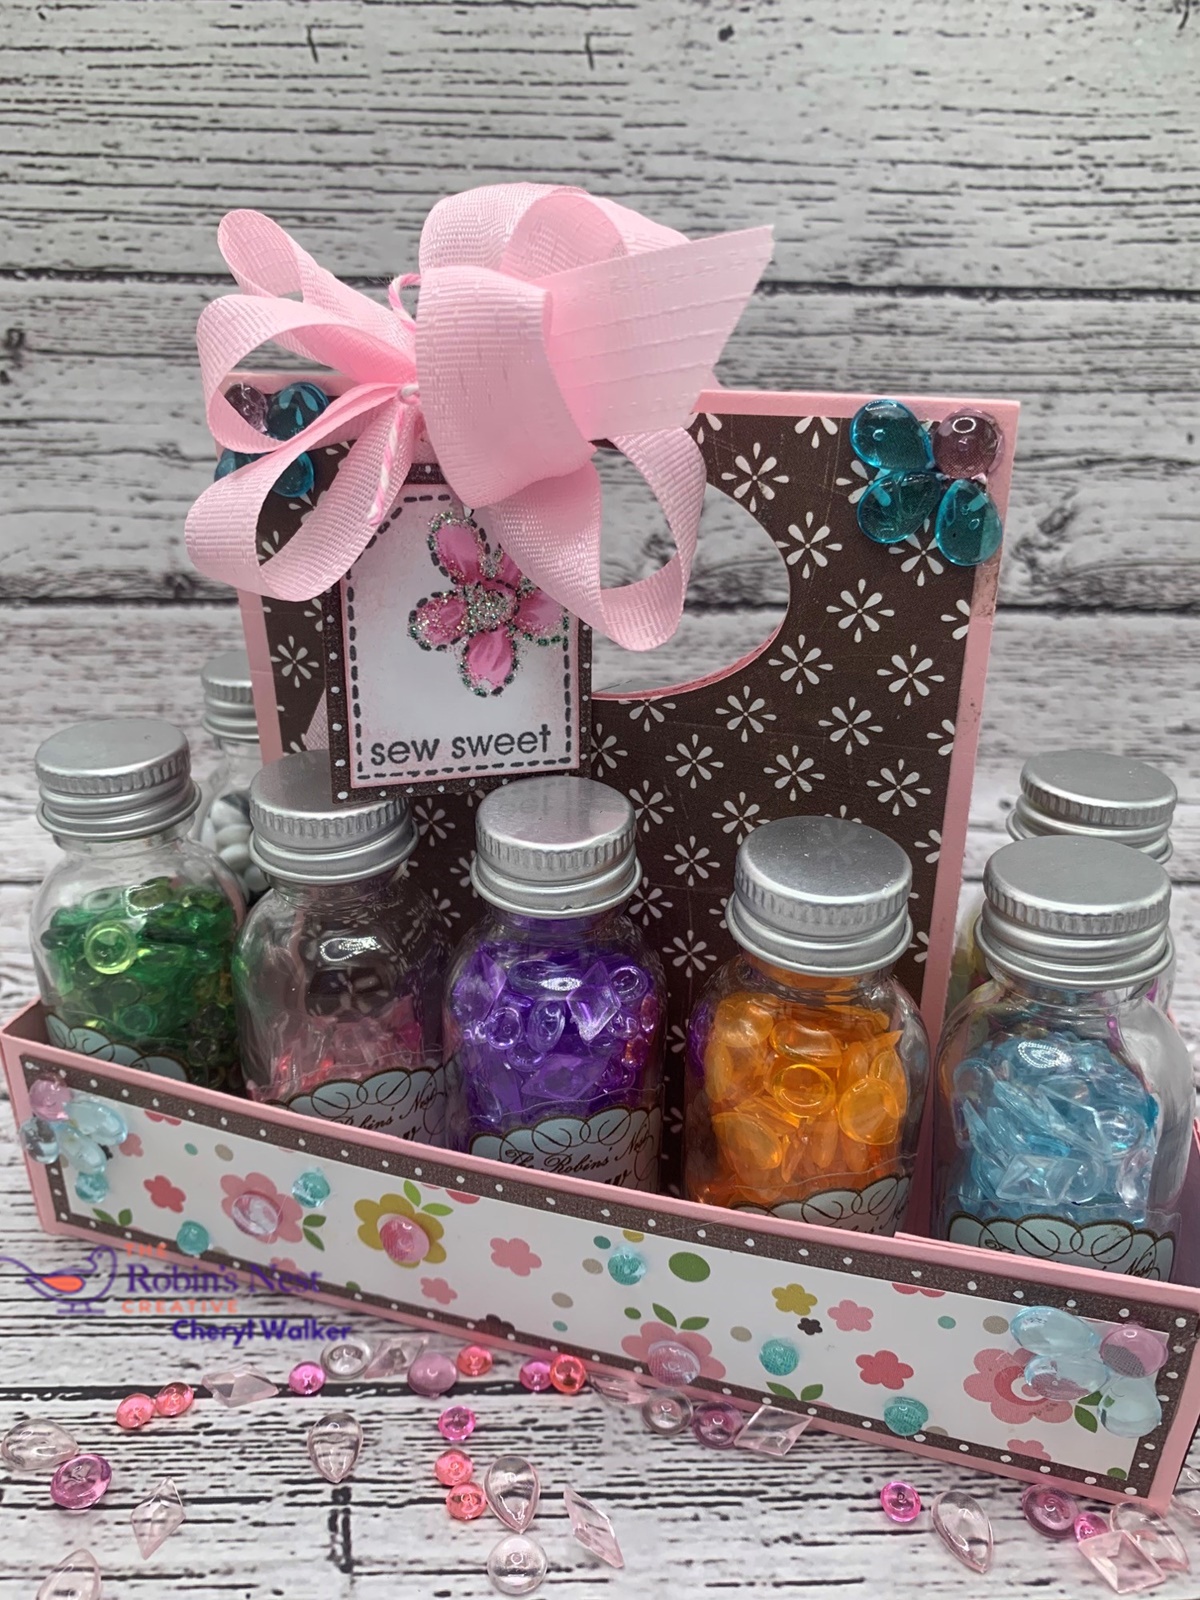
Hello everyone and happy Wednesday to you all! Todays project is a Dew Drop Caddy I designed for The Robins Nest Creative to hold the Dew drop jars. I used card stock, design paper, red tape, dew drops, ribbon, and stamps.

I have 2 videos , one is a tutorial, and the other shows decorating it. Hope you enjoy!


Video's and more photos can be seen on The Robins Nest Creative Blog here.
Hugs to all,
Cheryl


Thursday, March 31, 2022

Easter Squeak Memorydex card

Hello everyone and Happy Thursday to you all! Today I am sharing this darling Easter Memorydex card using Easter Squeak, isn't she darling? You could always use this layout on a card as well. I'm just loving these memorydex cards as I get to see them every time I'm crafting, and I change them up by just spinning it. Love that! 
I start out with all my cards measuring about 4 1/4" x 5 3/4" , then covering with design paper choices,then cut down the top using different edge dies. Next I cut out my shaped layers so I have a starting point to work with. I will then cut some greenery and pick what I'm gonna use on the center(unless I've picked it already) , I also pick up some of the embellishments I think I may use. This one here I chose to use this darling Easter Squeak and love her!
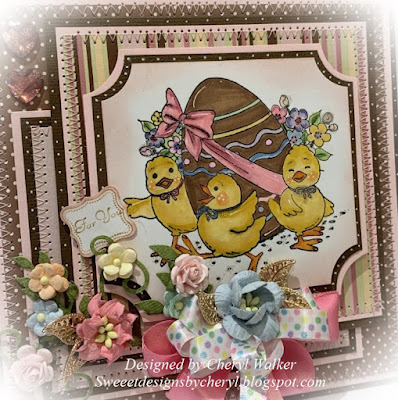


 thank you for stopping by and have a nice day!

Hugs to all, Cheryl

Monday, March 21, 2022

Pretty In Pink Envelope Treat Holders

Hello everyone and Happy Monday to you all! Today I'm sharing a little envelope treat holder I designed for some friends. I will be gifting these at a get together next month and cant wait. These were super fun and I just had to share with you all today.
first I picked out my design paper, and then used an old envelope die to cut each one out. I made a total of 14 of these. Super fun! Next I used 2 stampinUp! old punches to punch out my circle layers, and then used wood buttons on these. The ribbon is from Really Reasonable Ribbon, and so are the roses, and heart gem. I Love how they turned out, and super fun to give. I just need to buy more Ghirardelli chocolates.

 Thank you for stopping by today! Have a lovely day! 

Hugs to all, Cheryl

Sunday, March 13, 2022

Really Reasonable Ribbon March Blog Hop


Welcome to "Really Reasonable Ribbon's  March ” Blog Hop if you arrived here from Kathy's Blog you are on the right track. If not , you will want to head back to the Really Reasonable Ribbon Blog that way you don't miss out on any of the FABULOUS Designs from the Design Team today! There is going to be lots of Beautiful projects to see today using the Spring Pastels Ribbon Assortment, so I hope you Enjoy


For my Easter card today I chose some design papers I had in my Easter stash and cut layers for my card, adding sewing to each one. Next my image is from Alota Rubber Stamps and is an oldie, but goodie. colored my image with copic markers and then added some bows, and flowers all from Really Reasonable Ribbon. The leaves are from my stash, trying to use them, as I forgot I had these. Lastly I added some white paint dots, and 2 RRR gem hearts. I had a lot of fun designing this card, hope you like it!
Really Reasonable Ribbon Supplies:


Thank you so much for stopping by, and hope you enjoyed my Easter card for today.

Your NEXT stop for today's hop is Bonnies Wonderful Blog!!!
Hugs to all,

Cheryl


Friday, February 25, 2022

Sweet Fairy Lili wishes


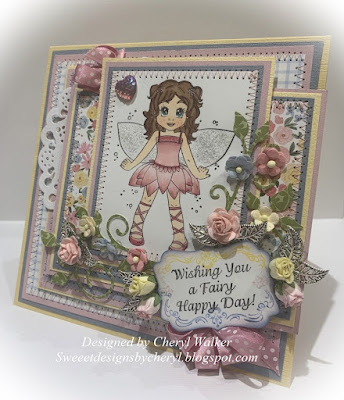
 Hello everyone and Happy Friday to you all! Today I have a super sweet card I designed for Really Reasonable Ribbon using lots of fun supplies. Ive been sorting through my craft room and pulling some older stamps out as I would like to start using them, and today I have Fairy Lili to share.
Of course I love lots of layers and chose this new stack I got from Echo park called Carta Bella Summer stack. I did 3 layers of design papers, 1 doily cut out, then the sweet Lili Fairy is my 4th layer. Next I used the sentiment I had with her, and stamped up StampinUp! frame, and used the matching punch to punch out. 

Embellishments are my flowers, , Heart , and leaves and ribbon. I had so much fun designing this card, cant wait to share my next one. Hope you enjoy my post for today.


Really Reasonable Ribbon Supplies:

Thank you for stopping by and have a lovely day!

Hugs to all, Cheryl

Thursday, February 3, 2022

Love notes candy mail box

Hello everyone and happy Thursday to you all! Today I'm sharing this sweet little mail box I made for Really Reasonable Ribbon using their beautiful satin ribbon. This box was super fun to make, and I'm hoping to have time to make more of this one.
For my Mail Box I used die cuts, and then figured out how big I wanted my base to be. I then scored and cut my paper and did up a templet for that so I have it on hand for future boxes. These would also be cute at Easter time too. It can hold lots of candy kisses. In the photo I have 11 kisses but you could add more if needed.

Next I added some magnets to keep it closed, then a cute 3-D embellishment, and Really Reasonable Ribbons Pink Satin, and Pink Bakers Twine. I also used Scor-Tape in 2 different sizes, and foam square as well. the little Heart embellishment is a 12mm Fish Scale Heart. Lastly I added my bow and little tag. You could also add some love notes to the inside as well. I will add those after.


Supplies used:

Thank you for stopping by and have a lovely day! Hugs to all, Cheryl