Monday, August 9, 2010

Doily Card & Envelope

  Hello everyone, hope you are all doing well and enjoying your day! Todays Card & Envelope were made using the "Wild Card" Cartridge from Scrapbookpal.com! purchase price an AWESOME 26.99 woooohoooo!!!
I LOVE this Cartridge, there are sooo many sweet cards and evelopes you can make with it, this cartridge is a must have!!!

Below Ive encluded instructions I how I made my Green and white card & Envelope. All other cards and envelopes are just samples to share with you!! :)


Green & White Doily Card & Envelope :
For the CARD (Page 52)
Use 12x12 mat for all these steps!
Step 1- Cut at 6"inch I used white cardstock(real Dial Size ON)Pg 52(this is the card base)Step 2- Cut at 6'Green cardstock for the layer.(Real Dial Size ON)(LINER ON)
NOTE: When cutting the green circle let your machine cut the circle then push STOP!!!
Step 3-Cut Design Paper at 5 1/2 inch
Step 4- "Cutting the oval Frame" Cut white cardstock at 4 1/2 inches(Frame key ON), (REAL DIAL SIZE OFF) ,
Step 5"Green Frame" cut green cardstock at 4 1/2 inches(Frame Key on),(shift Key),
Step 6 "Distressing"
Using the Colorbox "olive Pastel" fluid Chalk Inkpad rub around edges of cardbase, Design Paper,Green layer,and both oval frames then set them aside to dry!!
Step 7 "
Dots"Using Gelly Roll Med"White Pen" add your dots to both green (layer and frame)
Envelope:
For this size envelope you need the 12 x 24 mat

Step 8- Cut white cardstock at 6 1/2 inches with the (shift Key on),then press the key this will be the envelope

Step 9-Liner for the envelope(you can use the 12x12 mat) Cut green at 6 1/2 inches (liner Key on),(shift Key on)then press the key

Supplies Used for Card & Envelope above:
12 x 12 mat, 12 x24 mat
Design Paper(crafty Secrets)
Ribbon,flowers,swirls to embellish!

Here is another sample! Play around you can make different size cards and Envelopes!!! Have Fun!
Another card using the Wild Card Cartridge from Scrapbookpal.com! Wild Card Cartridge is only 26.99 at Scrapbookpal.com right now!!!!!

Also to visit the Scrapbookpal.com Blog Visit us HERE!!!!
Thank you for looking and have a nice day!
Hugs,
Cheryl

Friday, August 6, 2010

Strawberry Picken Time!

Happy Friday to all!!! Todays card was designed for several challenges but the main 2 are SCS F4A24 and the sketch is from The Pixie Cottages challenge! Ive also designed my card for several others as well!!

On my card I used the strawberry stamp from Pez-A-Doodle Designs, and the sentiment is from SU!
The red & white checked ribbon is from Really Reasonable Ribbon, and Bonnie carries sooo many BEAUTIFUL ribbons to choose from! If you havent seen the Really Reasonable Ribbon shop, you will want to stop by and take a peek! You will fall in LOVE with all the ribbon she carries!!!

I also used the gelly roll pens from Scrapbookpal.com and you can find those HERE!!

Challenges Ive entered my card into are:
SCS F$A24/Its Garden Picken Time
Cinema Saturday Challenge/Sparkle or Bling(my buttons, and sparkle on the strawberry)
The ABC Challenge blog/A=August
OWH Stars and Stamps/DP from your stash!
StampInsanity/Petals and swirls
Thank you for looking and have a lovely weekend!!
Hugs,
Cheryl

Wednesday, August 4, 2010

A Little Something Notebook

 Hello everyone todays Post-it Notebook was designed for Belles 'n Whistles Summer Fun challenge & Bunny Zoe's Smmer Days Challenge!
I just love these Darling images from Belles N Whistles.

 This little sweetie I won from Bunny Zoe's challenge and I just love coloring her up, Thank you Nikki!!!!!

You can find these DARLING Images Here at Bunny Zoe's
I used copics to airbrush the notebook, and then added choc dp with airbrushing as well. I added some Vintage Lace,some trim,ribbon,and flowers to complete my notebook.

The tag is from the Quickutz machine and die. And the sentiment is from SU!
Thank you for looking and enjoy your day!!! Im off to take my son to get Senior Pictures this morning, and cant wait!!!!
Hugs,
Cheryl

Monday, August 2, 2010

ARRGGHH...

you ready for some fun?
This week the ABC Toys and Crafts DT will be focusing on MY CUTE STAMPS and they will be 15% off this week until Aug 7th at ABC Toys and Crafts Store found HERE!!

For my card today I used "Pirate Princess" and she can be found HERE!! Also dont forget you get FREE SHIPPING ON ALL CLEAR STAMPS!!!WOOOOHOOOO THAT IS AN AWESOME DEAL!!! THANK YOU JULIE!!!

I love when I complete the insides of my cards, I just think they are sooo complete when a card is done both on the inside and outside.
For my Pirate Princess I colored her with Copic markers, and airbrushed around her as well. The dp I used is SEI "Moravia" I hardly ever use this dp, and thought it would work well with the Pirate Princess stamp set.

Here are some challenges Ive entered my Card into:
Daring Cardmakers/Its a Girl Thing
Totally PaperCrafts challenge/Going to the movies(Pirates of the Caribbean movie)
Dutch Dare/Anything Goes(Inside out)
Paper Sundaes/Stitching
Creative Inspiration/Anything Goes(inside out challenge)


Lastly to complete my card I added some sewing,ribbon,flowers,and branches!

Here is a link to visit the ABC Design Blog hope you will stop by and take a peak at what the DT has been up tooo lately!! :)

Thank you for looking and hope you have a very nice day!
Hugs,
Cheryl

Sunday, August 1, 2010

Video on Distressing with Copics

Notebook Made for Alota Rubber Stamps
Hello everyone , hope you are enjoying your weekend, mine has been great so far!! Todays post is YES Another Post-it Notebook....LOL hehehehe.
 I cant help it I'm addicted to making them once again

On my post-it notebook I used this SWEET little Sweetie from Alota Rubber Stamps. Her name is Girl with Rabbit(I cut her out, and not the rabbit)

Challenges my post it notebook was designed for:
Alota Rubber Stamps /Distress it challenge
Paperplay challenge/Anything goes(distressing)
Allsorts/Dress it up!(Her dress,shoes,and hairbow)
Paper Romance/Celebration

Video On Distressing with Copic Markers!

Thank you again for stopping by and looking, hope you enjoyed the video tutorial!!!
Hugs,
Cheryl


 Alota's Distress it Challenge #40 can be found here! Also all details on how you can enter to win some super sweet stamps :) Hope to see ya there!!!! :)

Saturday, July 31, 2010

Video on my Post-it Notebooks!

Hello everyone, hope you are enjoying your weekend so far! Todays post is on My Post-it Notebooks! Ive encluded a Video below to show you how easy these are to make!
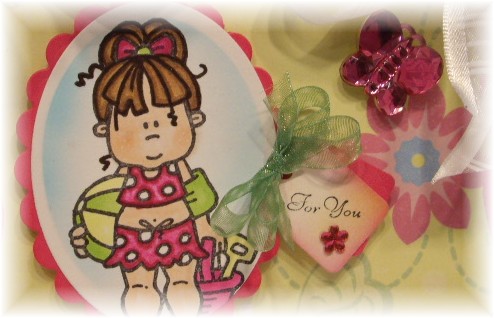
On my Post-it Notebook shown here today Ive used this SWEET Isabella Beach Girl Stamp from Alota Rubber Stamps!!! Isnt she just tooooo CUTE??!!!!!


Challenges Ive entered my Post-it Notebook:
SCS IC/Birdhouse Blessings(My Inspiration is from HERE
Treehouse Stamps challenge/Seeing Spots and Dots(Isabella's swimsuit)
Crafty Creations/Summer Lovin'
Wee Memories/Chipboard( I used Matteboard for my Post-it front &back cover)


My Video on Post-it Notebooks!

Hope you enjoyed todays video on my post-it notebooks! Thank you for stopping by and looking and have a lovely weekend!
Hugs,
Cheryl
Alota Stamps can be found HERE(they come mounted or unmounted, just add to cart and then change to unmounted there)

Friday, July 30, 2010

Think INK challenge #25 & Video on Crinkled Dp!

Hello everyone and Happy Friday to all! Todays card was designed for Artful INKables Think INK Challenge #25 Background Challenge and several other challenges!
Also
Ive encluded a Video on "Crinkle DP"

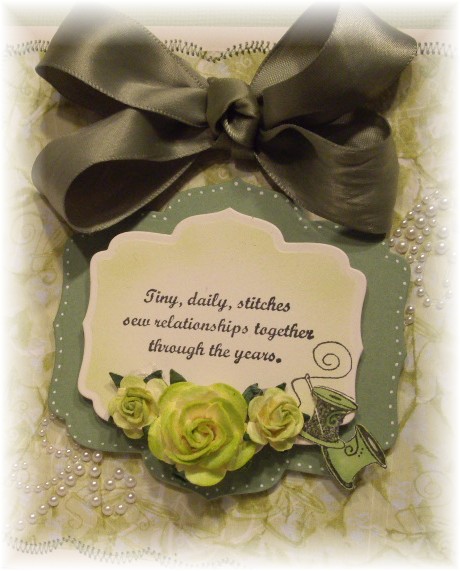
On my card I used this sweet set called "Sew You" from Artful INKables! The background DP I made using the Crinkle technique. I've done this technique in the past but had to take pictures to share , so now I wanted to update that tutorial with a video. You can view my video below!! :) Hope you enjoy it :)

I love the sentiment that I used and there are others in this sweet set found HERE!! I added some ribbon,parts of swirls, and some roses to complete my card.

Challenges my card was designed for:
Artful INKables/Design your own background paper
PaperPlay Challenge/Anything Goes
Simon Says Challenge Blog/Going dotty(I added dots to the frame, and pearls)
Treehouse Thursday Challenge/Seeing spots and dots!(my dots around the frame)
Blackleaf Designs/Use up your scraps(my dp)
GlitterBabe/Stitching
Video on Crinkle Dp!!!


Thank you for looking and I hope you enjoyed the video on the Crinkled DP!!!
Hugs,
Cheryl

Wednesday, July 28, 2010

"Sweet Monkey Love" Alota Rubber Stamps

Goodmorning everyone!
Todays post is with Alota Rubber Stamps, and these sweet Monkeys! These are the monkeys my Dear Hubby used on my Birthday card that he made just for me, and I just love them!
The monkeys were stamped 2 times on white cardstock, and then cut out and placed over the 1st stamped image. I colored them both with copics, and then added stickles to her dress and bow, and then his shorts. Tooo cute they are :) Sweet Monkey Love....LOL

The ribbon is from Really Reasonable Ribbon and I thought this ribbon was perfect for this card :) The Love and hearts are from the Martha Stewart punch, and the scallop oval frame is from SU! and its placed on the spellbinder frame.
Challenges for my card are:
Stamp Simply/Two's Company(2 bows,2 monkeys,2 hearts,2 gems, 2 different stitches,2 different frames)
Creative Inspiration/Anything Goes(Sets of 2's) 2 monkeys,2 bows,2 hearts,2 gems,2 different stitches!
Hand Full of Stamps/Punch the stress out!

Supplies Used:
Copics to color/Stickles to glitz
Cardstock-AC
Tags-SU! scallop oval/spellbinder frame
Sewing,gems,punch(for love and hearts)
Hope you will Join us at Alota Rubber Stamps "Glitter & Pearls" Challenge!!! To see more info HERE!! :)

Thank you for looking and have a lovely day!
Hugs,
Cheryl

Tuesday, July 27, 2010

For You!

Hello everyone todays card was designed for the ABC Toys and Crafts Paper Piecing Challenge!
Hope everyone had a lovely weekend, I know mine was great!!! :)

On my card I used:
Stamp-Sarah Kay from ABC Toys and Crafts Store!
Sentiment Penny Black "Tiny Wishes"
Scorpal 29.99 right now!! Awesome Price! :)
Vintage Lace/and ribbon
flower,pearls,and sewing

I just LOVE this DARLING image and it was super easy to paper piece as well! the dress was done with dp that was sent to me a couple years back in a RAK!

The ribbon was given to me by my Mom, and the lace is some Vintage lace I picked up!

Challenges Ive entered my card into are:
Practical Scrappers/to use 7 or more items!(CS,DP,LACE,RIBBON,FLOWER,SWIRLS,IMAGE,SEWING,SENTIMENT!)
Bunny Zoe's Crafts/Summer Days Challenge#2
Wee Memories/Simon Says Stamp!
The Stamp Man Challenge/Anything Goes(My card with Paper Piecing)
Stampavie and More/Anything goes
Lexi's Creations/Paper Piecing
Mami Doodles/Anything Goes(my card with Paper Piecing)

Mami Doodles/Anthing Goes(my card with Paper Piecing)


Thank you for looking and enjoy your week!!!!
Also Hope you will join us for ABC Toys and Crafts Paper Piecing Challenge!
Hugs,
Cheryl

Sunday, July 25, 2010

Birdhouse Giftset"Cindy Loo Cartridge"

This is a Birdhouse Giftbag & Card! I made this set for my Mom's Birthday and for my post for Scrapbookpal.com using the "Cindy Loo" Cartridge & Cricut Expressions!!!

To make the Card you will need:
Cindy Loo Cartridge Cricut Expression Machine
Pink,brown, and white cardstock
Embellishments:ribbon(Really Reasonable Ribbon),lace,buttons,roses,trims,swirls,and butterfly gem, stamp for sentiment!

Step 1-birdhouse(page 67)
Pink Cardstock 12 x 12 cut at 5 3/4 (FIT TO PAGE ON) (BORDER ON)(REAL DIAL SIZE ON) this will be the card base!
Step 2

Brown cardstock 12 x 12 TURN OFF (FIT TO PAGE)(BORDER)(REAL DIAL SIZE)
Now hit shift key and key THIS WILL BE FOR THE LAYER OF THE BIRDHOUSE FRONT OF CARD!
Step 3
Follow step 1 using brown cardstock this will be the inside of card(this will make it sturdy)
Step 4
Pink cardstock (shift ) for inside layer cut at 7 1/2 inch
Step 5
white card stock cut at 7 1/2 inches (once cut then take scissors and cut across the bottom of the white birdhouse to fit to inside!
Step 6
Branches(pg 48)
(shadow on)(real dial size on)1 1/4 inch cut 6 (set aside 3 for giftbag)

Make sure to score your card, and then attach layers, this card and giftbag are super simple to make and you will have alot of fun doing this project I know I did!! :)

I glued all lace,ric rac,trim, buttons,flowers,leaves and bow to card front. I then added some swirls.

For the inside I used more lace,ric rac,ribbon,roses,and trim. I then added a frame with happy birthday stamped and a gem butterfly. I left the left inside page white so there would be room to write.
TO MAKE THE BIRD-HOUSE GIFT BAG:
Using Cindy Loo Cardtridge
Step1
12 x 12 pink cardstock cut 2 at 7 3/4 inch page 67 (you can get both pinks for front and back)
Step 2
12 x 12 brown hit( shift )then cut 2 at 7 3/4
Step3
You should have 3 extra branches from step 6 on the card cuttings!
Now you will want to Decorate to your liking :)
Step 4
cut piece of pink cardstock to measure 3 1/4 x 10 1/2 this will be the bottom of your birdhouse giftbag
Step 5
score at 1/2 inch along the length (10 1/2 ) then flip and score again at 1/2 along other side
Step 6
score at 3 1/2 inches, then at 6 inches
step 7
cut like I did in picture below and then add double sided sticky tape like in picture ! do this to both sides!


I wanted to add some pictures so you could see how I put this together! I love the giftbag and card I think they turned out DARLING and my Mom LOVED them tooo!!!
Supplies Used:
Cardstock(pink brown,white)
Ribbon(Really Reasonable Ribbon)Lace,swirl pearls,buttons,flowers,trim,

I hope you like todays project, I know I had alot of fun making these, and hope you give it a try too!!!
Thank you for looking and enjoy your day!
Hugs,
Cheryl
Also dont forget to stop by the Scrapbookpal Blog to see all the DT's Work!!! Have fun!