Friday, April 29, 2016

Dance is a superpower

Hello everyone and Happy Friday to all!
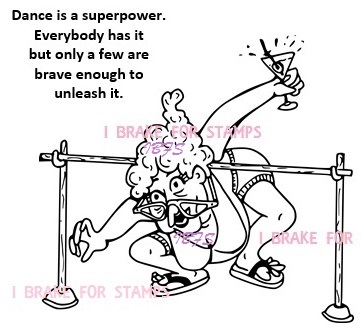
Today's card is using the Super SWEET Limbo Dance Daphne set, from I Brake For Stamps Humorous Senior Stamps. I made this card for this weeks Sketch challenge on SCS, and thought she was PERFECT for this sketch! I wanted to use some different colors as I love mixing them up a bit, so went with the red, teal, yellow, and pink for this card today.

http://ibrakeforstamps.com/images/products/detail/limbolady_set.1.jpg
My card was super simple to make, as I cut the white card stock for the base at 6" x 12" and then scored at 6" to make my 6" x 6" card.
Next I cut the blue/teal card stock at 5 1/2" x 5 1/2", and the red is 5 1/4" x 5 1/4". For the dp pieces I used 2 pieces and then a strip. The 2 main ones are5" x 2 1/2" and then 5" x 3" then I had a piece leftover and cut it5 " x 1" that is the yellow. I then added my sewing. Super EASY!! I stamped my sentiment on the chevron design paper.
 
For my image, I stamped her in black memento ink, and then colored with copics BG15,BG32,BG23. Next I used E27,E57 for the hair, and for the red I used R59. The skin tone is R00. and for the glasses I used a Red "atyou spica" pen. I did add some stickles to her outfit and flowers.
 
Lastly to embellish I used  Really Reasonable ribbons, American Crafts brads, and  some sewing!

To visit the I Brake For Stamps Store, please click on my DT badge below!
use coupon code "SAVE10CHERYL" At checkout to save 10% off your order!
http://ibrakeforstamps.com/lateststampreleases.aspx
Thank you for looking and have a wonderful weekend!
hugs to all,
Cheryl

Wednesday, April 27, 2016

Beautiful Dogwood Blossoms & Video Tutorial

Hello everyone, Today' card I created for I Brake For Stamps, using the Beautiful "Dogwood Blossoms" Stamp. LOVE this beauty! Super easy to color, and I really enjoyed using the blues and yellows here.

So my card was created for SplitCoastStampers Color challenge yesterday! I tried to get the blues as close as possible, so I did have to mix 3 colors to do so...hehehehee I do love the way they turned out & decided to make a video on how I colored them.
 
 I stamp the Beautiful Dogwood Blossoms stamp in memento black ink, and then colored them up using copic markers BG09,BG72,B18 , those were used for the blues on the flowers. Next I used Y08, & YR31 for the centers. I then added some stickles to give some glitz! 
The layers I cut a 12 x 6 black card stock, then scored at 6" to create my 6 x 6 card.
Next I cut another black at 5 3/4" x 5 3/4". then yellow Echo park dp at 5 1/2" x 5 1/2". set aside to sew later. Next  black layer was cut at 5" x 5" and then the blue design paper at 4 3/4" x 4 3/4", set this aside to sew later. Last layer was cut at 3 1/2" x 3 1/2" , then the yellow dp was cut at 3 1/4" x 3 1/4", now I take and sew each panel.
Embellishments- I added some white gel dots, Yellow ribbon, big pearl, and some green brads to complete my card for today.


I love that all the flowers are blooming right now, its so nice to see, after what seemed to be a long winter. I Brake for stamps carries so many beautiful flower stamps, and even some NEW Releases, that can be found HERE!~ All Flowers can be found HERE!
 Click on my Design Team Badge Below to take you to the I Brake For Stamps Store! Have fun!!!
http://ibrakeforstamps.com/dealoftheweek.aspx
USE COUPON CODE "SAVE10CHERYL" TO SAVE 10% OFF YOUR ORDER
 
MY VIDEO showing how I colored the DOGWOOD BLOSSOMS
Thank you for looking and have a lovely day!
hugs to all,
Cheryl

Monday, April 25, 2016

SPURS & BLING


its a COWGIRL THING.Ah I just LOVE this NEW Sentiment from The Project Bin Stamps, its called "Cowgirl Up!" and it has the cutest darn sentiments you have ever seen!
 
 So for my Cowgirl Thing card
Stamp-"Project Bin" Cowgirl UP!I used the stamp and stamped it in StampinUp! Craft Brown ink, then used a brown glitter on top. Next I cut out using an Oval die, and then airbrushed using copics RV21, B41,&E31. Next I layered it on another oval cut in pink, and then  spellbinders fancy frame die, adding white gel dots around the edges of the brown.
Design Paper- I have had this design paper for a long time, and fell in love with it when I bought it. I think I have a few sheets of each left, it is the cutest darn dp I have seen for a cowgirl...hehehee its Debbie Mum Creative Imaginations.
Layers- 6" x 12" score at 6" to make a 6"x 6" card base.
Next is the brown card stock , its cut at 5 3/4" x 5 3/4", then the design paper at 5 1/2" x 5 1/2". Next layer is the brown, and its cut a little under 5" x 5", then pink card stock is cut at 4 3/4" x 4 3/4" , then design paper  4 1/2" x 4 1/2". and lastly the banner is 4 1/4" 2 3/4", then pink is 4" x 2 1/2", design paper 3 3/4" x 2 1/4". then add sewing to all layers.
Embellishments- Dew drops, Really Reasonable Ribbon, charms, and sewing
Challenges:
Thank you for stopping by, and to see other inspiration from The Project Bin Design Team, please visit us here!
Hugs,
Cheryl

Thursday, April 21, 2016

Coincidence is....


 God's way of remaining anonymous.
Hello everyone and Happy Thursday to all! My card for today was created for The Project Bin " A Way With Words" & Splitcoaststampers "Way to use it" Challenge.

 On my card I used The Project Bins "A Way With Words" set "Wise Men" and LOVE this sentiment and all the others in this set! To see the entire set, please click HERE!

Today's Splitcoaststampers challenge consist of using a TREE, and I wanted to use this new set as I LOVE all the sentiments in it. I stamped my sentiment in Memento Black ink, and then used a spellbinders die to cut it out. For the coloring on it, I kept the die on top and then airbrushed using copic BG32 , that way the main image was colored to coordinate with my card.

Next I had a piece of a die cut frame laying around on my work station, so I colored it with copic R39 so it too would match up. I layered it on top of a scrap piece of pink card stock, and then used a circle punch to cut all four corners of the pink. Love how you can do that with punches to give your layers a different look

Speaking of layers -
First is my card base 6" x 12", score at 6"
Next is  the blue at 5 3/4" x 5 3/4", then the striped echo park "Sweet Girl" dp, and that was cut at 5 1/2" x 5 1/2". Next layer is a blue card stock at 5" x 5" , then red at 4 3/4" x 4 3/4", and dp at 4 1/2" x 4 1/2". next layer is 4 x 4 , then dp is 3 3/4" x 3 3/4", then add all sewing to all panels.
Main Sentiment panel is 3 3/4" x 2 1/2"

Embellishments would consist of Stickles, gems, sewing, and Really Reasonable Ribbon.
Challenges:
Clear it Out Tuesday/Spring is Here
Craft-Dee Bowz/anything goes with a handmade bow
Crafty Boots/use a sentiment
Craft your passion/Anything Goes
One Stitch at a Time/Anything with wings(my bird, and butterfly!


To see all creations designed by the Project Bin DT please visit the Blog HERE!
Thank you for stopping by, and have a lovely day!
hugs to all,
Cheryl

Tuesday, April 19, 2016

IBFS Beautiful Mums

Hello everyone, and Happy Tuesday to all! So today's Splitcoaststampers challenge is a cute one....hehehehe its called "I lost my Honey in a Gray Lagoon" hahahaha gotta love this one! So the colors for this week are Hello Honey, Basic Gray, & Lost Lagoon. LOVE them!!! Also designed my card for I Brake For Stamps, using the Beautiful Large MUMS!

My card Measures 5 1/2" x 5 1/2"
Coloring my mums with Copics YR31, and for the greenery I used BG10 & BG72. I also went over parts of the flowers with glimmer paints Sea Foam, Sunshine, and buttercup, these are CIP's, I have had them for a long time.
 
Die cuts I used are Spellbinders LOVE their fancy corners and square frame! The design paper is Echo Park For the Record 2, I have had this pack for many years, and I have been trying to use up some of the older collections lately. Boy do I have a long way to go...hehehehe funny how we always seem to need more papers. NOT! hahahah
 
Ribbon is OLD it is Vintage Seam Binding that I received for free. LOVE that! I used a color that matches pretty close, and then the gray and white are the same roll, funny it came that way with 3 different colors. I also used some dew drops as embellishments for my card today.

 
Challenges :
Splitcoaststampers Color Challenge
Corrosive Challenge/Girls ,ladies, women
Clear it Out Challenge/Spring/Nature I used flowers and dew drops ,old papers
Deep Ocean Challenge/Spring is in the air(Flowers for me)
The Paper Shelter/Flowers everywhere
http://ibrakeforstamps.com/search.aspx?find=large+mum

To SAVE 10% off your order from I Brake For Stamps, Please use COUPON CODE "SAVE10CHERYL"

Have a wonderful day and thank you for stopping by!
hugs to all,
Cheryl
 

Thursday, April 14, 2016

The Flower Effect/Video Tutorial

Hello everyone today's card was designed for I Brake For Stamps & Splitcoaststampers way to use it challenge....LOL this challenge was to use inspiration from an Ad! Oh boy, the only ad I could think of was the Jake from State Farm ad....LOL hahahahaha so I knew there were flower ads, and found one on youtube called "The Flower Effect" , so that is where my inspiration for todays card came from.

So for my card I used Cherry Blossom with Dream stamp from I Brake For Stamps. LOVE this image, and the coloring was super easy as I airbrushed it. I do have my video tutorial below for you to view. Also did the Glass Flower Technique on this. As I LOVE the look of these flowers and love how they keep their shape.
 
My write-up for todays post will be short and sweet!
Supplies Used:
I Brake For Stamps/Cherry Blossom With Dream (SAVE 10% by using Code "SAVE10CHERYL" AT checkout.
Dp- Heartfelt Creations(they were scraps)
Ribbon- Seam Binding from RRR
Pebbles pearls, Jolee pearls for flowers
Embossing Powder
Heat gun/air brushing system/glue gun/glue pad
Bazzill card stock
Copics, Distress ink , White Gel Pen


Challenges"
In the Pink/use pink pearls
Southern Girls/Pattern paper free for all
Cute Card Thursday/Handmade embellishments(flowers and butterfly,bow)
Crafty Creations/Stitching
 
Thank you for looking and have a lovely day!
hugs to all,
Cheryl

Wednesday, April 13, 2016

Happy Birthday Cupcake

 Hello everyone, and Happy Wednesday to all!!!
Today I wanted to do a quick post to share my card designed for The Project Bin, & Splitcoaststampers Sketch Challenge today!
I LOVE LOVE LOVE this Cupcake Stamp, its so perfect for a Birthday card. I have plans for this one, but cant say, as I don't want the receiver of this to know.....hehehehehe I LOVE cupcakes, they are sooo yummy, so when I saw this stamp I knew it was perfect! Love the saying on it, its so true!!!
 
On my card I used the Darling Happy Birthday & Cupcake from The Project Bin "Fun is Good" set. It was stamped in Memento black ink, on white card stock, and then airbrushed with pink and blue. Next I stamped the cupcake 3 times, and colored with brown and pink, adding some stickles for glitz, and for the cherry I used a viva pearl pen in red.
 
The paper I used is OLD from The Greeting Farm, its one of my FAV's for cupcake design paper, I keep this put up in a cabinet, so I don't use it very often, as I cant replace it.
 
Ribbon is Really Reasonable Ribbon, it was a piece hanging on my wall rack, and I figured I better use it....hehehehe
 
Buttons came from different button packs. I did use Twine through the buttons, and added some sewing, and dots.

 Challenges:
Splitcoaststampers Sketch Challenge
Tuesday Throwdown/Use your diecuts
Craft-D-Bowz /Anything goes with a handmade bow
Craft Your Passion/Anything goes
Crafty Boots/Use a Sentiment
Melonheads Friends Challenge/Let's Get Girly
Thank you for stopping by, and have a lovely day!
hugs to all,
Cheryl

Tuesday, April 12, 2016

Super EXCITING NEWS!!!!!/Video Tutorial

Hello everyone, and Happy Tuesday to all!
Today I have some very EXCITING news that I have wanted to share with you all! I am now designing for The Project Bin Company and today I am using A Way With Words "Wise Women" Stamp Set! I LOVE these stamps, as they aren't just a sentiment, they have some design to them as well, and LOVE that! They are so unique, and I LOVE that too! I am Honored to have been chosen to design for this AWESOME company, and cant wait to share all my designs using their beautiful stamps!!!
So my card for today was designed for Splitcoaststampers Color challenge. We were to use 3 colors being Old Olive, Bermuda Bay, and Elegant Eggplant. I match my colors to them as close as possible. I did add in some neutrals being cream and black.
 
Layers-
I started with black 12" x 6" card stock, and then scored at 6" to create my 6" x 6" card base. Next I cut my black card stock at 5 3/4" x 5 3/4", then the cream design paper at 5 1/2" x 5 1/2"/ added sewing. The next layer is cut at 5" x 5", then the green design paper at 4 3/4" x 4 3/4", then added sewing. Next I cut black card stock at 4 1/4" x 4 1/4", then the DCWV design paper at 4"x 4"then added sewing.
The Project Bin Stamp- I used the NEW Project Bin A Way With Words "Wise Women" stamped in Tim Holtz Distress Ink Chipped Sapphire and stamped on a cream design paper, then I distressed the edges using Antique Linen.
Dies- spellbinders for the corner brackets, and I also used one of their frames, and a corner bracket behind the top of it.
Leaves- Really Reasonable Ribbon leaves
Dots- Pebbles Glitter Dots
Ribbon-from my stash(Hobby Lobby)
Flowers- Video tutorial explains it all :) hehehehe
 
Video Tutorial using paint and Glass Flower Technique
Challenges:
SCS/Color Challenge
Creative Card Crew/#110 Die cut
Digi Choosday/Emboss It
Tuesday Throwdown/Use your diecuts
Craft-D-Bowz Challenge/Anything goes with a handmade bow
Colouring in Scrapland /Bingo(Flower, pearls, and die)
Love to Scrap Challenge/The Big Bow Theory
 
Thank you for looking and have a lovely day!
hugs to all,
Cheryl
 

Try it on Tuesday Guest designer


Hello everyone, and Happy Tuesday to all!
Today I have a card I made for I Brake For StampsTry it on Tuesdays "Mood Board" challenge. Also super excited to be Guest Designing for this months challenge !!
 
Click for Options
 
I'm loving the colors on this card, as there are so many, but mostly you see the blue,yellow and red. I have hints of pink & Green on here as well. We were to be inspired by the Mood Board, and you can see that here!
 
My card was simple to make and it measures 6 x 6
Layers-First layer is 5 3/4" x 5 3/4" then the dp yellow is 5 1/2" x 5 1/2". I then cut my next panel 3 3/4" x 5" then the dp panel on that is 3 1/2" x 4 3/4". Next one is cut 4 1/4" x 2 1/2" and then the red dp panel is 4" x 2 1/4" all glued using ATG gun, and then added my sewing with the sewing machine
Stamp- I used the IBFS sentiment and stamped it in memento black ink, and on white card stock. I then cut out using CottageCutz oval and dusted around the inside with Tim Holtz distress ink spun sugar.
Spellbinders- super simple, just cut white printed card stock by bazzill using spellbinders corner brackets. I did add some Enamel Dots to these.
Ribbon- Ribbon is velvet and from RRR I received this years back, but have always loved using velvet ribbon, as it makes the cards look so pretty. I added some RRR leaves, and Sweetheart Blossoms to the bows.


Supplies Used:
Echo Park Sweet Girl paper pad
Really Reasonable Ribbon/Velvet ribbon/ Sweetheart blossoms/leaves
Random flowers/Tim Holtz distress ink
Spellbinders corners/CC ovals
Bazzill Blue bling paper
Sewing, Dear Lizzy Enamel Dots

Challenges-
Try it on Tuesday- Mood Board
Really Reasonable Ribbon Challenge/
Thank you for looking and have a lovely day!
hugs to all,
Cheryl

Thursday, April 7, 2016

Shabby Chic /Jesus is the Key

Hello everyone and Happy Thursday to all!
Today's card was created for 4 challenges , and those will be listed below. I truly enjoyed creating this Sweet Shabby Chic card this morning!

I absolutely LOVE this design paper from ODBD is called Blushing Rose Collection. The NEW stamp I just received this week is called "Key to Happiness" as is also from Our Daily Bread Designs.
 
My card measures 6 x 6
Layers- cut white card stock 6 x 12" then score at 6"
Next layer is white 5 3/4" x 5 3/4" with the green design paper being 5 1/2" x 5 1/2", then added sewing to that layer
Next layer is a white piece of card stock ct 5" x 5" and then used Martha Stewart punch around the page, and the design paper piece is 4 1/4" x 4 1/4". I did add sewing to this one as well
Dies-I used Spellbinders corners, and then cut CC fancy frame and layered with CC oval stitched die. I dusted the center of the oval with Spun Sugar distressed ink from Tim Holtz.
Stamps-Our Daily Bread Designs "Key To Happiness" Love his saying
Ribbon- Really Reasonable Ribbon/Flowers are from there as well, they are Sweetheart Blossoms.
Punches-Martha Stewart Punch around the page, and branch punch
Sewing, half backed pearls
Challenges:
Splitcoaststampers/WT578 challenge(Shabby Chic)
ODBDSLC272 Challenge/Recipe(O)for ODBD stamps (D) for Double Stitching(B)for Bow&Bling(D)for Dies used
Really Reasonable Ribbon/Flowers with Ribbon and Trim
Word Art Wednesday/Anything Goes with uplifting sentiments
 
Thank you for looking and I always enjoy reading your SWEET Comments!
hugs to all,
Cheryl
 

Wednesday, April 6, 2016

Vintage Greetings(Birthday)

Hello everyone and Happy Wednesday to all!
Today's card was created for Splitcoaststampers Sketch Challenge & I Brake For Stamps using the Manly Large Vintage Auto Stamp. LOVE this stamp as its not only vintage, but its also manly, and works perfect for Birthdays/Fathers Day/or just to say hello!
It's funny, when I was all done with my card, I was taking the photo's and thinking something is missing...hmmmmm I thought maybe it was a BIG BOW!!!!LOL NO..... I thought maybe some brads or something, as I am used to lots of layers and embellishing. Anyways I am pleased with how this one turned out, as it is for a man, and im sure the last thing they want to see is a big bow....hahahahaha
 
Card Base is 12 x 6 and scored in the center at 6".
Layers-then cut my brown card stock at 5 3/4" x 5 3/4", the Polka dot(crate paper bundled up Noel) design paper is cut at 5 1/2" x 5 1/2",I did add 2 strips of another design paper down the left side, it is bazzill (Dino Mite sharp tooth) and then sewn together. Next the brown card stock panel is cut at 5 x 2 3/4"  and then the design paper (calico state fair)at 4 3/4" x 2 1/2", and sewn together.
Vintage Auto image was stamped in Memento black ink, and stamped on white card stock, then colored with copics E57, T0 , and C5, and then cut down to 4 x 2 1/2" and then I distressed the edges with antique Linen. Its layered on brown card stock, and that is cut at 4 1/4" x 2 3/4". No sewing to that layer
HAPPY- is done with Thickers
Polka Dot Ribbon- Cut to look like a banner tag.
 

Large Vintage Auto photo is linked to the I Brake For Stamp store
http://ibrakeforstamps.com/dm66largevintageauto4-14x2-18.aspx


To SAVE 10% off your order please used COUPON CODE " SAVE10CHERYL"
http://ibrakeforstamps.com/
Thank you for looking!
hugs to all,
Cheryl