Hello everyone, Today I'm sharing my Beautiful card created usingClub Scraps Christmas Thyme Collection. I Absolutely LOVE this collection of Beautiful Design papers and card stock, and my Favorite design paper in this collection is this one used on my card here.
I chose to make some Cheery Lynn Poinsettia's out of the wine colored card stock, and the other brownish, wine colored one as well. I ran my die through the machine 1 time for each color, glued them together, and then added some of the green card stock for the leaves.
Now for Club Scraps Tool and Stash Challenge this month is to use some sort of Sparkle (Liquid Glitter) on your card or project. I chose Stickles in a green for the leaves, and a darker green for the wreath on the door. I also used red stickles on the berries under the windows.
My card was created using the green card stock that comes in this collection, the wine colored card stock, and the 1 sheet of design paper for this card. My card does measure 5 3/4" x 5 3/4"
The Merry Christmas banner is from AC and was from my stash.
Awwww LOVE this sentiment!!!! Hello everyone and Happy Friday to all!!! Yes its the WEEKEND!!! wooohooo :) Today's Manly card was created for The Project Bin & Really Reasonable Ribbon! Yes its that time again for our challenge over at the Really Reasonable Ribbon blog, and this time around its a MANLY challenge :)
Really Reasonable Ribbons May assortmentis what I used on my card for today, LOVE the RED, WHITE, & BLUE! So I decided to keep with the Manly theme challenge, and use the ribbon for banners with the buttons. I thought it worked perfect!!! LOVE all the ribbons Bonnie had put together in this assortment for May! I LOVE this sentiment from The Project Bin "Anchors Away stamp set" as it is so sweet, and reminds me of being on the water in our boat. Its been a LONG time since we have taken our boat out on Utah lake, as the water level is super low, and we don't want to take any chances of ruining it. We do have tons of lakes here in Utah, and hope to be bringing it out to them this year. :) I also love the sailors cap with this sentiment, isn't is just too cute!???
The dp I used is a mix match of different ones I have in my stash. I did use Bazzill Bling Blank Check, and Then American Crafts Red. I added sewing in Blue and red to compliment my card. Love adding sewing as its an embellishment in itself!
To see all other cards by the RRR Design Team for our Manly Challenge , please visit the Really Reasonable Ribbon Blog here!
Hello everyone and Happy Thursday to all! Today I made my card for The Project Bin Stamps using A Way With Words Set"Wise Women"! Love these sentiments as you can get so creative with them. On my card for today I did just that!
My Sentiment was stamped 3 times- Once on the white card stock that I cut out with a spellbinders die, and airbrushed with red copic marker, next on the blue design paper, and then on the pink design paper. I wanted to use all 3 colors that I used on my card for today.
Card Base- Measures 5 1/2" x 5 1/2" and cut in white Next my blue layer is cut at 5 1/4" x 5 1/4" , then pink at 5" x 5", and red polka dots at 4 3/4" x 4 3/4"
4 3/4" x 3 3/4" is the next panel in pink, then red is cut at 4 1/2" x 3 1/2", and then blue design paper at 4 1/4" x 3 1/4", and then I added my sewing. I always use just one short run of ATG tape and then add my sewing. That way my layers at least stick, but sewing them surely keeps them together for years and years to come. As most of us know, tape does over the years break down due to air exposure .
Embellishments- For my Ribbon, Flowers, and Leaves, those are all from Really Reasonable Ribbon. The doily is CheeryLynn , and the dots are from American Crafts . Sewing is done in red, and then a blue. Challenges: Crafty Gals Corner/ polka Dots or stripes Paper Craft Crew/Flowers Simon Says /Flowers The Crafty Addicts/ sentiment and anything goes! CheeryLynn Challenge/Red White & Blue(I did add some Pink) just had to :) hehehe
Thank you for looking and have a lovely day! To see more inspiration from the Project Bin Design Team visit us HERE! Hugs to all, Cheryl
Today's card was created for Splitcoaststampers Color Challenge. So glad to play along today, as I haven't felt good for the last 3 days. LOVE these colors, and this YUMMY Strawberry from I Brake For Stamps. SAVE 10% off your Order using COUPON CODE "SAVE10CHERYL" at checkout! Also be sure to stop by the store to see all NEW Releases!!! :) Have fun!!!
On my card today I used the YUMMY Strawberry stamp from I Brake For Stamps "Flower & Strawberry Sheet"I colored it with R39 & R59 for the strawberry, then for the leaves I used YG03, YG95, G24. I did add some glitter pen for the seeds, not sure you can tell from this photo.
The Design papers are from Pebbles Americana Stack, and Pebbles for the Pebbles Polka dots its from the Back to School line. The ribbon is from Really Reasonable Ribbon, and my doily is from Cheerylynn dies. I also added some sewing and a ladybug button to complete my card for today!
Challenges: Cheerylynn Mothers Day theme challenge
Card Measures 5 1/2 x 5 1/2 and was cut at 5 1/2" x 11" then score at 5 1/2"
Layer 5 1/4" x 5 1/4" rust color card stock, and then La Crème paper pack (for Cream design paper)cut at 5" x 5" . 4 1/2" x 4 1/2" rust color, cream color is 4 1/4" x 4 1/4", design paper graphic45 steampunk debutante cut at 4" x 4".
Dogwood Blossoms- are from I Brake For Stamps/I colored them to match my dp, using copics E15,E31,E43,then I used Copper Stickles to add a little glitz to my dogwood blossoms.
Dies-The Corner brackets I cut using Spellbinders and the copper looking card stock. The Doily is CheeryLynn and I cut cream colored card stock for it.
Really Reasonable Ribbon Satin Buttermilk with gold metallic edges I love the way this ribbon works up to make beautiful bows!!! I also added a vintage button to the center of my bow.
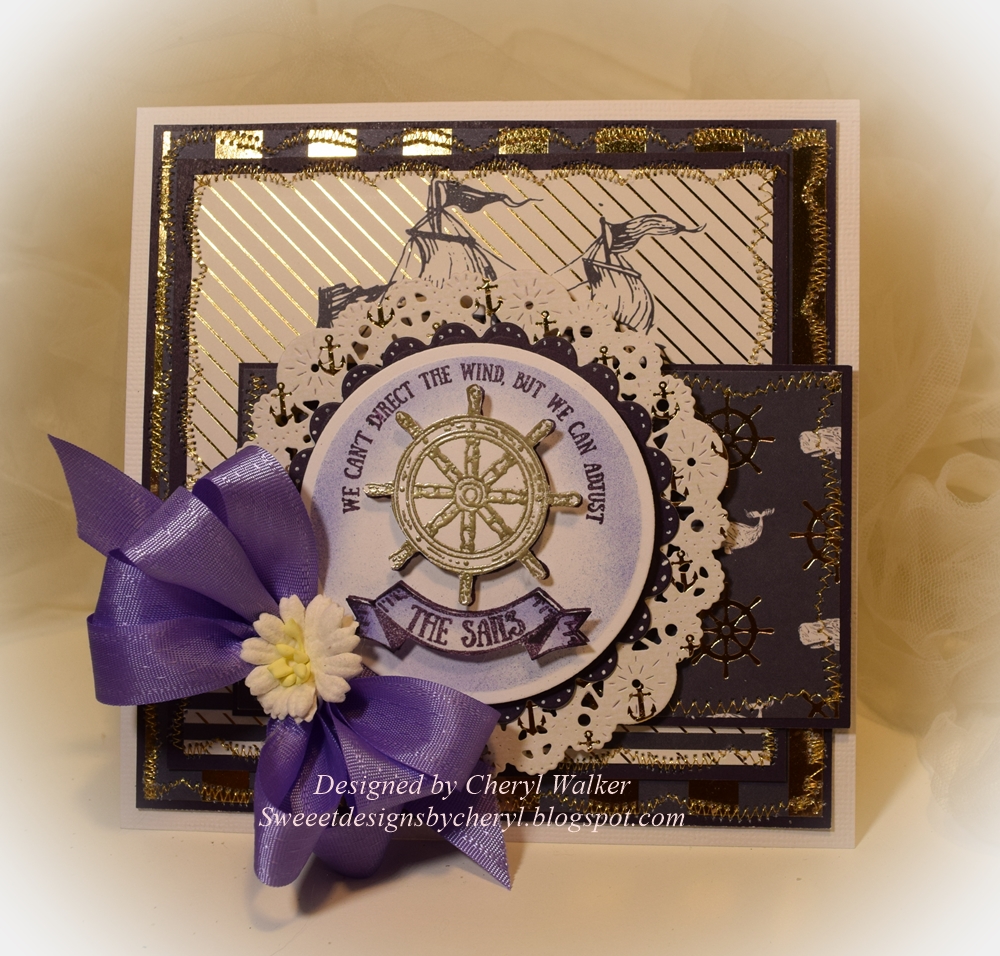
This one was a easy card to make. I used DCWV Seaworthy Stack & The Project Bin Stamps. I received this stack over a year ago for free and have been waiting to use it..hehehehe it goes perfect with this stamp set called "Anchors Away"!
Stamped my The Project Bin image Anchors Away- Pansy Purple from close to my heart. then stamped in glue pad and used platinum embossing powered for the center. Next I inked up just the banner part in black, and stamped it, fussy cut, and then airbrushed it.
Hello everyone, and Happy Thursday to all!!!! LOVE this sentiment "IT'S KINDA FUN to do the IMPOSSIBLE", this sentiment is from The Project Bin Stamps.LOVE all the sentiments they carry, as they are all unique and super SWEET!!! If you haven't had a chance to check out their site, you might want to stop by and take a peek, lots of Stamping Goodness there!
So on my card for today I used the Wise Men stamp set to create my card. My sentiment is a fun one, that I LOVE from The Project Bin. I stamped it in Pansy Purple and then again in black(to cut the banner out), then airbrushed the banner in BV04, and fussy cut out. Next I airbrushed the main sentiment in B00, BV04, and YG03 green(its under the flowers) I then cut with spellbinder shape die. I backed the top with a spellbinders corner die cut.
The flowers are die cut using Posey Patch,and I did cut them out on a blue'ish design paper, and then airbrushed each flower with B00 & BV04, then did the Glass Technique on the flowers. I'm sure by now most of you know I LOVE making these flowers. I cant tell you how well they seem to keep their shape, and I LOVE that!
To add the green I used Really Reasonable Ribbons Seam Binding in moss Green. that was another one of the colors for Splitcoaststampers Color Challenge. The blue can be found in the Seam Binding as well. So the colors were 2 shades of purple, and a blue & Green. LOVE these colors together!
I used a CheeryLynn Die its the doily one. And then used some spellbinders dies as well.
The Design paper is GCD Studios, love this dp! its beautiful!
Hello everyone today's card was designed for I Brake For Stamps & Splitcoaststampers way to use it challenge....LOL this challenge was to use inspiration from an Ad! Oh boy, the only ad I could think of was the Jake from State Farm ad....LOL hahahahaha so I knew there were flower ads, and found one on youtube called "The Flower Effect" , so that is where my inspiration for todays card came from.
So for my card I used Cherry Blossom with Dream stamp from I Brake For Stamps. LOVE this image, and the coloring was super easy as I airbrushed it. I do have my video tutorial below for you to view. Also did the Glass Flower Technique on this. As I LOVE the look of these flowers and love how they keep their shape.
My write-up for todays post will be short and sweet!
Today's card was created for 4 challenges , and those will be listed below. I truly enjoyed creating this Sweet Shabby Chic card this morning!
I absolutely LOVE this design paper from ODBD is called Blushing Rose Collection. The NEW stamp I just received this week is called "Key to Happiness" as is also from Our Daily Bread Designs.
My card measures 6 x 6
Layers- cut white card stock 6 x 12" then score at 6"
Next layer is white 5 3/4" x 5 3/4" with the green design paper being 5 1/2" x 5 1/2", then added sewing to that layer
Next layer is a white piece of card stock ct 5" x 5" and then used Martha Stewart punch around the page, and the design paper piece is 4 1/4" x 4 1/4". I did add sewing to this one as well
Dies-I used Spellbinders corners, and then cut CC fancy frame and layered with CC oval stitched die. I dusted the center of the oval with Spun Sugar distressed ink from Tim Holtz. Stamps-Our Daily Bread Designs "Key To Happiness" Love his saying Ribbon- Really Reasonable Ribbon/Flowers are from there as well, they are Sweetheart Blossoms. Punches-Martha Stewart Punch around the page, and branch punch Sewing, half backed pearls
Today I wanted to share my card I created for SplitCoastStampers challenge using the BEAUTIFUL I Brake For Stamps "Victorian Boot"!I also used the beautiful Phrase "Bouquet of Love" , and stamped just the Love for you part on my card. LOVE that about stamping, you can always pick the words if you don't have enough room to stamp all.
My Card Instructions:
Card Base-
Cut White card stock 5 3/4" x 11 1/2" and score at 5 3/4" so you can fold in half. Next I cut my blue'ish colored card stock at 5 1/2" x 5 1/2 " and the dp on that at 5 1/4" x 5 1/4".
Card Layers-I then cut a 5 x 5 piece of white card stock to create the frame, using Martha Stewart punch around the page. It will change the size depending on what design you pick, however I always measure the center piece and then cut my dp to fit. so for this punch I did cut my PINK heart Design Paper at 4" x 4". Next I cut another white card stock at 3 1/4" x 3 1/4" and then a piece of the blue ' ish colored card stock at 3" x 3" to fit behind the white top frame. All layers were sewn with the sewing machine and pink thread.
My image was stamped in memento black ink, and then colored with copics. I colored the boot in E37, and then used E29 for the laces. for the flowers I used -RV11,RV34,BG000,B00, & V09 is the violet. I then added some Eucalyptus colored stickles, and some clear stickles to my image, & then fussy cut my boot and flowers. Lastly I added a vintage feather behind it, and popped it off the main top layer.
Bouquet of Love - I colored the words "Love for You" with Chromatix black pen, and then stamped on the top layer of my card.
Embellishments-Gems, flower brad, vintage ribbon, and a vintage feather
White and Blue card stock/Left over AC design Paper & Pebbles dp
Copics for coloring/Stickles for embellishing
Gems, Brad, Vintage Feather, Vintage Ribbon,sewing, Martha Stewart punch around the page
I absolutely LOVE this Victorian boot and coloring it was very easy. It reminds me more and more of spring, and I really cant wait for the flowers to bloom. I do have some tulip's that are coming up right now, and cant wait to see those. They are located in my front yard! Here in Utah, winter months are dull, except when the snow it on the ground, tree's and mountains. In California I was used to everything being green in the winters....heheheeh
Hello everyone, and Happy Tuesday to all! today's card was designed for a couple of challenges, one of those being Our Daily Bread Designs, and the other is Really Reasonable Ribbon. I wanted to make another one of these super fun folds, and this one has a hidden message inside. I have a Video Tutorial below for you to view and see how easy these are to put together. Hope you enjoy!!
Instructions: Card Base-Spellbinders /CottageCutz all different sizes find what sizes you like to layer best, as you can go larger or smaller with this card base. Then its all about layer up with Design paper & Card Stock layers. Brads for holding together and cropadile to punch holes
Rose was done-Embossing Powder /glue pad/heat gun(large Rose)
Rose- Was stamped 2 times in memento black ink, on white card stock. I then colored both images with copics RV21, RV02, RV11, RV34, I left 1 image and then cut the other one up so I could layer it and make my rose 3-D. I used the glue pad to dab each piece into, and then dipped into clear embossing powder, repeat that several times until you get the desired look you like. Normally I can dip about 3 times. I then use hot glue, and glue each peace on top of my flat image.
Birthday Blessings Tag- was just stamped in memento black ink, on white card stock, and then cut down to size that would fit my card. I layered with some leftover border pieces I was going to throw out, but decided to use it up, behind my sentiment. I then glued it to a piece of Lace. Next I added the floral piece, its from CottageCutz and was left over from the fancy oval. I colored it with RV34,RV21,RV02 , and for the greenery I used YG03 & YG95, and then added some pearls . Butterflies were stamped in memento black ink, an then colored with copics RV34,RV02,RV21, then I added some of the glossy accents to them and set aside to dry, after they dried I added pearls.
Envelope- was made using the Envelope punch board from We R Memory Keepers. I used the Card size 4 1/2" x 4 1/2" to create my envelope as shown here. when the envelope is all folded up it ends up measuring 4 3/4" x 4 3/4"that way there is plenty of room for a 3-D card to fit inside. This one can be mailed out with USPS, but I will be giving it in person.I did add some Lace, and a die cut piece from the scrapping cottage.
Supplies: Design Paper-ODBD blushing rose collection, cardstock bazzill, su Stamps-ODBD Blossom for rose, ODBD Happy Birthday set(butterflies, happy birthday, birthday blessings, and may you be blessed)ODBD Mom set-(mom) Copics RV21,RV02,RV11,R20,RV34YG03,YG95 Glossy Accents for the butterflies Embellishments-Brads,lace, cropadile, ATG , Helmar 450,WOC Leaves , Really Reasonable Ribbon lace WOC leaves(found at Really Reasonable Ribbon) Ribbon I used is Satin also from RRR Extra's - CottageCutz circle frames, stitched circles dies, Be Mine die,spellbinders frames, We R Memory Keepers envelope punch board, brads, glue.
Today's card was created for 3 challenges/Splitcoaststampers Color Challenge, CheeryLynn's Doily Challenge , & ODBD Scripture & Lace Challenge. Absolutely so glad to be able to join in on these challenges this week, as for the last past week I had been sick, but much better now :)
For my card I started with American Crafts card stock in white(5 3/4" x 11 1/2") and fold in center at 5 3/4",then black cs for all the layers except the doily. Next I used G.C.D Studio's Ella Blue design paper, and spritz it with Tiger Lily. The doily I used is CheeryLynn's French Pastry. The circles were cut using Spellbinders dies, and then I spritz the sentiment layer with tiger lily, Mister Hueys Cameo, and Walnut Gold spritz. I stamped my verse from ODBD Bloom set. And the Rose is from the Blossom set. I just received both sets in the mail, and LOVE them! I colored the rose with markers and then used Cameo spritz over it, and colored again. Made the color change a tad bit. The leaves behind are GLASS :) love these, I bought them years ago I think in the jewelry section at Roberts.
Ribbon is from Big Lots, and the lace is from Really Reasonable Ribbon.
Challenges: Color Challenge/SCS /Dessert option is DOTS, so I added tons in white. Doily Challenge#224/CheeryLynn(French Pastry) Scripture & Lace Challenge/ODBDSLC272Our Daily Bread Designs
Supply List: Our Daily Bread Designs Stamps/BLOOM & BLOSSOM CheeryLynn /Doily French Pastry American Crafts Card Stock/white and black G.C.D/Ella Blue Embellishments/ Ribbon, Lace, Glass leaves, spellbinders, and white gel pen Coloring /Memory Markers and Chromatix, spritz
Today's card was designed for I Brake For Stamps using the Beautiful "Flowers" stamp. Absolutely LOVE this stamp, and the colors I chose to use on these flowers. My card I am entering into 2 challenges today/1st being Splitcoaststampers "Color Bingo" Challenge, and 2nd is Really Reasonable Ribbons "Show Me the Green" Challenge.
Card Measures 6" x 6"
Supplies Used:
Stamp used :Flowers from I Brake For Stamps. Stamped in Memento Black ink, and I dusted them in Dusty Concord distress ink, and then used a Ne-Opaque yellow for the centers. I ended up using my favorite Glass Technique on this, as I am addicted!!! hehehehe for the leaves I colored them in copics YG95, YG03,YG13.
Dies- Spellbinders
Design Paper: Basic Grey Origins paper pad, and green card stock from American Crafts.
Embellishments: Really Reasonable Ribbon, Half Backed pearls, and vintage buttons.
I absolutely LOVE the way this card turned out, and love the color combo! There were sooo many FUN color combo's to choose from, but this one really caught my eye. I really enjoyed coloring these beautiful flowers :) The design paper I have had for years, and thought it would be a good idea to start using up so of my older paper collections. I have sooo many of these 6 x 6 paper pads, there is no way I will ever use them all. YIKES! hehehe When I make some time, I will show how I have been making my flowers, as its super fun, and I LOVE the look of these. Hope you enjoyed my post today!
If you would Like to SAVE 10% on your order from I Brake For Stamps, please use COUPON CODE "SAVE10CHERYL"
Hello everyone and Happy Thursday to all! Wow its hard to believe we are already in March!! YIKES time sure does fly as we get older....hehehe
Todays card is "So Grateful for you" created using Heartfelt Creations Beautiful flowers Dies & Design paper. Absolutely LOVE their flower stamps and dies!
I used the Vintage Floret Collection by Heartfelt Creations. LOVE this paper, and love the vintage shabby chic truck. I have always enjoyed working with their stamps and dies, and felt I needed to start bringing out all my old stamp collections. I have soooo MANY of them...
Flowers- were created using Rose Creations Die, I just used the matching dp and cut out. I used weathered wood distress ink by Tim Holtz to dust my flowers, and added some Mist in Silver Sugar over the tops. Now the centers were done using Vintage Glitter Glass in "600 Indian Summer) love the look of these!
Butterfly-Cut in white card stock, and then airbrushed with R11 & distressed with weathered wood ink. I added some of the glitter glass to the butterfly as well (600 Indian Summer) I also added some dots with the viva pearl pen!
Leaves- I left them in the die and then dusted them with Shabby Shutters distress ink. Gives a 2 tone effect for those. They were cut using the Rose Creation Dies as well.
HC Lace Die-was cut using white card stock, super simple and no fussing to get out small pieces!
Bow-My bow was created with 3/8" satin ribbon from Really Reasonable Ribbon!
Today my card was created for Splitcoaststampers Sketch challenge. Absolutely LOVE this sketch as it has lots of layers, and I love layers!!! I made this card last night before bed, and it took me about 35 minutes to make, as I had 8 flowers prepped, and 2 that needed to be done.
I love when I have extra flowers cut out, and it made me start thinking, that maybe when watching a movie I should bring up my cutter and start cutting them, to have ready to airbrush,paint,dust, or do whatever to. It really makes the card come together much faster if you have them prepped like I did :) hehehe Anyways I used Heartfelt Creations Stamp sentiment, and then the Posy Patch die for the flowers, They were stamped but you can hardly tell, as I used Creative Inspiration Paints on the flowers to try to match up with the dp. I used the color Burnt Clay! I then did my glass technique on them. LOVe it, and then added some pearls to the centers. these are a little different, s they have some glitter or something on them. Not sure what it is, but they are pretty! The branches are from Martha Stewarts punch, and the doily is from Cheery Lynn Dies!
The dp is from Heartfelt Creations too, and I added some sewing to each panel. The sketch is available on SCS here if you would like to join in on this fun challenge!