Showing posts with label Video on Crinkled DP. Show all posts

Friday, July 30, 2010

Think INK challenge #25 & Video on Crinkled Dp!

Hello everyone and Happy Friday to all! Todays card was designed for Artful INKables Think INK Challenge #25 Background Challenge and several other challenges!
Also
Ive encluded a Video on "Crinkle DP"

On my card I used this sweet set called "Sew You" from Artful INKables! The background DP I made using the Crinkle technique. I've done this technique in the past but had to take pictures to share , so now I wanted to update that tutorial with a video. You can view my video below!! :) Hope you enjoy it :)

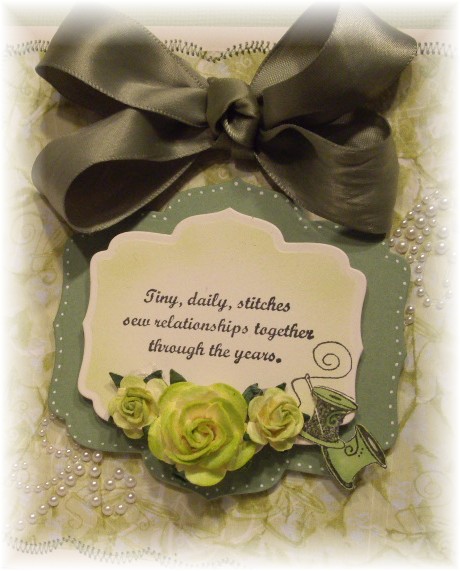
I love the sentiment that I used and there are others in this sweet set found HERE!! I added some ribbon,parts of swirls, and some roses to complete my card.

Challenges my card was designed for:
Artful INKables/Design your own background paper
PaperPlay Challenge/Anything Goes
Simon Says Challenge Blog/Going dotty(I added dots to the frame, and pearls)
Treehouse Thursday Challenge/Seeing spots and dots!(my dots around the frame)
Blackleaf Designs/Use up your scraps(my dp)
GlitterBabe/Stitching
Video on Crinkle Dp!!!


Thank you for looking and I hope you enjoyed the video on the Crinkled DP!!!
Hugs,
Cheryl

Sunday, September 6, 2009

Corrosive Challenge #28 Here Kitty Kitty!! Tutorial on Crinkled dp!

This challenge is done by Janet over at the Corrosive challenge blog, and the challenge this week is to use any kitty on your card! I picked Ginger Bell from The Greeting Farm! This is a post-it Notebook made from the Top Note die, and I used a matt for pictures to make the notebook part, and then took a light print dp to make my dp. I added wedding trim, ribbon, and a heart charm to this!

Tutorial is below!!

so first you will want to cut 2 pieces and they do not have to be the whole die, you can do them like below, or a little smaller.


Next you will want to crinkle them up, aned then lay them flat like below.


Then take whatever colors of your choice of distressing inks and rub across the top! this would be your lightest color first!
I used Tim Holtz distressing inks, and right now they are on SALE at Pez-A-Doodle Designs for SUPER CHEAP!!

Next this is wha it will look like with the first color on!
The next color is a little darker and is called Scattered straw!! I only did this one around the edges!
Remember right now is a good time to stock up on these Distress Inks from Tim Holtz at Pez-A-Doodle Designs Marti the owner has them on SALE for an AWESOME PRICE!
Next you will want to plug in your Iron on low, and then take your darkest color and rub it across the dp like you did the first color. Then take your Iron and run it over the paper to smooth it out!

Now you will want to cut these down to fit your notebook frame.
I did cut around the edges of the dp so it would lay on top of the other die! like shown below!
Thank you for looking and hope you will join us in the Corrosive Challenge!!! Heres the Link to the Corrosive Challenge!!
Have fun!!
Hugs,
Cheryl